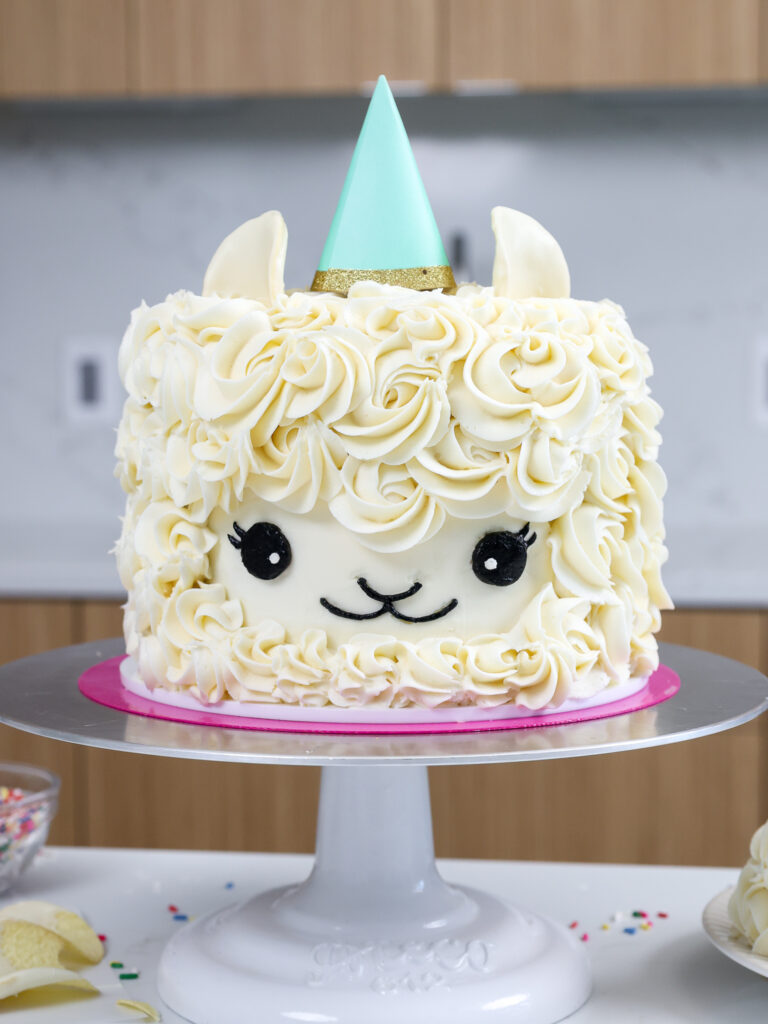
This week we’re continuing my animal cake series with this easy llama cake!
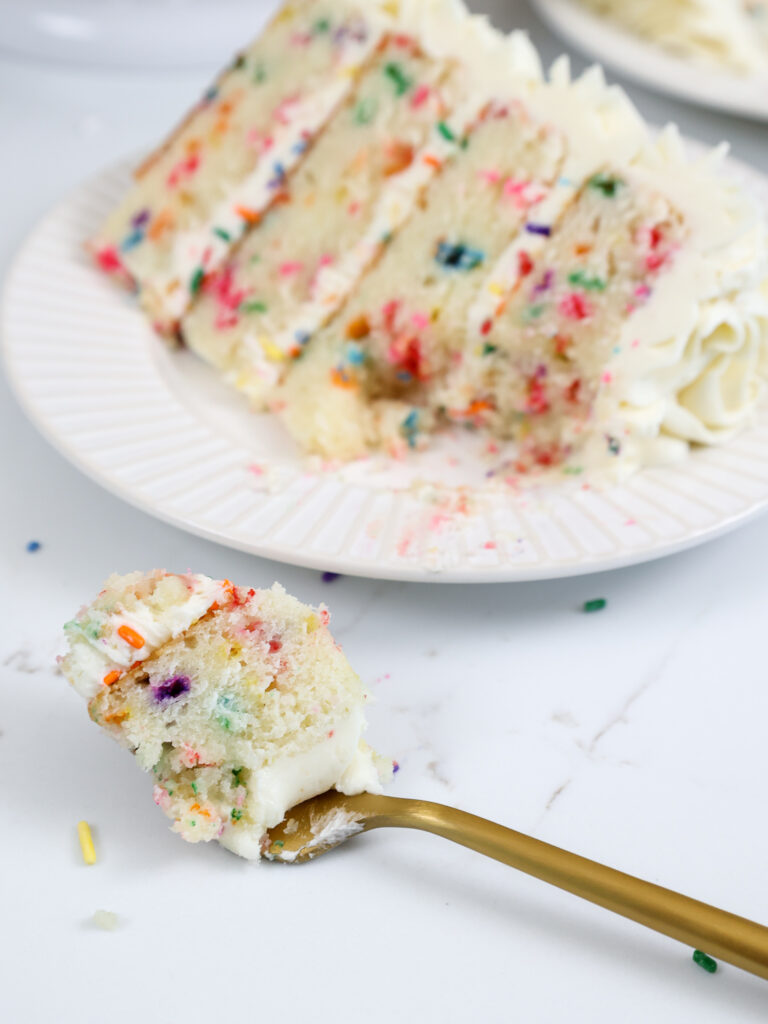
I decided to make this cake with my favorite funfetti layer cake recipe, but you can make it with any flavor of cake!
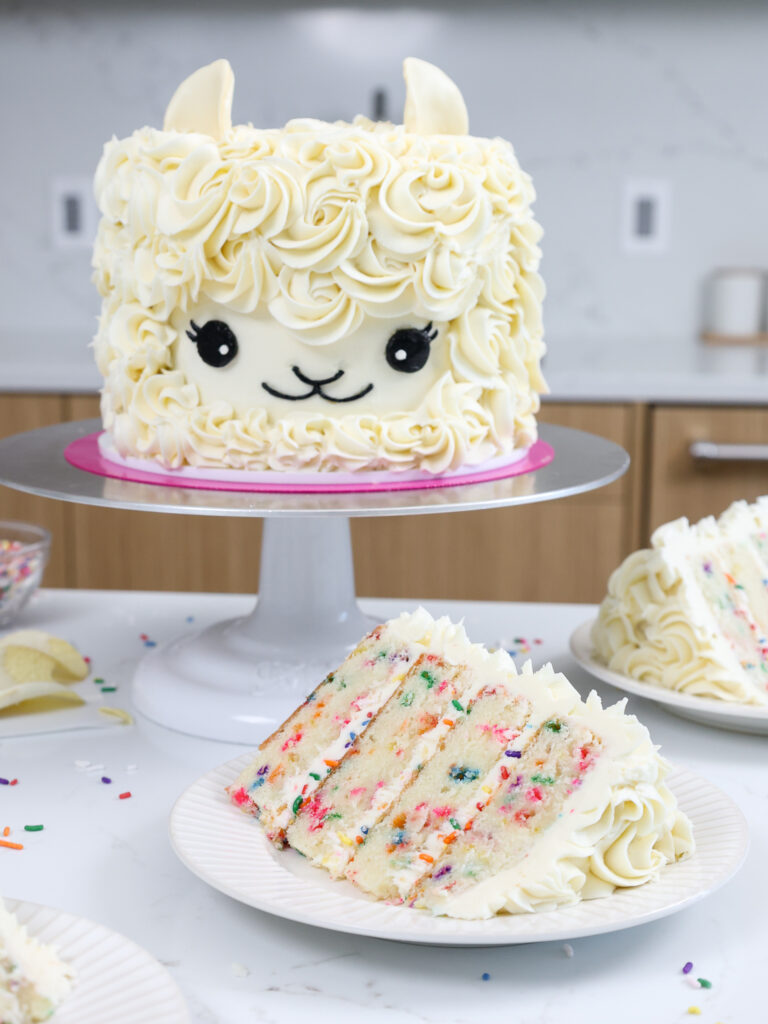
It’s decorated with buttercream frosting and white chocolate ears to look just like a baby llama!
Making this Easy Llama Cake: Step-by-Step Tutorial
Let’s walk through each step of this cake together to make sure it turns out as amazing as possible! I’ve shared a video below.
I figured it might be helpful to know what tools I use too, so I’ve shared a list below.
Not all of these are mandatory, but they make the process a lot easier. If you don’t have all these things on hand, feel free to improvise and work with what you have.
- Electric hand mixer or stand mixer
- 4, 7-inch Cake Pans
- Spinning Cake Stand
- 8-inch Cake Board
- Offset Spatula
- Bench Scraper
- Black Gel food Coloring
- 1 Small Piping Bag
- 1 Large Piping Bag
- Open Star Piping Tip (like a Wilton 1M)
- Small Round Piping Tip (like a Wilton 2)
- 2 Pringles
- 1/2 cup White Chocolate Chips
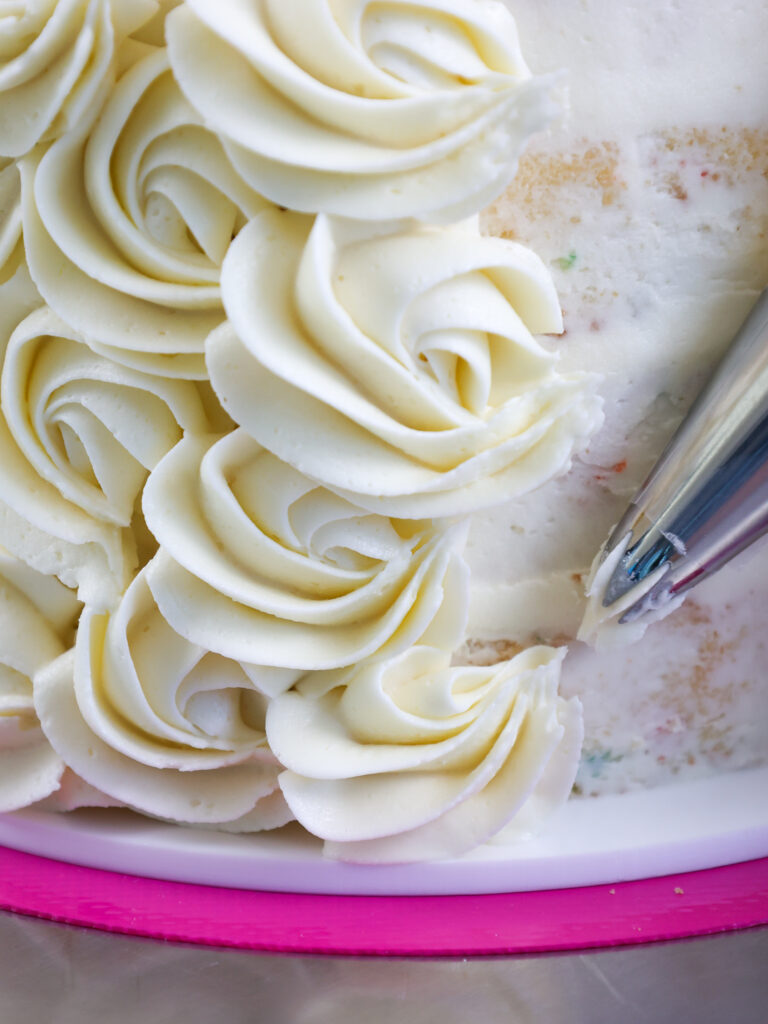
Step 1: Bake the Funfetti Cake Layers
Our first step is to bake the cake layers. Line four, 6- or 7-inch round cake pans with parchment rounds and grease with non-stick baking spray or homemade cake release.
If you don’t have 4 cake pans, the batter can sit at room temperature for a few hours. Bake as many layers at a time as you can.
Divide the batter evenly between the cake pans and bake for 34-37 minutes.
Remove the cake pans from the oven and set on a wire rack. Run an offset spatula around the edge of the pan to help release the cake layers from the pan. Let the cakes cool fully in the pan.
These layers bake up pretty flat, so leveling them is optional! If you want to level them, use a serrated knife to level the top of each cake layer.
I also like to trim the sides of the cake layers to make them easier to frost (sometimes the sprinkles can make the sides a bit wonky!).
If you make these in advance, wrap and freeze them at this point. Take them out of the freezer about 20 minutes before you want to assemble the cake.
Step 2: Make the Buttercream Frosting
Then it’s time to make the buttercream frosting for this cake! I like to use an American buttercream because I think it’s the easiest to decorate with and I love eating it.
It might seem like a lot of frosting for this size of cake, but we need a lot to pipe those pretty buttercream swirls around the cake.
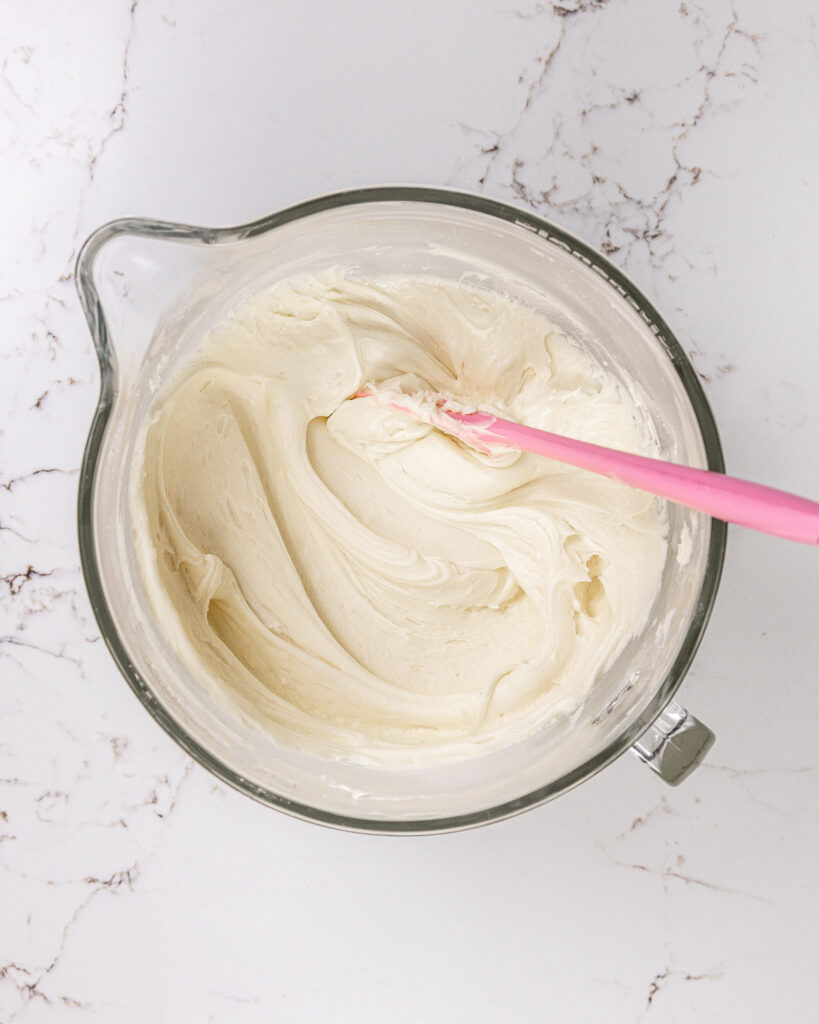
If you want to use a less sweet frosting, I’d recommend making 1.5 batches of my Swiss meringue buttercream or my hybrid buttercream.
Cover the frosting with plastic wrap to prevent crusting, then set aside.
Step #3: Stack and Frost the Cake Layers
Stack and frost the cake layers on an 8-inch, grease-proof cardboard cake round or flat plate.
Use a dab of frosting to help stick the first cake layer in the center of the board.
Spread an even layer of buttercream between each cake layer with an offset spatula. If desired, add some sprinkles on top of the frosting for a bit of texture.
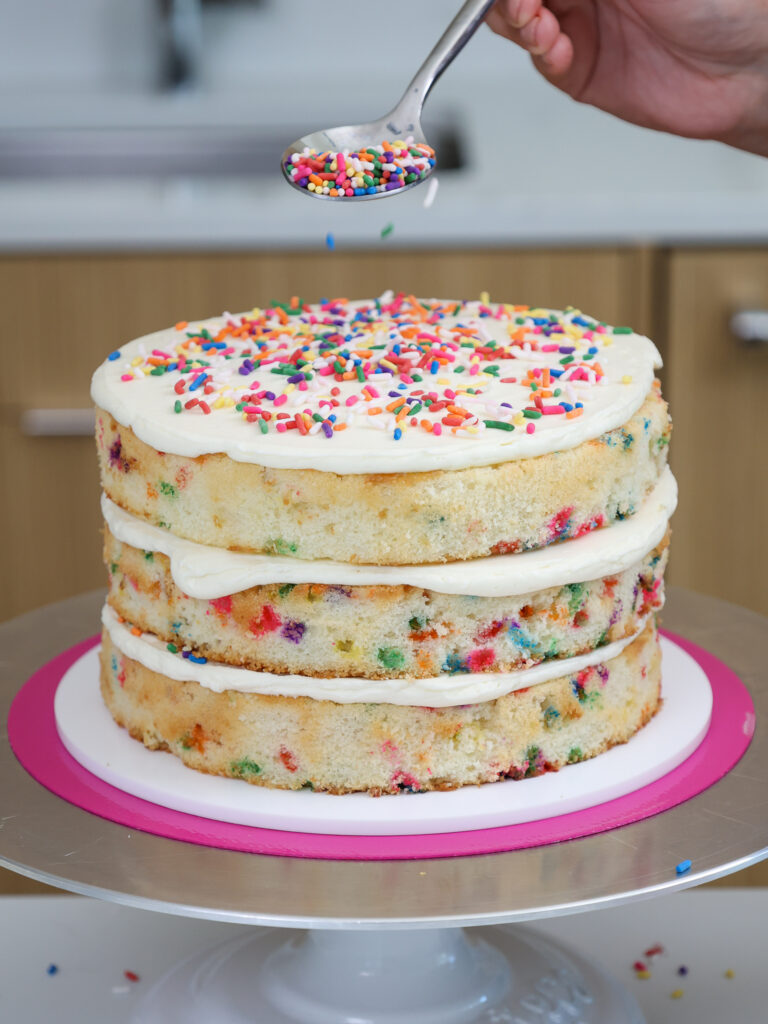
Repeat with the remaining cake layers. Once all the cake layers are stacked, spread a thin coat of frosting around the cake. Smooth using a bench scraper.
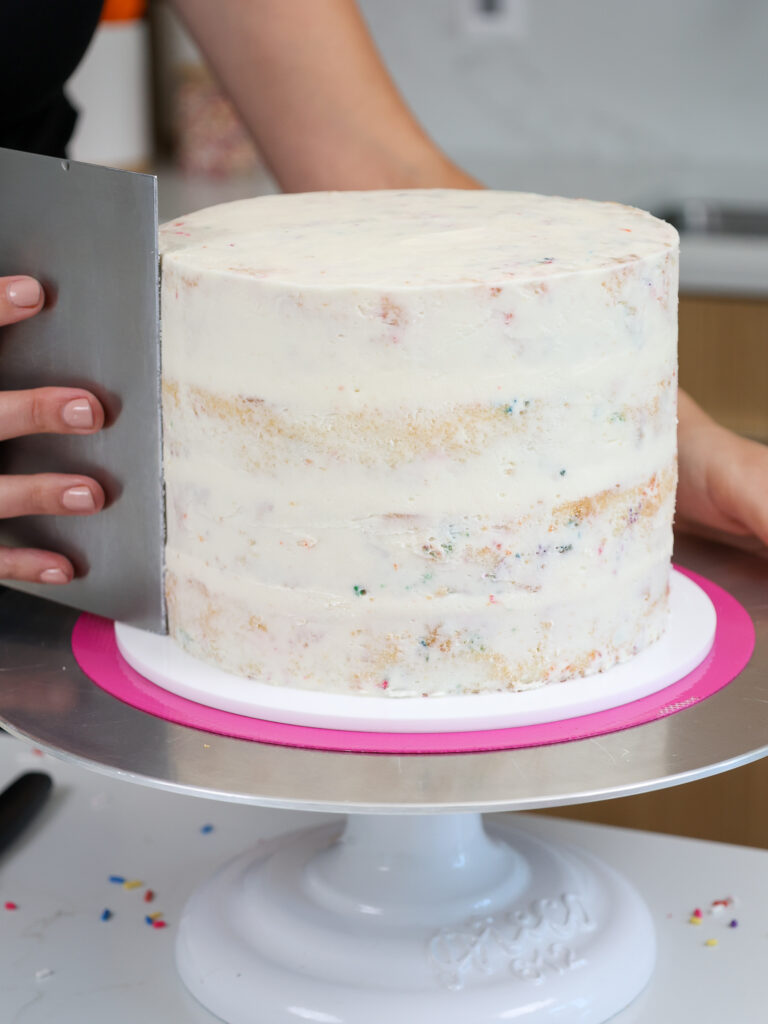
Chill the cake in the fridge (20 minutes) or freezer (10 minutes) until the frosting is firm to the touch. This makes it easier to pipe on the llama’s hair.
Step 4: Make the Llama’s Ears
While the cake chills make the llama’s ears! Melt the white chocolate in a short cup.
Heat in 15 second intervals until the white chocolate is fully melted, stirring between each interval.
Dunk 2 Pringles about 2/3 way into the white chocolate and shake off any excess. Place them on a piece of parchment paper and set aside to let the white chocolate harden.
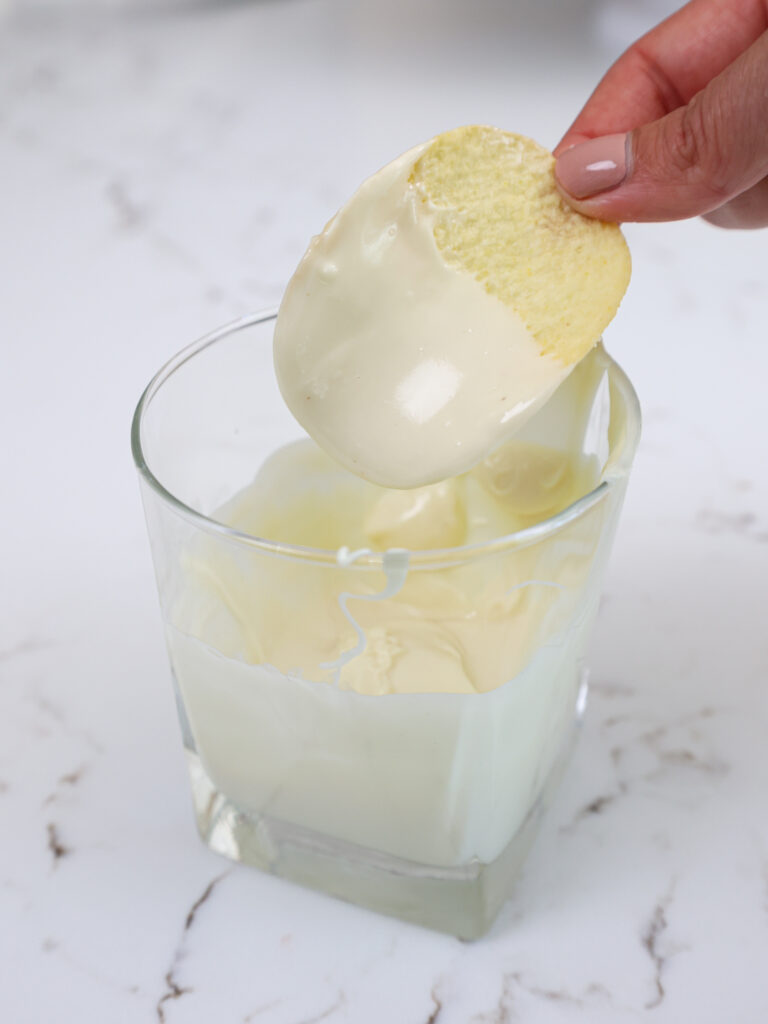
If you don’t have Pringles, you can also use white fondant to make the ears.
Step 5: Frost and Decorate this Llama Birthday Cake
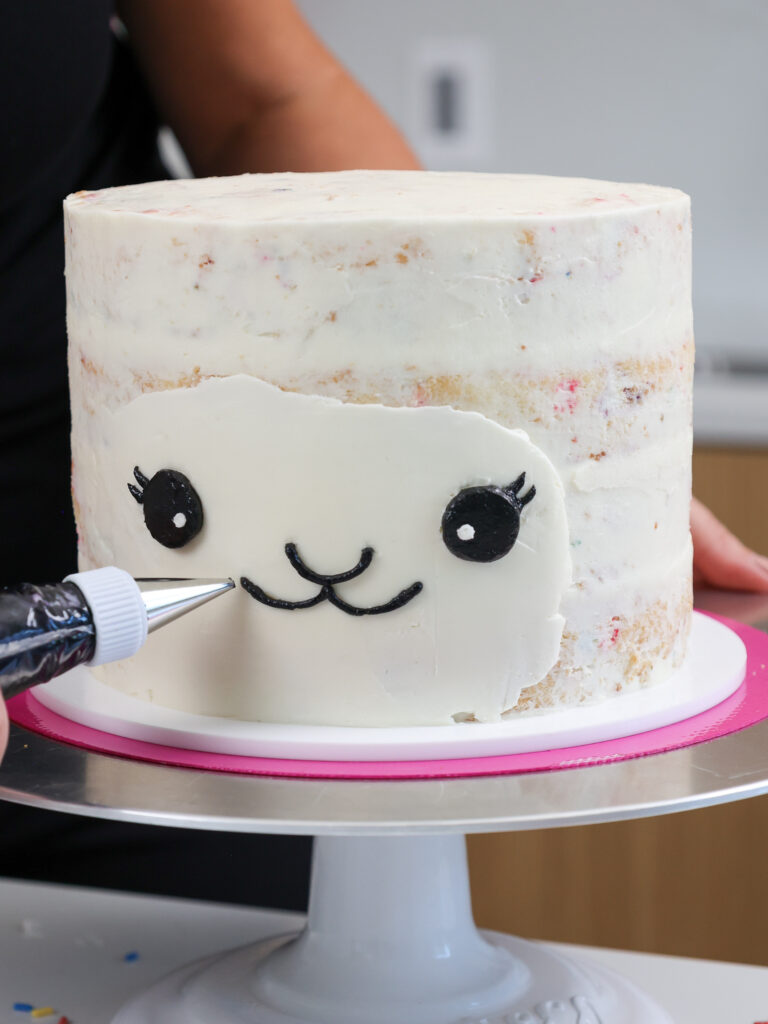
Add a second layer of frosting on front of the cake where the llamas face will be. Smooth the frosting with a bench scraper or large offset spatula.
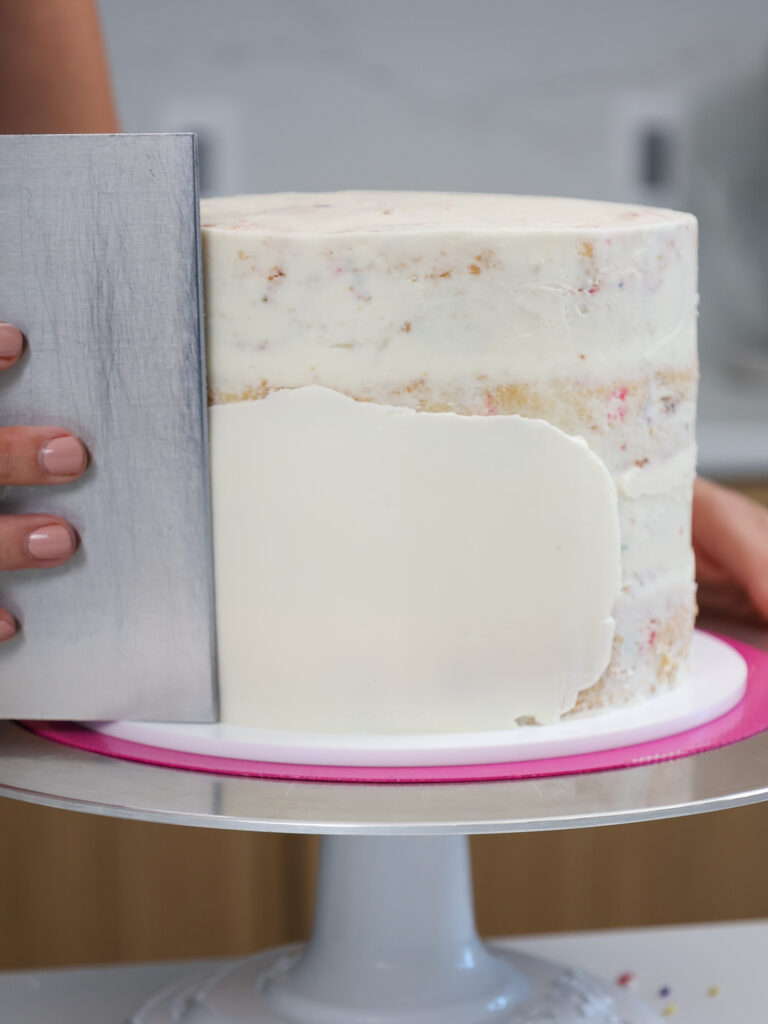
Scoop about 2 tbsp of buttercream in a bowl and color black with a generous squirt of black gel food coloring. Place in a small piping bag fit with a small round piping tip.
Place the remaining uncolored buttercream in a large piping bag fit with a Wilton 1M piping tip.
Use a toothpick to trace out where you want the llama’s eyes, nose, and mouth to be.
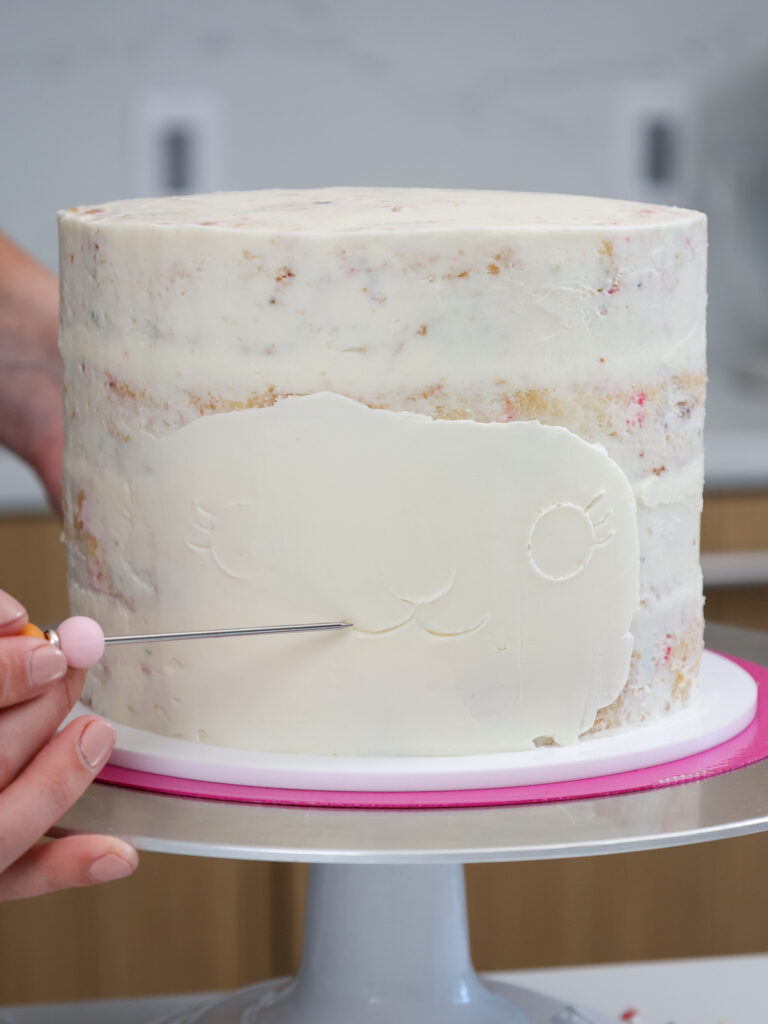
Use the black buttercream to pipe on the llama’s facial features. The llama might look a little silly at this point but trust the process!
If you don’t feel comfortable piping on the face, you can also use black fondant instead of buttercream.
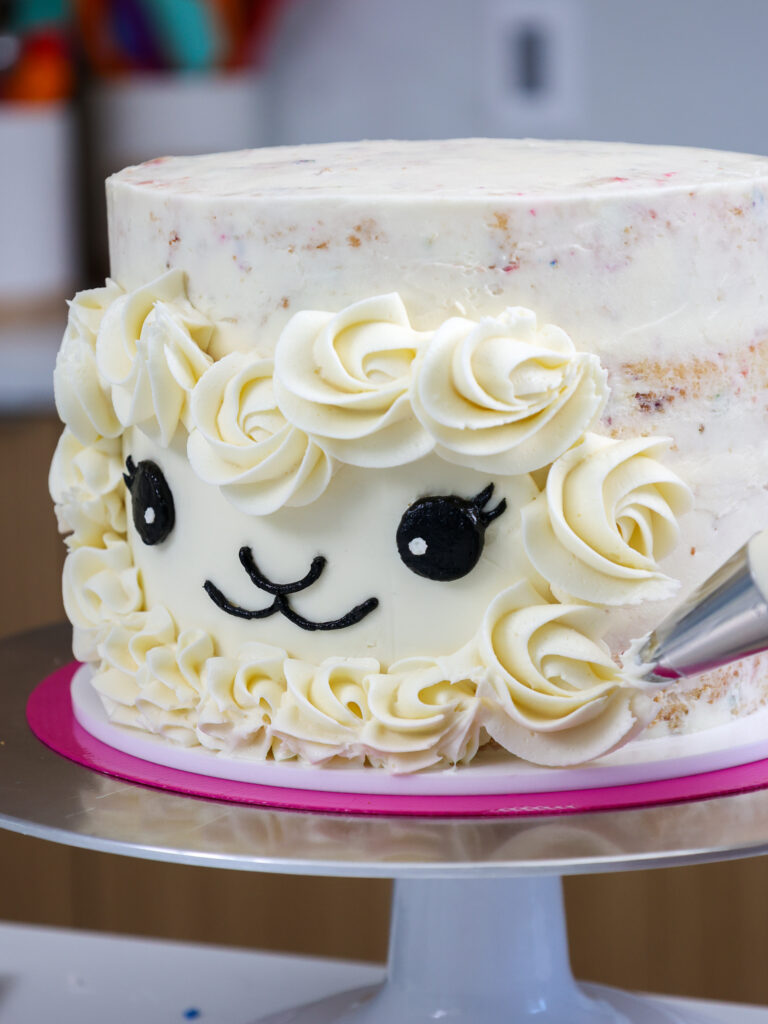
Then cover the cake in small buttercream rosettes and dollops of white buttercream.
Start around the llama’s face first, then cover the rest of the cake.
Gently press the white chocolate-covered Pringles into the frosting on the top of the cake, and then your llama cake is all ready to go!
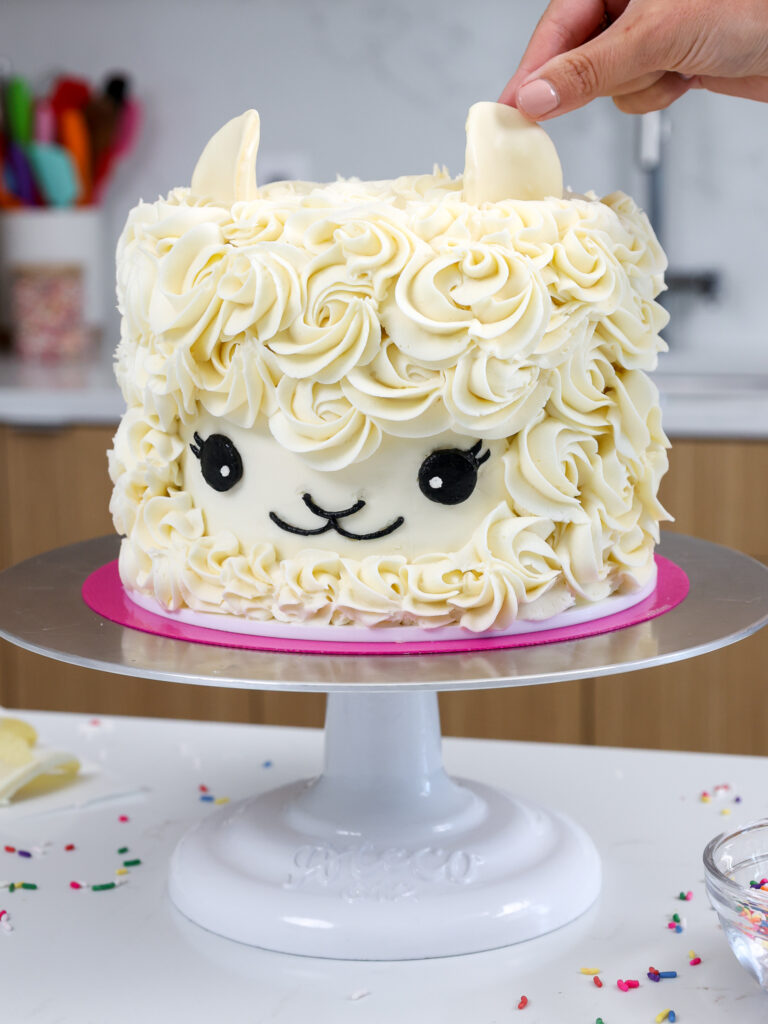
If you’re making this cake in advance, wait to add on the Pringle ears until you’re ready to serve the cake.
Llama Cake Substitutions and Swaps
Below are some swaps and substitutions that can be made in this recipe.
- All-Purpose Flour – This recipe works best with all-purpose flour, but you can use cake flour or a gluten free flour blend if needed.
- Unsalted Butter – If you only have salted butter on hand, you can use it in place of the unsalted butter and omit the salt in this recipe. You can also use vegan butter in its place!
- Egg Whites – You can also use 5 large eggs or if you have an egg allergy you can use an egg replacer like this. However, it will slightly change the color and texture of these cake layers.
- Buttermilk – You can also use whole milk, full-fat yogurt, sour cream or alternative yogurt or milk (almond, soy, oat) if you’re dairy free.
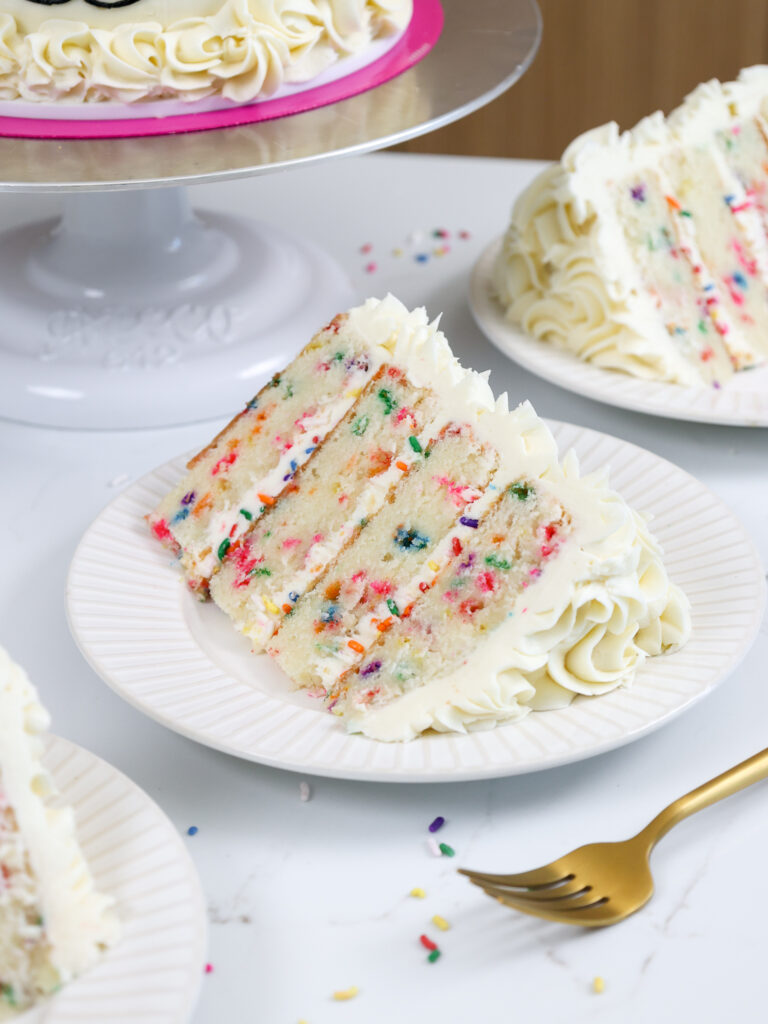
Tips for Making the Best Llama Cake
- Ingredients at room temp mix together better! Set out any cold ingredients ahead of time.
- Properly measure your flour (spoon into the cup measure, then level) or use a kitchen scale to measure the dry ingredients.
- Bang your cake pans on the counter before putting them in the oven. This brings any air bubbles that are trapped in the batter to the surface.
- Make this buttercream llama cake vegan or dairy free if needed! Use your favorite type of dairy free milk to replace the buttermilk and heavy cream and use vegan butter sticks in place of the butter. For the eggs I recommend using an egg replacer like this.
- Crumb coat and chill your cake, then pipe on a second layer of frosting. This will help the buttercream rosettes stick to the cake more easily.
- Make sure your buttercream is the right consistency before frosting your cake. It will help give your cake proper structure and make it easier to decorate.
Making This Buttercream Llama Cake in Advance & Storage Tips
Make the cake layers in advance and freeze them. It breaks the process up and makes it more approachable.
Make the frosting ahead of time or save any leftover frosting! It can be stored in an airtight container in the fridge for up to a month, or in the freezer for up to 3 months. Be sure to give it a good stir once it thaws to get the consistency nice and smooth again.
A frosted cake can last in the fridge for up to a week or in the freezer for up to a month. The buttercream locks in all the moisture, keeping the cake fresh and delicious!
If you freeze this cake, transfer it to the fridge the day before you plan to eat it to help minimize temperature shock and reduce condensation.
If you cut into the cake and have leftovers, use any remaining frosting to cover the cut section to keep it moist and store in the fridge for up to a week.
Let Me Know What You Think!
If you make this llama birthday cake, I’d love to hear what you think! Let me know by leaving a rating and comment below.
If you plan to share on social media, tag me @chelsweets and #chelsweets so that I can see your amazing creations!
Other Recipes You Might Like:
Easy Llama Cake
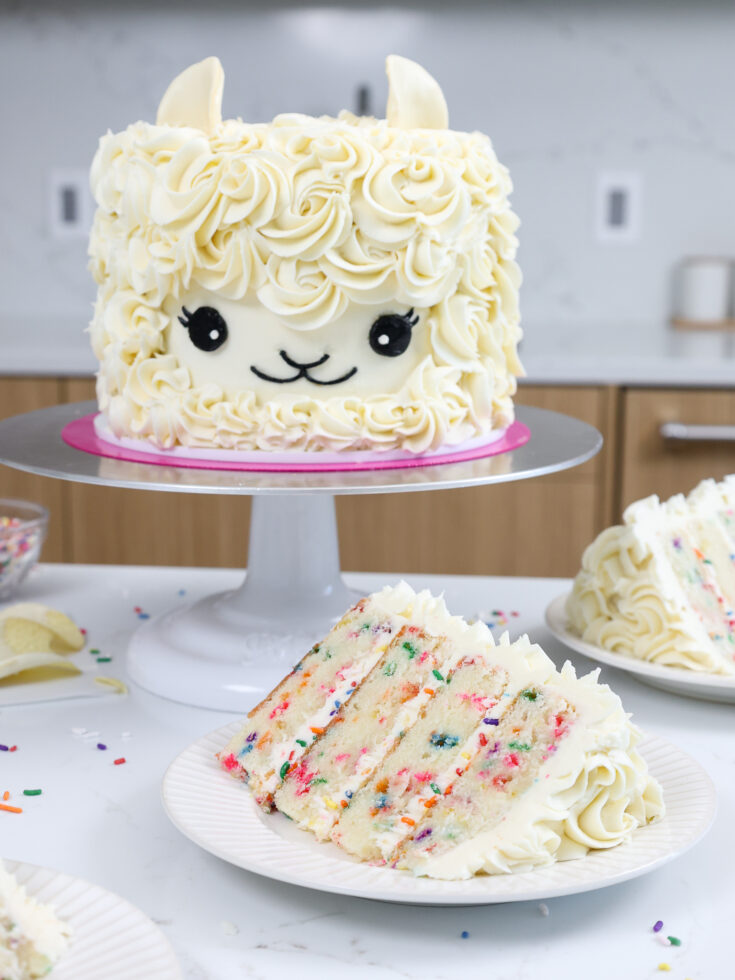
This easy llama cake is made from scratch and is so easy to make! It's tender, moist, and decorated with buttercream frosting to look just like a baby llama!
Ingredients
Funfetti Cake Layers
- 3 cups all-purpose flour (375g)
- 3 cups granulated sugar (600g)
- 2 1/2 tsp baking powder (10g)
- 1 tsp fine salt (6g)
- 1 cup or 2 sticks unsalted butter, room temperature (226g)
- 1 cup pasteurized egg whites from a carton or about 7 egg whites (235g)
- 1 1/2 cups buttermilk, room temperature (360g)
- 2 Tbsp vegetable oil (28g)
- 2 tsp vanilla extract (8g)
- 1 1/2 tsp almond extract - optional (6g)
- 3/4 cup of rainbow jimmies or long strand sprinkles (130g)
Vanilla Buttercream Frosting
- 3 cups unsalted butter, room temp (678g)
- 1 Tbsp vanilla extract (12g)
- 1 tsp fine salt (6g)
- 10 cups powdered sugar (1250g)
- 1/3 cup heavy cream or whipping cream (80g)
Llama Cake Decorations
Instructions
Funfetti Cake Layers:
- Preheat the oven to 350°F/175°C. Line four 7-inch or 6-inch round pans with parchment rounds and grease with non-stick cooking spray. You can also use this recipe to make 3, 8-inch cake layers. If you don't have that many cake pans, the batter can sit at room temperature for a few hours. Bake as many layers at a time as you can at a time.
- Mix 3 cups all purpose flour, 3 cups sugar, 2 1/2 tsp baking powder and 1 tsp salt together in a stand mixer with a paddle attachment or hand mixer until fully combined.
- Mix in 1 cup of room temperature, unsalted butter slowly into the dry ingredients on a low speed. Continue to mix until no large chunks of butter remain and the mixture looks like moist sand.
- Pour in 1 cup of egg whites and mix on low until just incorporated. Mix in 1 1/2 cups of buttermilk in two installments, on a low speed.
- Add in 2 Tbsp of vegetable oil, 2 tsp of vanilla extract, and 1 1/2 tsp almond extract (optional) and mix at a low speed until fully incorporated. If you want to color these cake layers, add in the gel food coloring during this step.
- Scrape down the sides of the bowl with a rubber spatula, then beat on a medium speed for about a minute to make sure everything is properly mixed together. This also helps lighten the texture of the cake layers a bit.
- Fold 3/4 cup of sprinkles into the cake batter using a rubber spatula and mix until they're evenly distributed.
- Divide batter evenly between the prepared cake pans. Bake for 34-37 minutes or until a toothpick comes out with a few moist crumbs. If you use 6-inch cake pans, they might take a couple minutes longer to bake. Let the pans cool for 10 minutes, then run an offset spatula around the perimeter of the pan to separate the cake from the pan.
- Place the cake pans into the freezer for 45 minutes to accelerate the cooling process. Once the layers are fully cooled, carefully flip the pans and remove the layers from the pans.
- These layers bake up pretty flat, so leveling them is optional! If you want to level them, use a serrated knife to level the top of each cake layer. I also like to trim the sides of the cake layers to make them easier to frost (sometimes the sprinkles can make the sides a bit wonky!). If you make these in advance, wrap and freeze them at this point.
Vanilla Buttercream Frosting:
- While the cake layers bake and cool, make the vanilla buttercream frosting.
- Beat 3 cups of unsalted butter on a medium speed for 30 seconds with a paddle attachment until smooth.
- Mix in 1 Tbsp of vanilla extract and 1 tsp salt on a low speed.
- Slowly mix in 10 cups of powdered sugar on a low speed. Add 1/3 cup of heavy cream halfway through to make the frosting easier to mix.
- Continue to mix on a low speed for a few minutes until the desired consistency is reached.
- If the frosting is too thick, add in additional cream (1 Tbsp at a time). If the frosting is too thin, add in more powdered sugar (quarter of a cup at a time).
- Cover the buttercream flush with plastic wrap to prevent crusting, then set aside.
Assembling This Llama Birthday Cake:
- Stack and frost the cake layers on an 8-inch greaseproof cake board using a dab of frosting to help stick the first cake layer in the center of the board.
- Add a thick, even layer of buttercream between each cake layer with a large offset spatula. If desired, add some sprinkles on top of the frosting for a bit of texture. Repeat with the remaining cake layers.
- Once all the cake layers are stacked, spread a thin coat of frosting around the cake. Smooth using a bench scraper, then chill the cake in the fridge (30 minutes) or freezer (10 minutes) until the frosting is firm to the touch. This makes it easier to pipe on the llama's hair!
- While the cake chills, make the llama's ears. Melt 1/2 cup of white chocolate in a short cup. Heat in 15 second intervals until the white chocolate is fully melted, stirring between each interval. Dunk 2 Pringles about 2/3 way into the white chocolate and shake off any excess. Place them on a piece of parchment paper and set aside to let the white chocolate harden. If you don't have Pringles, you can also use white fondant to make the ears.
- Add a second layer of frosting on front of the cake where the llamas face will be. Smooth the frosting with a bench scraper or large offset spatula.
- Place about 2 tbsp of buttercream in a bowl and color black with a squirt of black gel food coloring. Place in a small piping bag fit with a small round piping tip.
- Place the remaining uncolored buttercream in a large piping bag fit with a Wilton 1M piping tip.
- Use a toothpick to trace out where you want the llama's eyes, nose, and mouth to be.
- Use the black buttercream to pipe on the llama's facial features. The llama might look a little silly at this point but trust the process! If you don't feel comfortable piping on the face, you can also use black fondant instead of buttercream.
- Cover the cake in small buttercream rosettes and dollops of white buttercream. Start around the llama's face first, then cover the rest of the cake.
- Gently press the white chocolate covered Pringles into the frosting on the top of the cake, and then you llama cake is all ready to go! If you're making this cake in advance, wait to add on the Pringle ears until you're ready to serve the cake.
Notes
Llama Cake Recipe Variations
This recipe can be used to make 4, 6-inch cake layers, 4, 7-inch cake layers, or 3, 8-inch cake layers.
This recipe can also be used to make a sheet cake! One batch will make 2, 9-inch x 13 inch cake layers that are about 1 inch tall. Bake at 350°F/175°C for 30-35 minutes.
Tips for Making this Easy Llama Cake
- Properly measure your flour. Either spoon it into the cup measure, then level with a knife or use a kitchen scale.
- Make sure your ingredients are at room temperature to help them mix together better.
- Chill the cake layers in the freezer for about 20 minutes before assembling the cake. This makes them easier to stack and frost.
- Crumb coat and chill your cake, then pipe on a second layer of frosting. This will help the buttercream rosettes stick to the cake more easily.
- Make sure your buttercream is the right consistency before frosting your cake. It will help give your cake proper structure and make it easier to decorate.
Making this Llama Cake in Advance and Storage Tips
Make the cake layers in advance and freeze them. It breaks the process up and makes it more approachable.
Make the frosting ahead of time too or save any leftover frosting! It can be stored in an airtight container in the fridge for up to a month, or in the freezer for up to 3 months. Be sure to give it a good stir once it thaws to get the consistency nice and smooth again.
A frosted cake can last in the fridge for up to a week or in the freezer for up to a month. The buttercream locks in all the moisture, keeping the cake fresh and delicious!
If you freeze this cake, transfer it to the fridge the day before you plan to eat it to help minimize temperature shock and reduce condensation.
If you cut into the cake and have leftovers, use any remaining frosting to cover the cut section to keep it moist and store in the fridge for up to a week.
Nutrition Information
Yield
24Serving Size
1Amount Per Serving Calories 854Total Fat 45gSaturated Fat 22gTrans Fat 0gUnsaturated Fat 20gCholesterol 94mgSodium 340mgCarbohydrates 111gFiber 1gSugar 92gProtein 5g

Jill
Wednesday 21st of September 2022
This was a fun recipe to make and easy to follow! I ended up using chocolate buttercream because that’s what the birthday girl asked for. I wanted to let you know the first affiliate link for the Wilton 1M actually links to Wilton 1A.
TP, RN
Monday 1st of August 2022
She’s so cute! I’m definitely going to try this soon. Btw, Do you realize that in the listed ingredients most of them are written twice?
Chelsweets
Sunday 7th of August 2022
Hi Terry,
Thanks, I hope your llama turns out great!! I have no idea how that happened to the recipe card, I've never had a glitch like that before. But I just fixed it. Thank you for letting me know, happy baking!