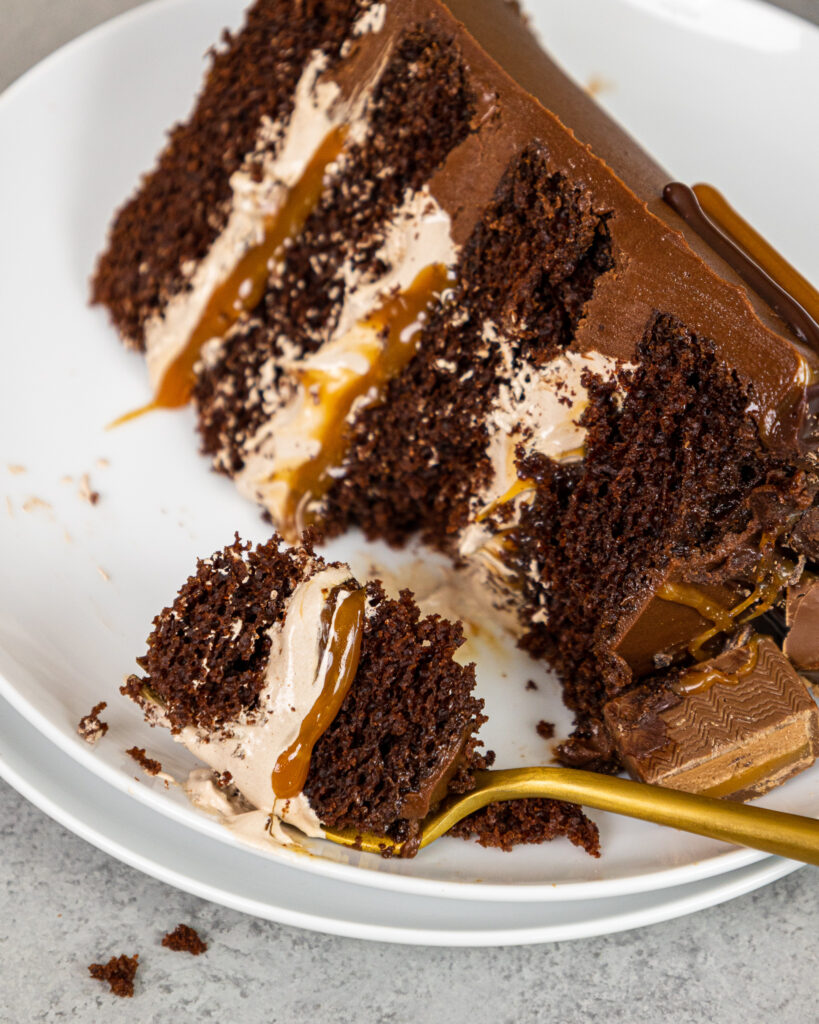
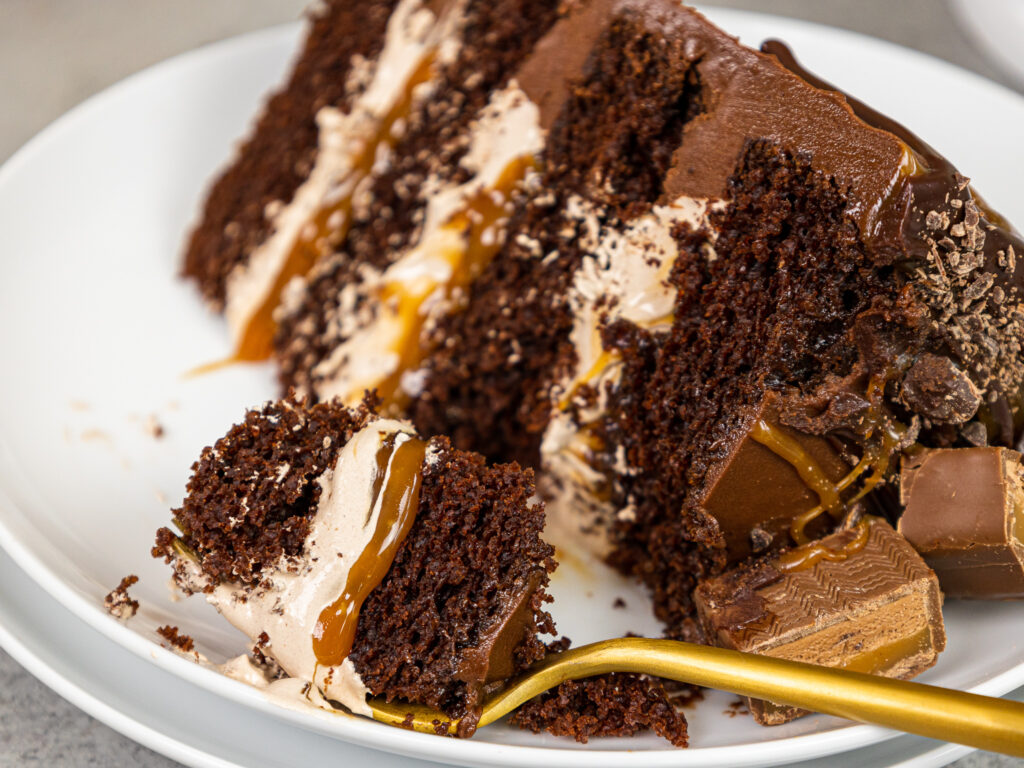
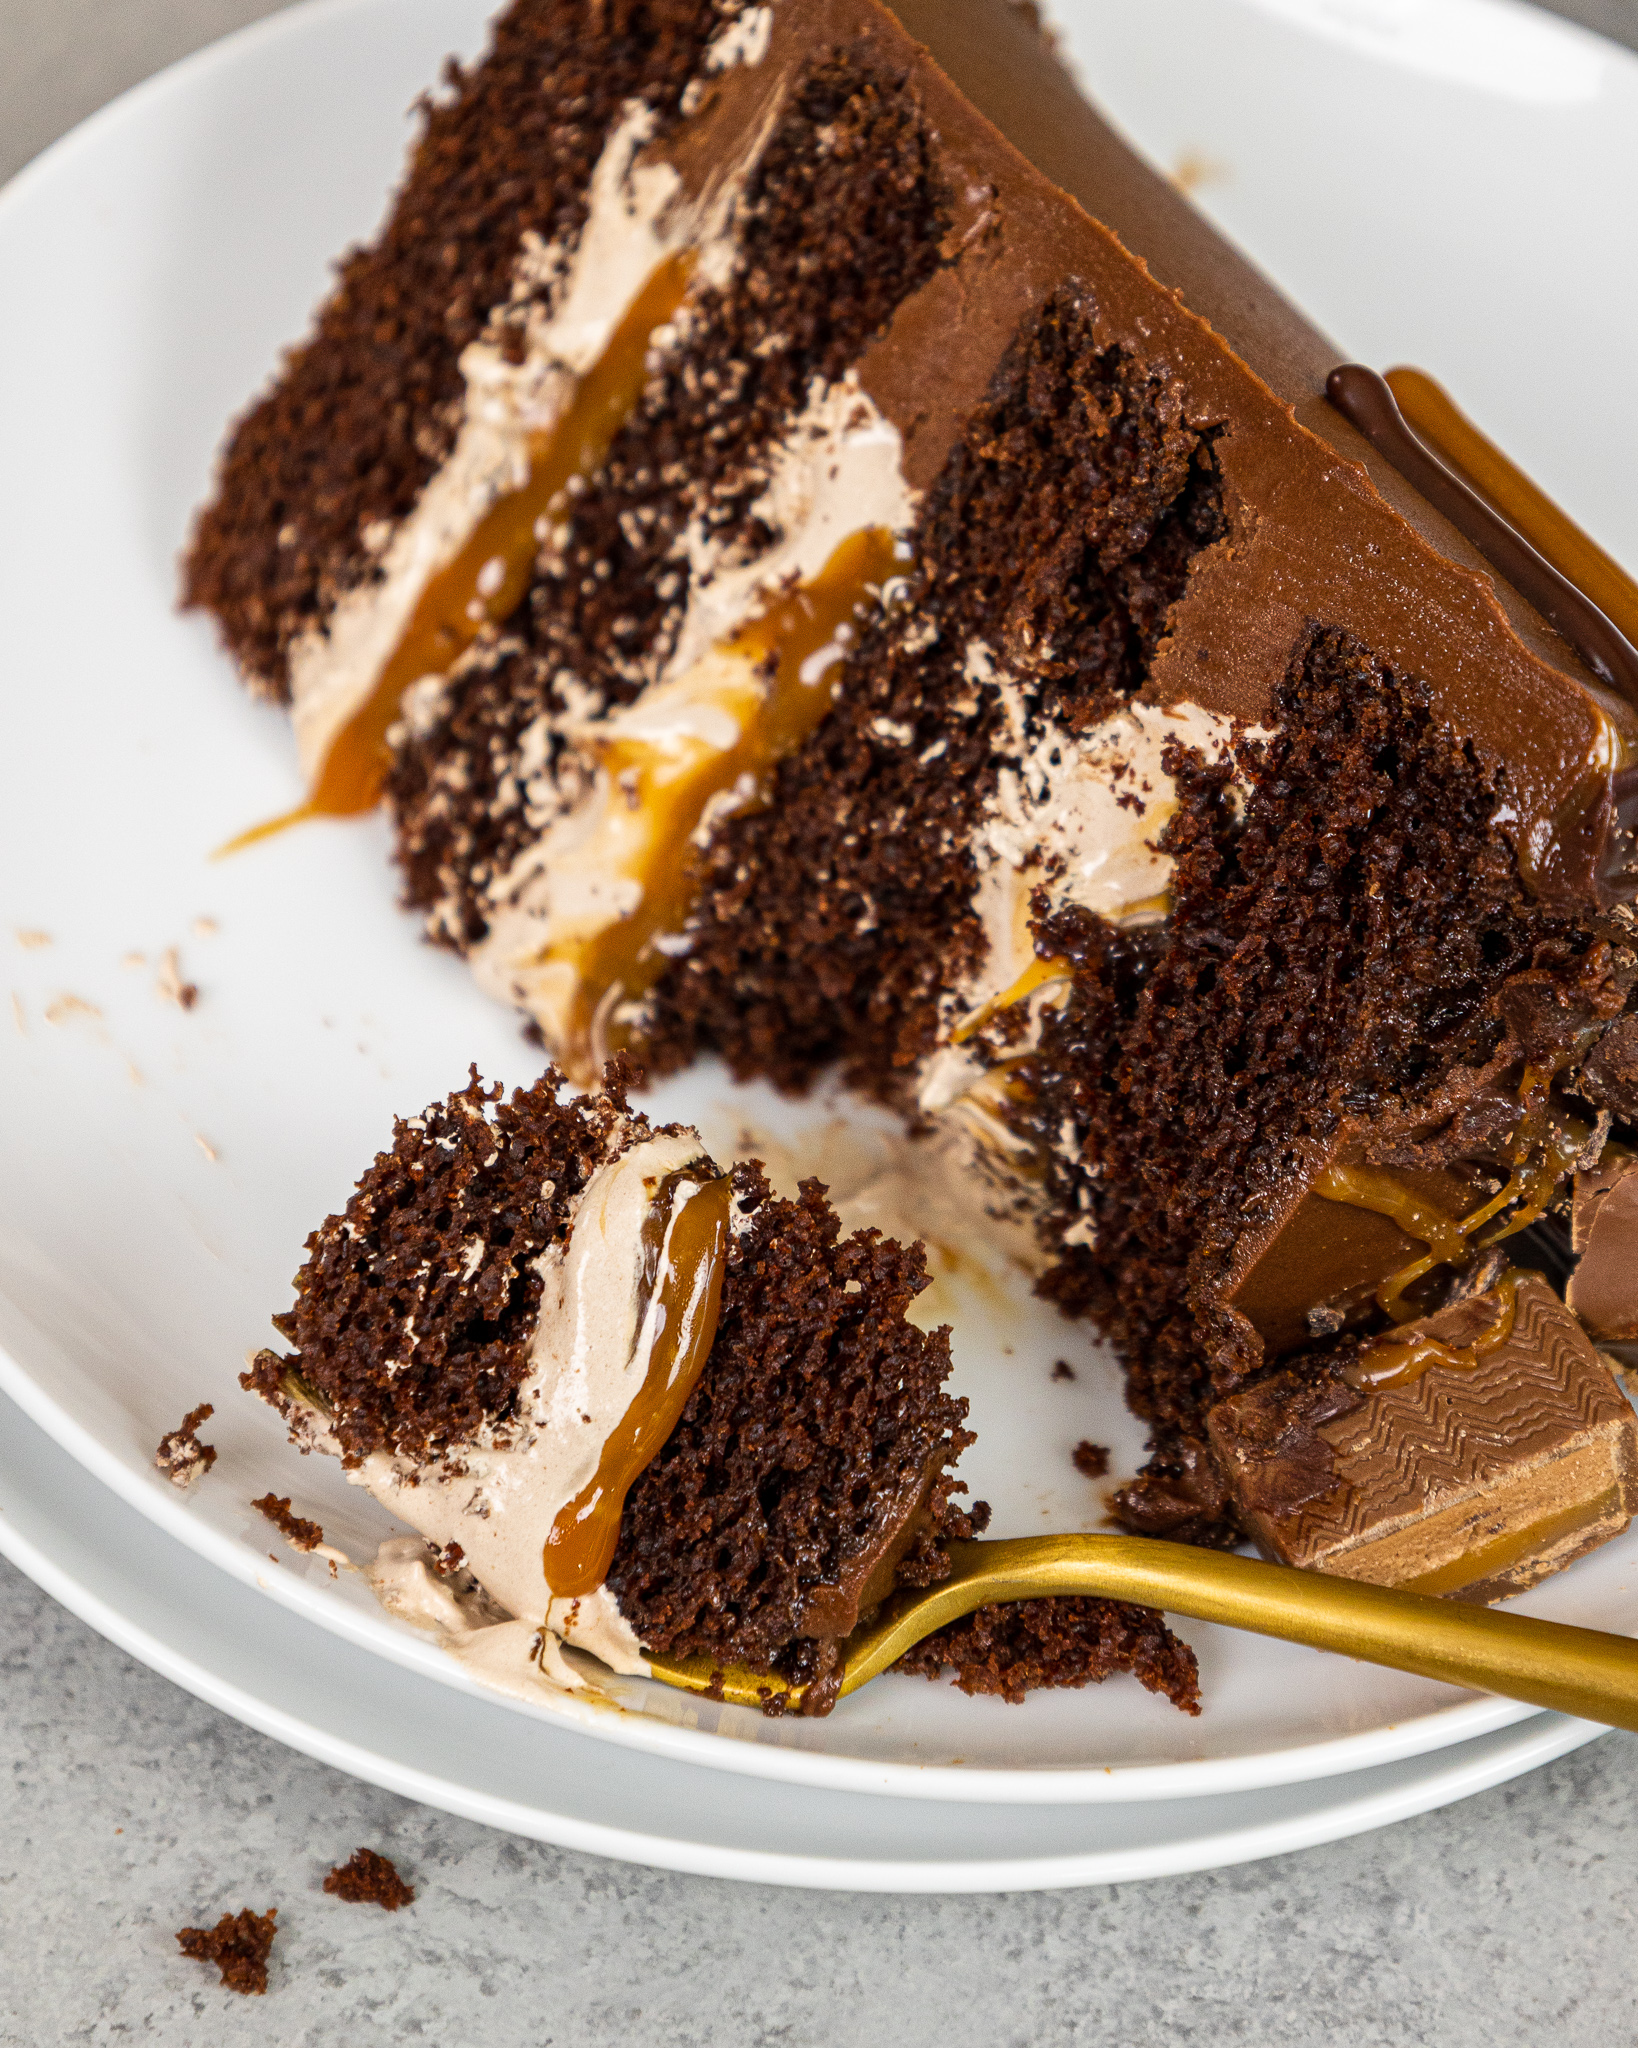
This chocolate Milky Way cake tastes just like our favorite candy bar! Its moist chocolate cake layers are filled with a fluffy chocolate filling, homemade caramel, and milk chocolate buttercream.
How to Make This Chocolate Milky Way Cake
To make sure your chocolate Milky Way cake turns out as amazing as possible, let’s walk through each step together! I’ve also included a video tutorial of the process below.
Step 1: Bake and Level the Chocolate Cake Layers
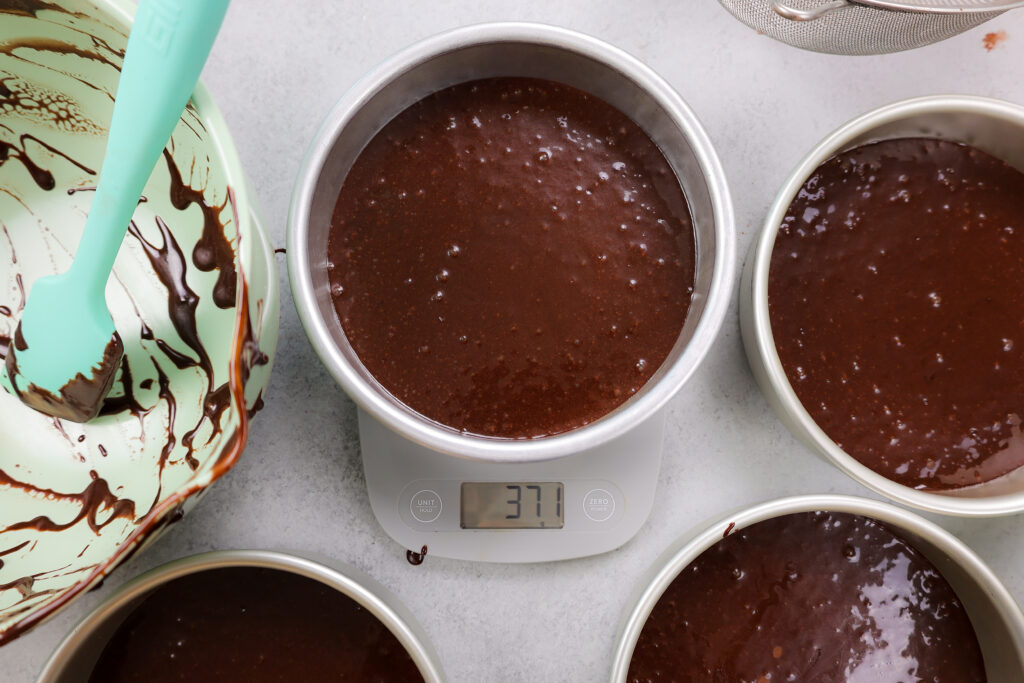
Start by making the chocolate cake layers. Divide the batter evenly between four prepared 8-inch cake pans. Bake for 23-26 minutes or until a toothpick comes out with a few moist crumbs.
Remove the cake layers from the oven and let them cool in the pans for about 10 minutes. Gently run an offset spatula around the rim of the cake pans to loosen them, then flip them into wire racks to finish cooling.
Once the cake layers have cooled to room temperature, use a serrated knife to level the top of each cake layer. It makes the cake so much easier to stack and assemble!!
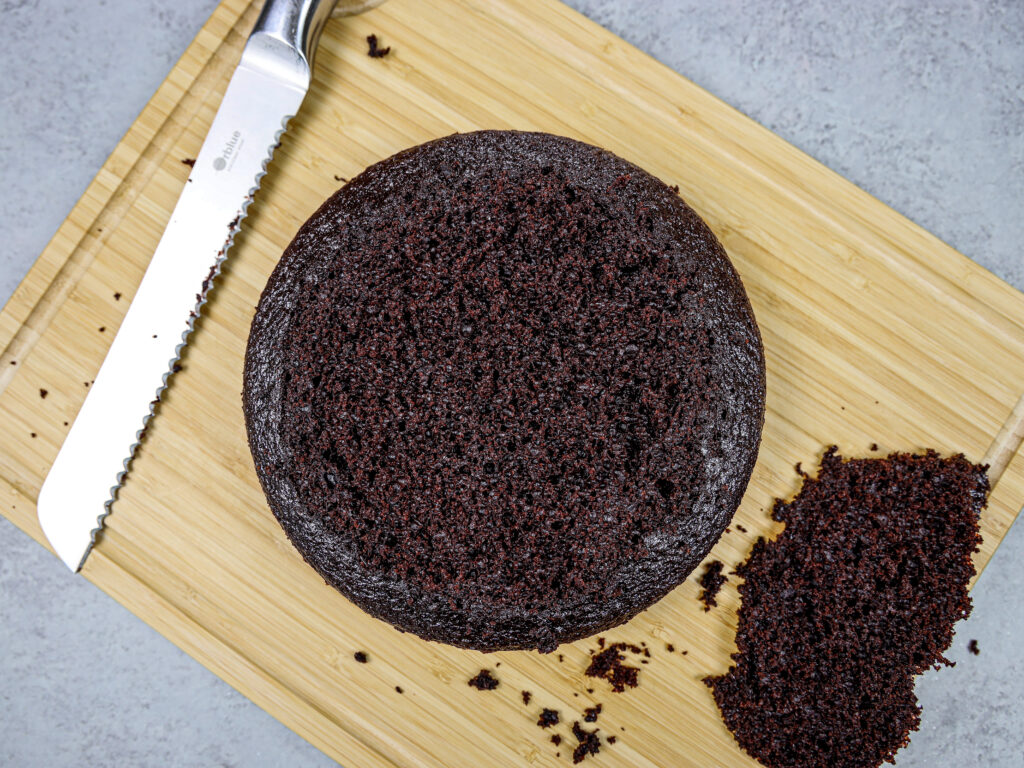
If you’re making these cake layers in advance, you can wrap and freeze them at this point.
Step 2: Make the Caramel Drizzle
Make the caramel drizzle while the cake layers bake and cool. This can be made up to a month in advance.
Place a medium saucepan over medium to medium-high heat. Pour in 1 cup sugar gradually, adding 1/4 cup at a time. Wait until the sugar is mostly dissolved, then add in the next bit of sugar.
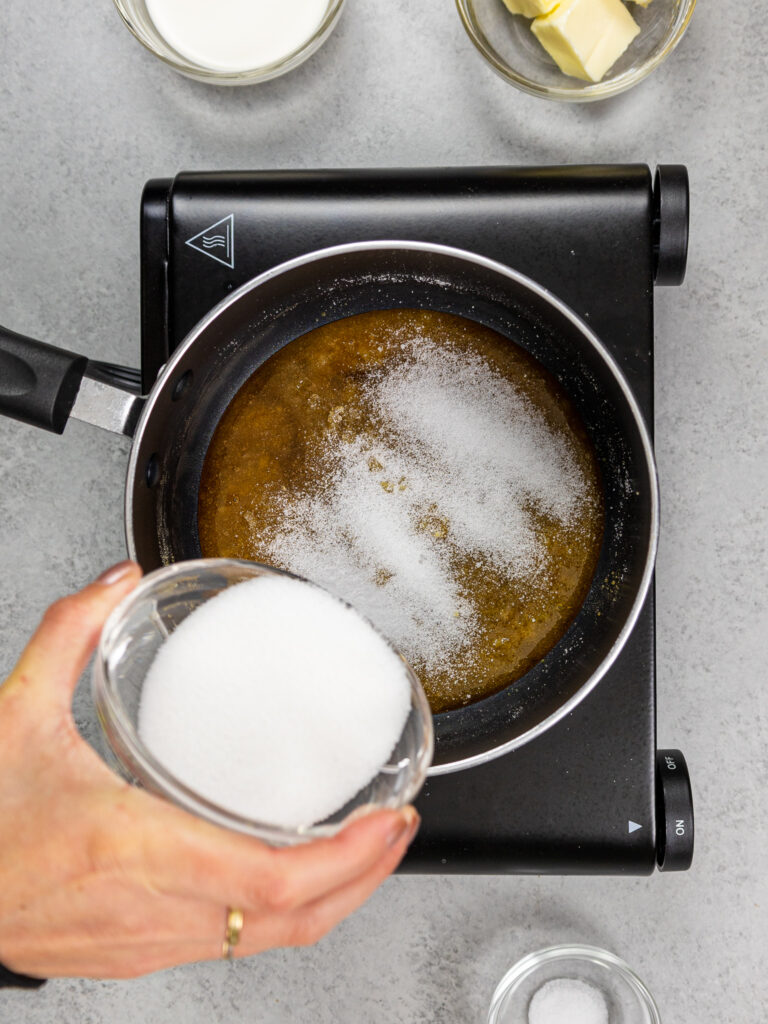
As the sugar melts it will gradually deepen in color.
Stir occasionally until the sugar is fully dissolved and has become an amber color, then turn off the heat.
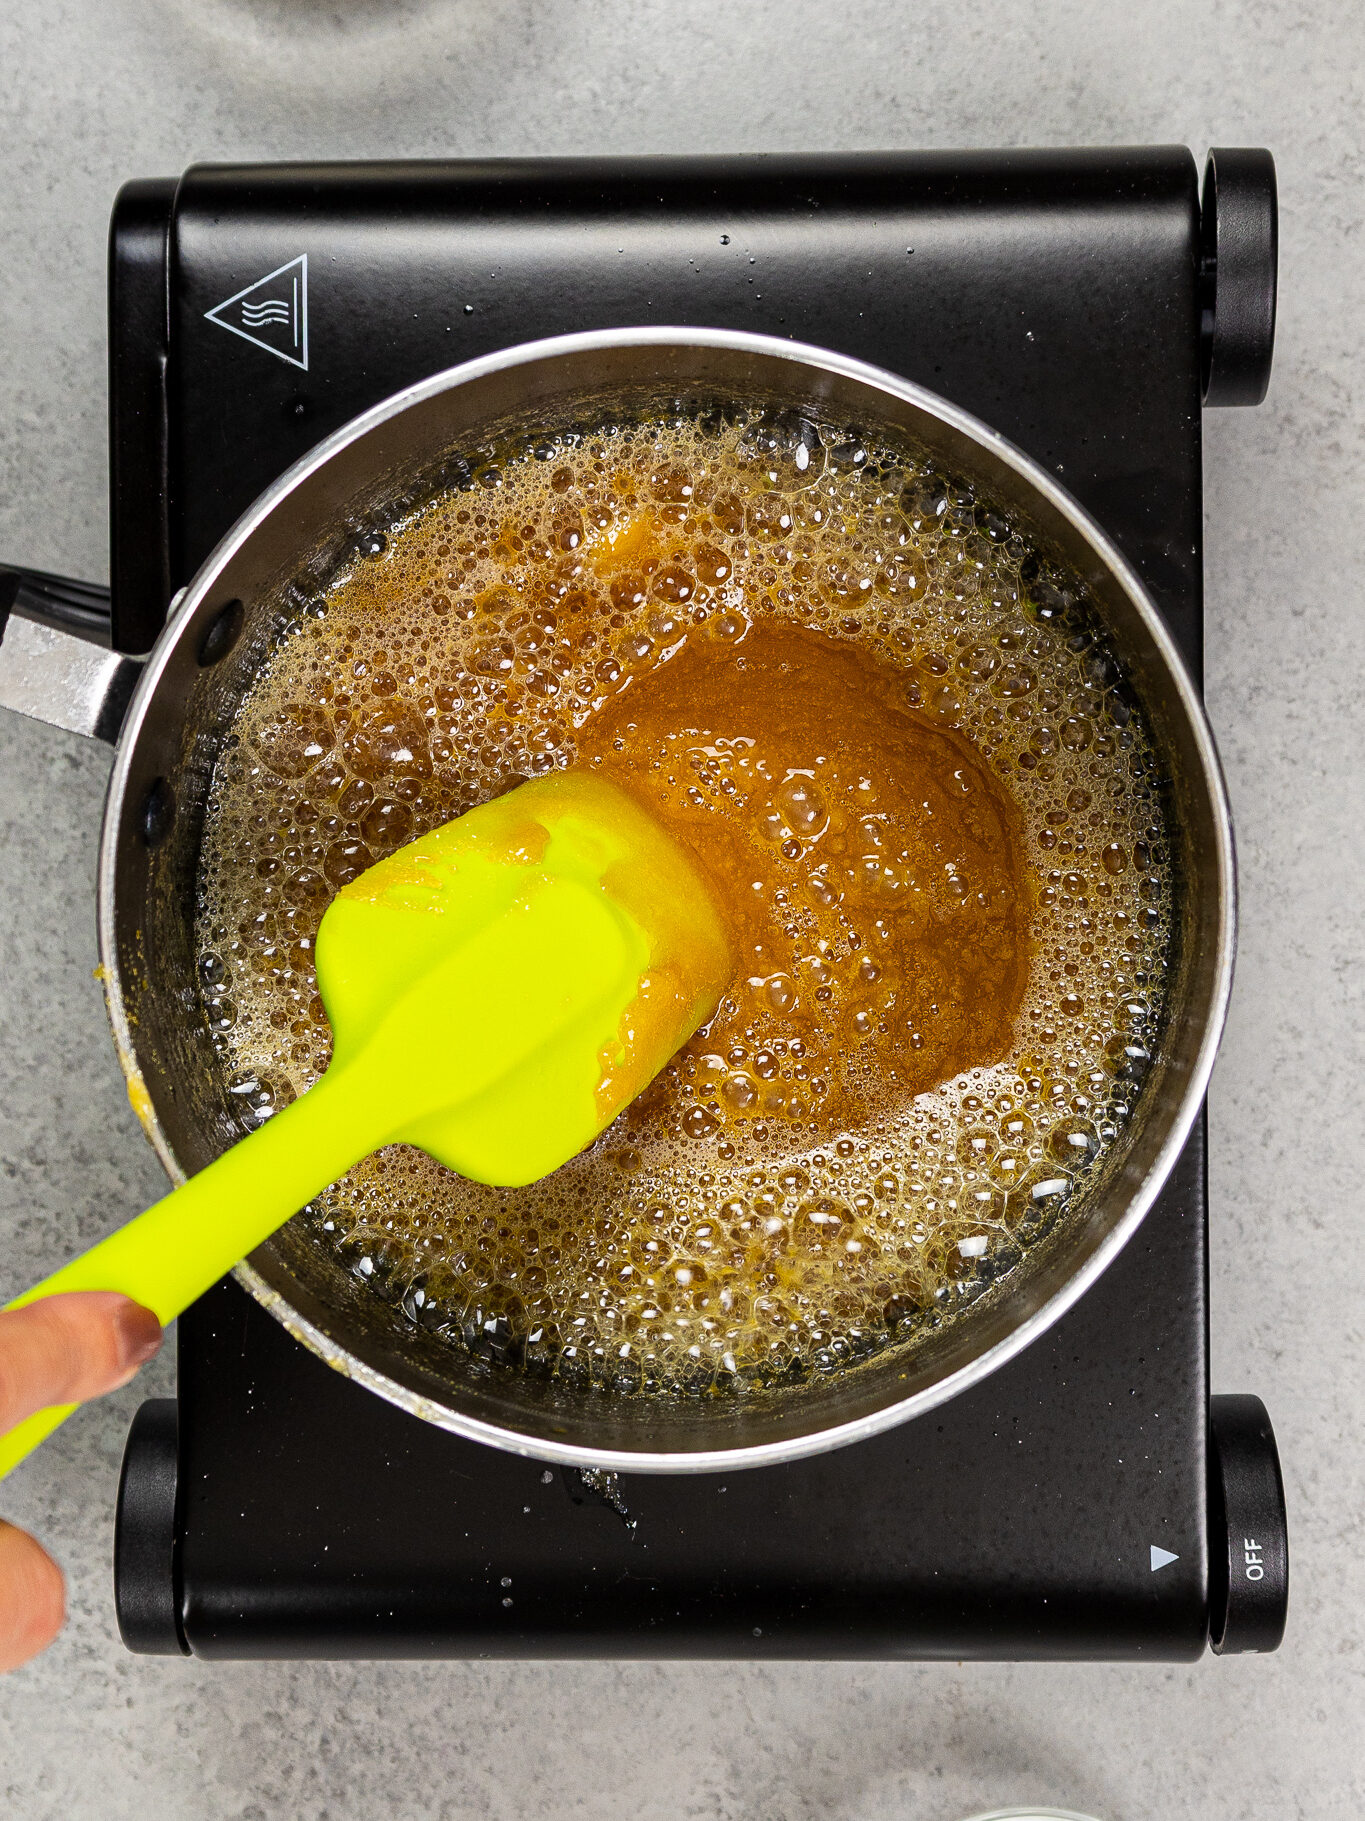
Slowly mix in 6 Tbsp of butter (2 Tbsp at a time), then stir in 1/4 cup of heavy cream and 1/4 tsp salt. The mixture will be thin but will thicken as it cools.
Pour into a separate container, then place in the fridge to cool and/or store.
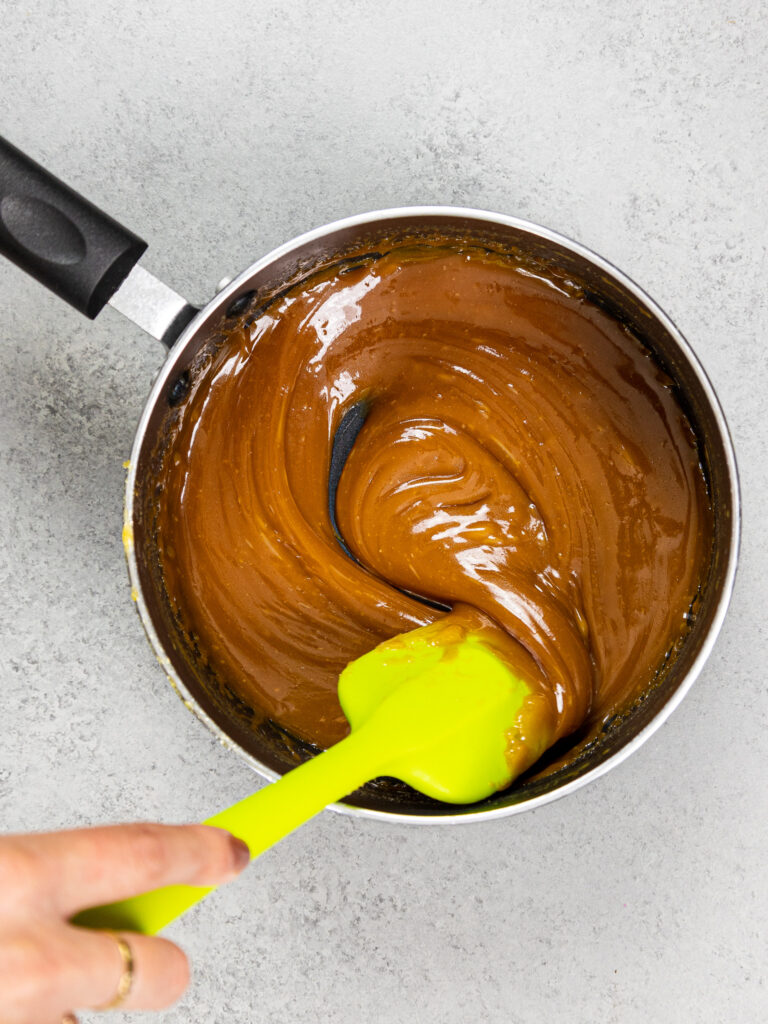
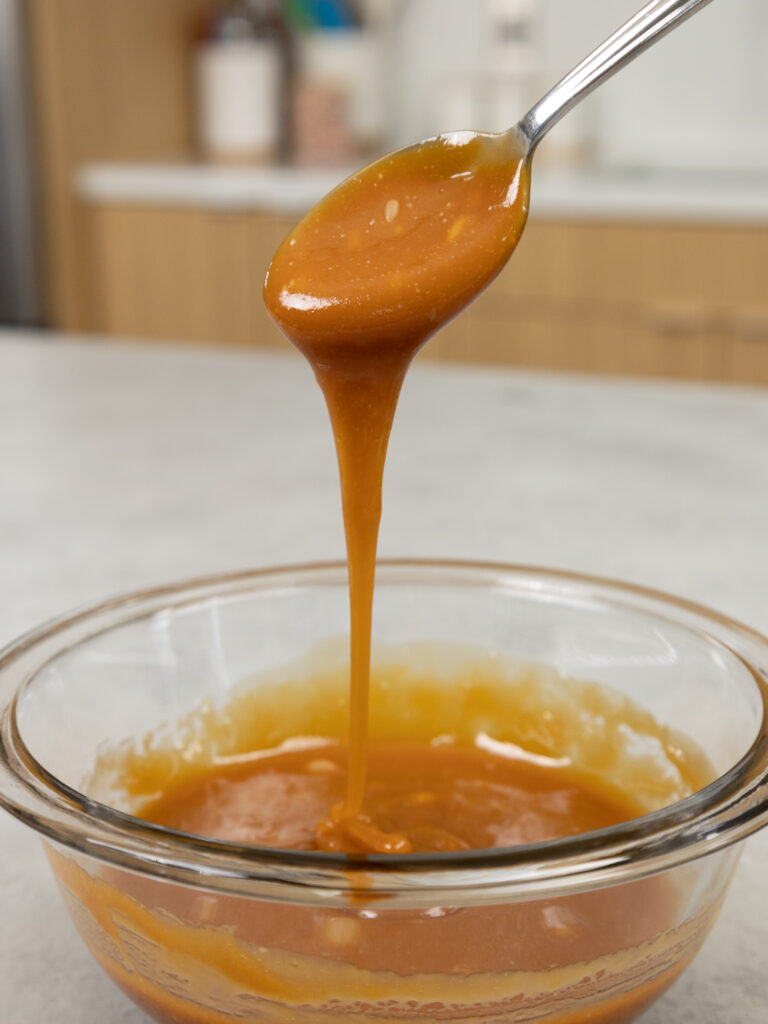
When you’re ready to use it, heat the caramel in the microwave in short 10 second intervals until it’s a more workable consistency like in the photo below.
Step 3: Make the Chocolate Ganache Drip
Next, make the chocolate ganache drip. Place 1/2 cup semi-sweet chocolate chips in a heatproof bowl and set aside.
Heat 1/3 cup of heavy cream in a heatproof bowl in the microwave for 45 seconds to 1 minute, until it’s steaming and just starting to bubble.
If you don’t have a microwave or prefer to use the stove top, you can heat the cream over medium heat in a pan until it begins to simmer. Remove from heat.
Gently pour the heavy cream over the chocolate, making sure it’s fully covered with cream. Allow the mixture to sit for 1-2 minutes.
Stir slowly until the cream and chocolate are fully combined and mixture is smooth.
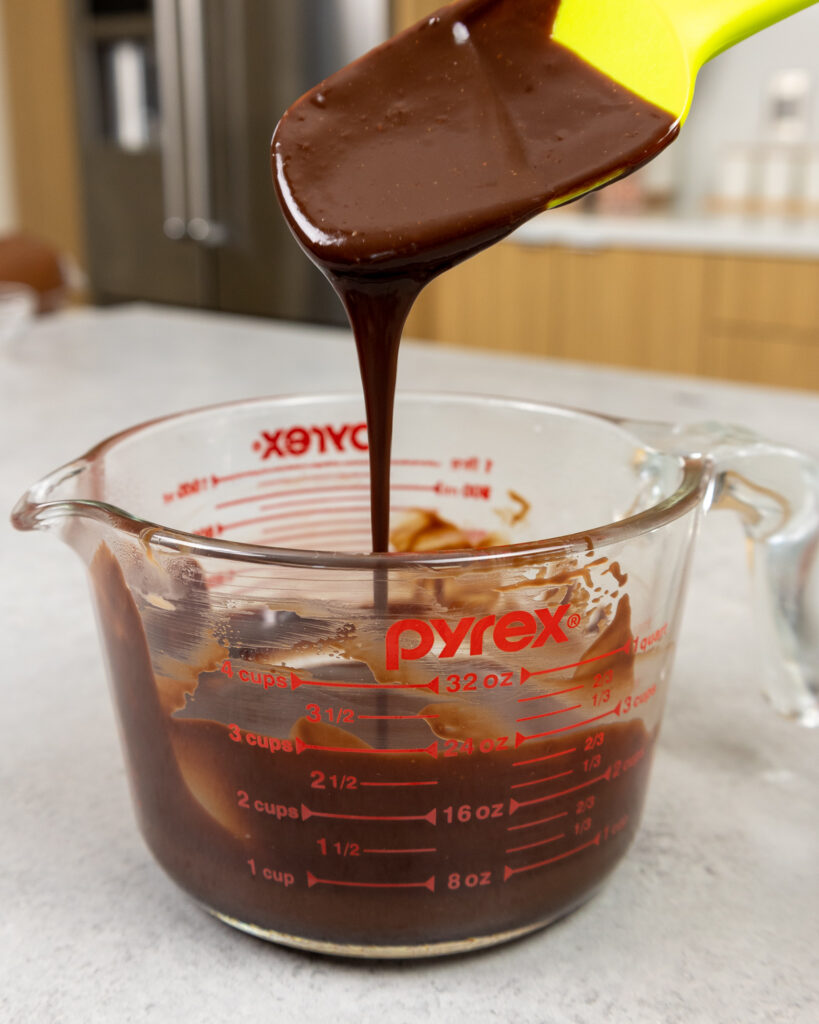
Set aside to cool for about 10 minutes, until the mixture is just slightly warm to the touch. Cover with plastic wrap or pour into a plastic squirt bottle and set aside.
Step 4: Make the Chocolate Buttercream
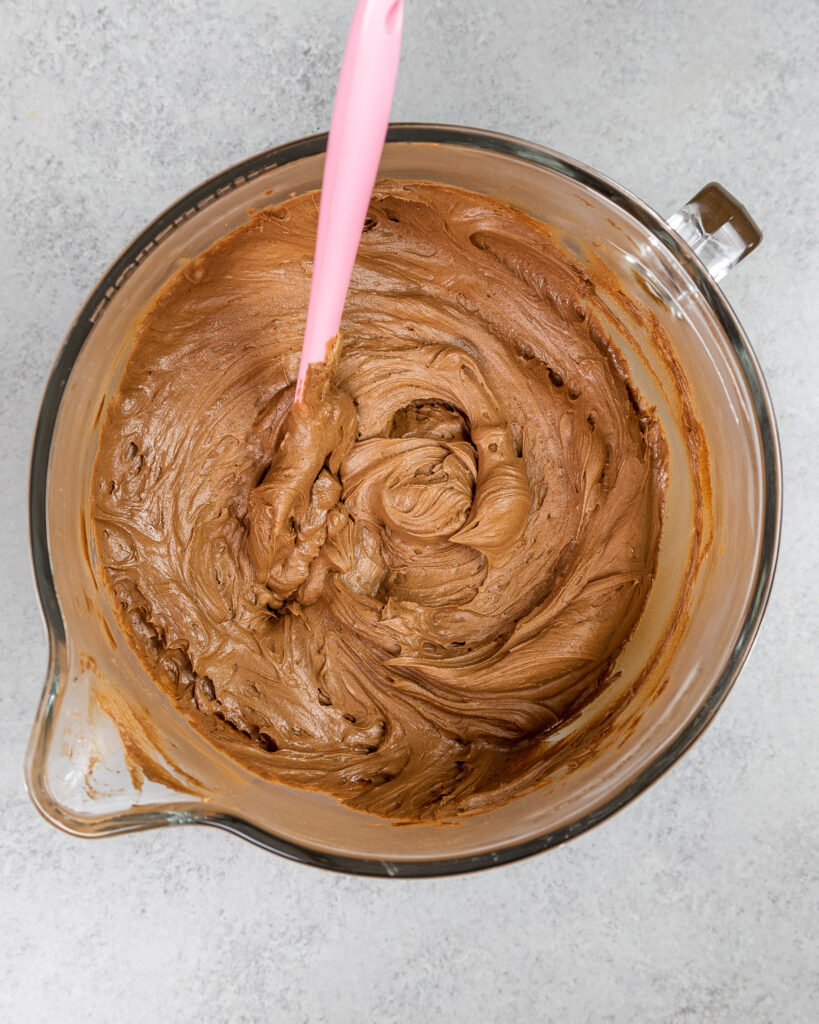
While the cake layers bake and cool, make the chocolate buttercream. This frosting can also be made in advance and kept in the fridge for up to a month!
If your frosting seems too thick after mixing your ingredients, add in additional cream (1 tablespoon at a time). Or if the frosting is too thin, add in more powdered sugar (quarter of a cup at a time).
If you’re unsure how thick your frosting should be, you can learn what consistency you’re looking for in my frosting consistency post.
Step 5: Make the Fluffy Chocolate Cake Filling
Make the fluffy chocolate cake filling last. It’s a bit more time-sensitive and it’s best to make it right before you assemble the cake. It can sit out at room temperature for about 3 hours, but it begins to lose its shape if it sits longer than that.
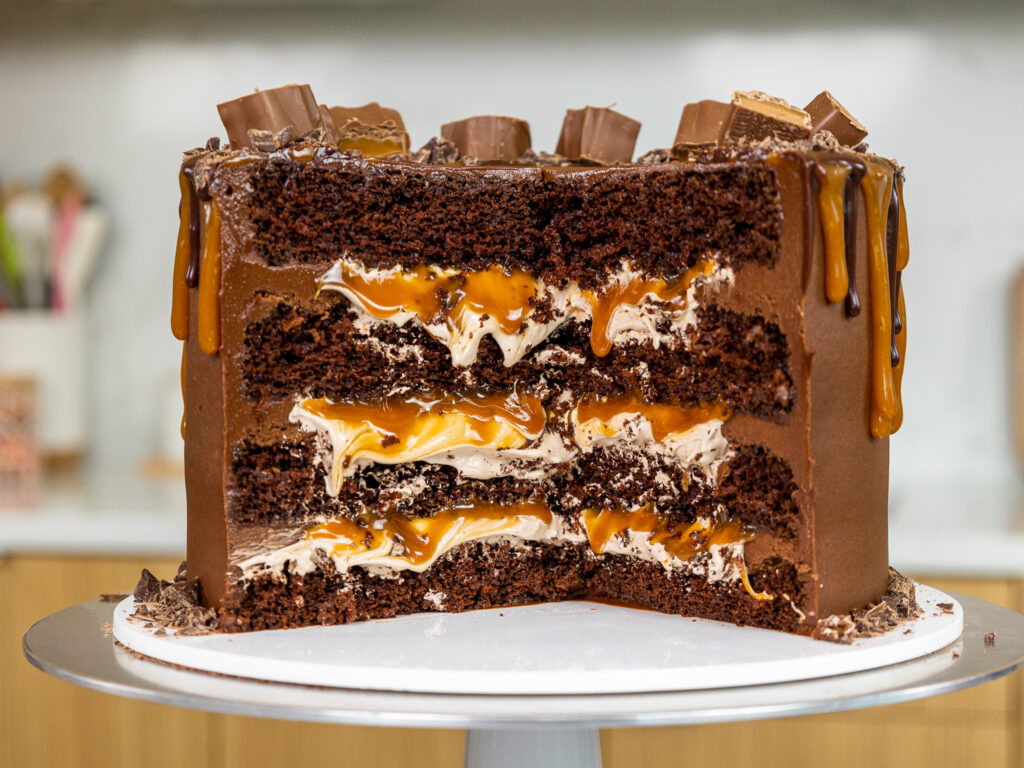
The base of this filling is Swiss meringue! This gives it an amazing, light as air texture that tastes just like the chocolate filling in a Milky Way bar.
Place the egg whites, sugar, and cream of tartar in a heatproof (preferably metal) bowl.
Set the bowl over a saucepan filled with an inch or two of simmering water. Make sure the metal bowl does not touch the water!! If it does, it can cook /scramble the egg whites.
Whisk constantly for about 4 minutes, until sugar is fully dissolved and has become thinner and lighter in color. The mixture will feel thick and tacky at first but will become thinner and start to look a bit frothy on top.
I like to do the finger test to see if the meringue is ready, but you can also use a thermometer. To test with your fingers, dip a tiny bit of your pointer finger (it’s very hot, be careful) and rub the mixture between your thumb and finger.
It should feel smooth, and you shouldn’t be able to feel any sugar granules. If you use a thermometer, the temperature should be 160 F / 70 C.
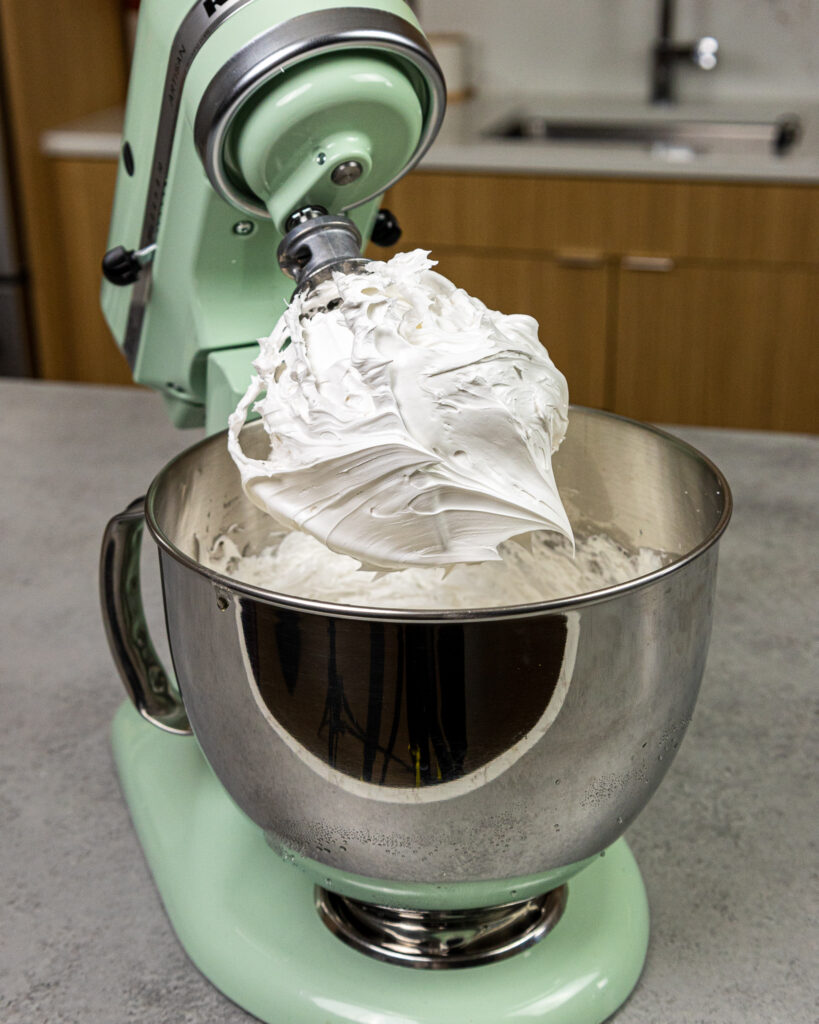
Remove from heat and add the vanilla extract. Use a handheld or stand mixer fitted with a whisk attachment to beat on high speed for about 5 minutes, until stiff glossy peaks form.
Mix in the butter, cocoa powder, and pinch of salt on a medium speed. Scrape around the side and bottom of the bowl as needed with a rubber spatula.
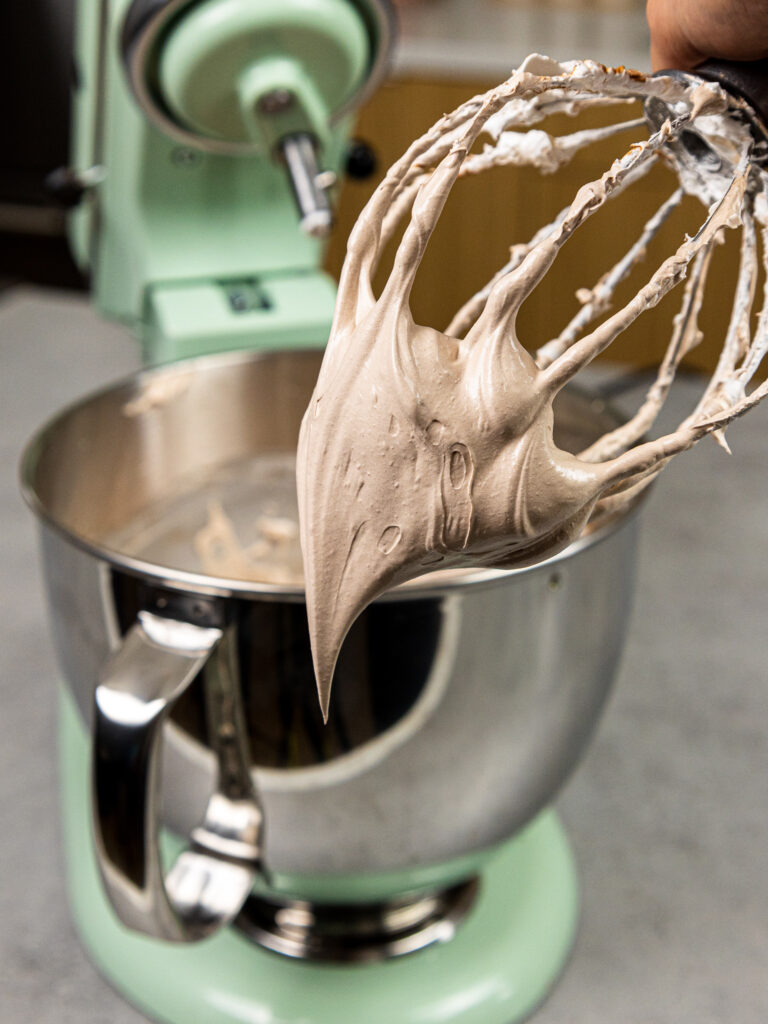
Step 6: Stack and Fill This Milky Way Cake
Stack and frost cake layers on a greaseproof cake board, using a dab of chocolate buttercream to help stick the first cake layer to the board.
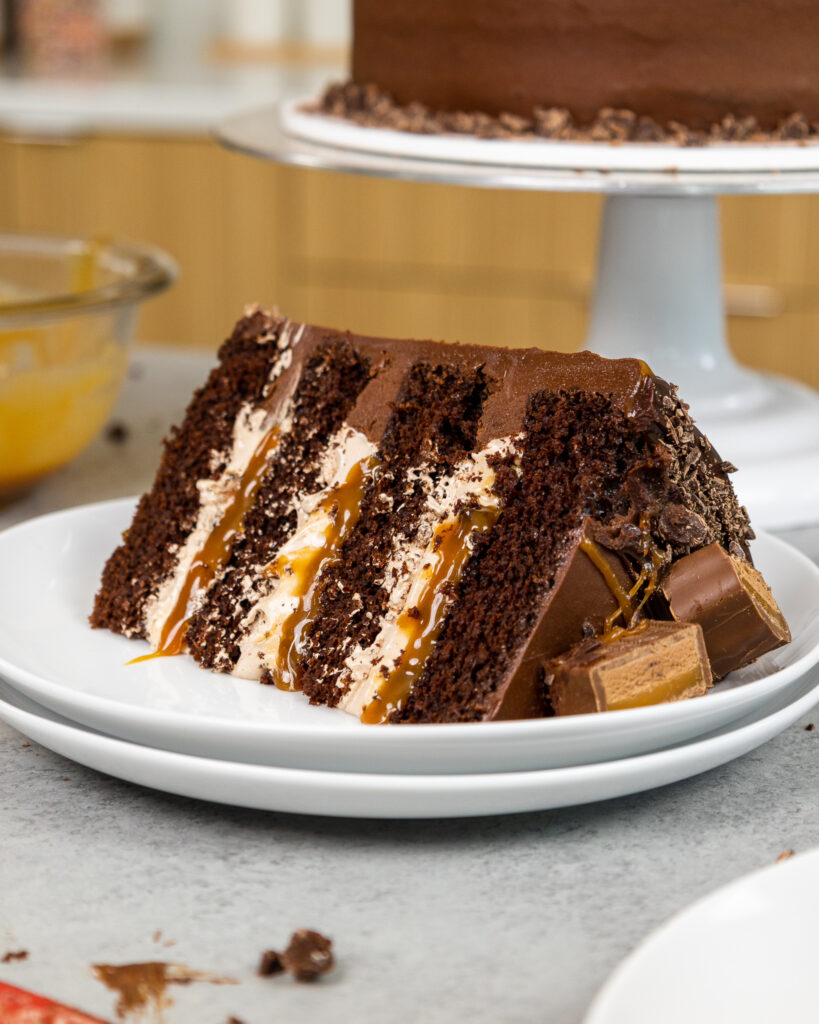
As you assemble the cake, pipe a ring of chocolate buttercream around each cake layer. Spread about 1/3 of the fluffy chocolate cake filling inside the buttercream ring. Top with a generous drizzle of caramel.
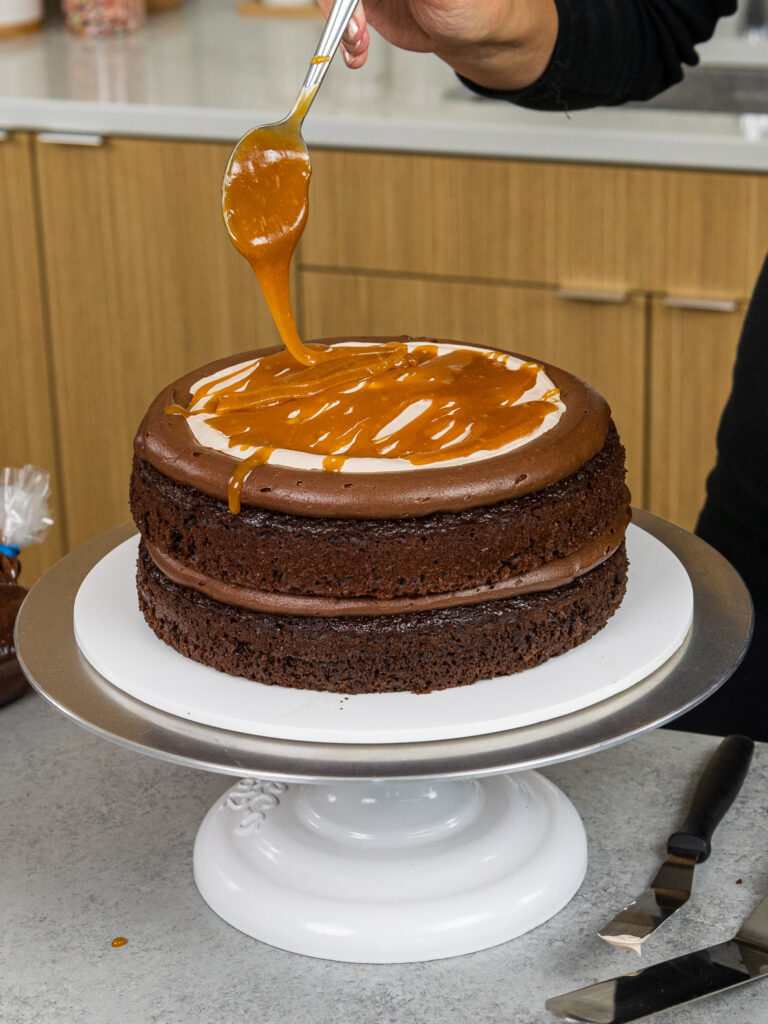
Repeat with the remaining cake layers. Smooth any overhanging buttercream around the cake with a large offset spatula.
Then freeze the cake for about 10 minutes in the freezer or 30 minutes in the fridge. This will help the buttercream and filling between the cake layers firm up and make the cake easier to frost.
Step 7: The Best Part: Decorate This Milky Way Cake!
Carefully cover the cake with a thick, even layer of chocolate buttercream and smooth using a bench scraper.
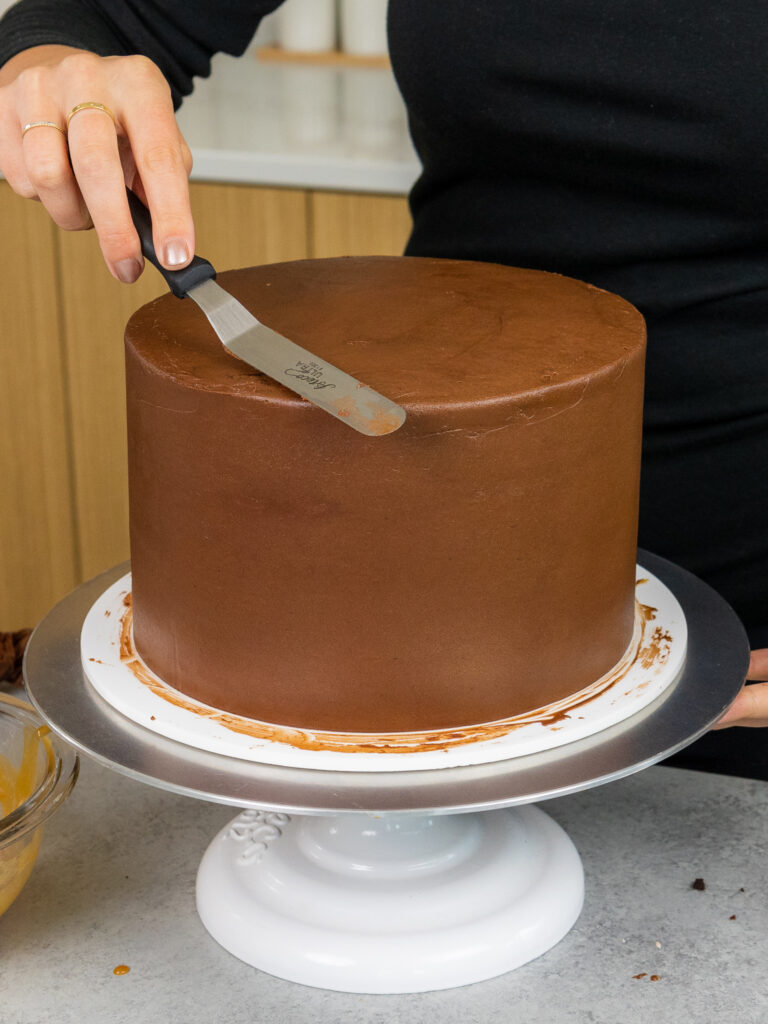
Chill the cake one more time in the fridge or freezer until the buttercream is firm to the touch.
Heat up the caramel and chocolate ganache in the microwave for short 5-10 second intervals until they’re a good consistency to add drips around the cake.
Remove the cake from the fridge and add a test drip using both the chocolate ganache and the caramel to the back of the cake.
Adjust the temperature of the caramel and the ganache as needed (hotter for longer drips, or let it cool more for shorter/thicker drips). Add chocolate and caramel drips around the cake.
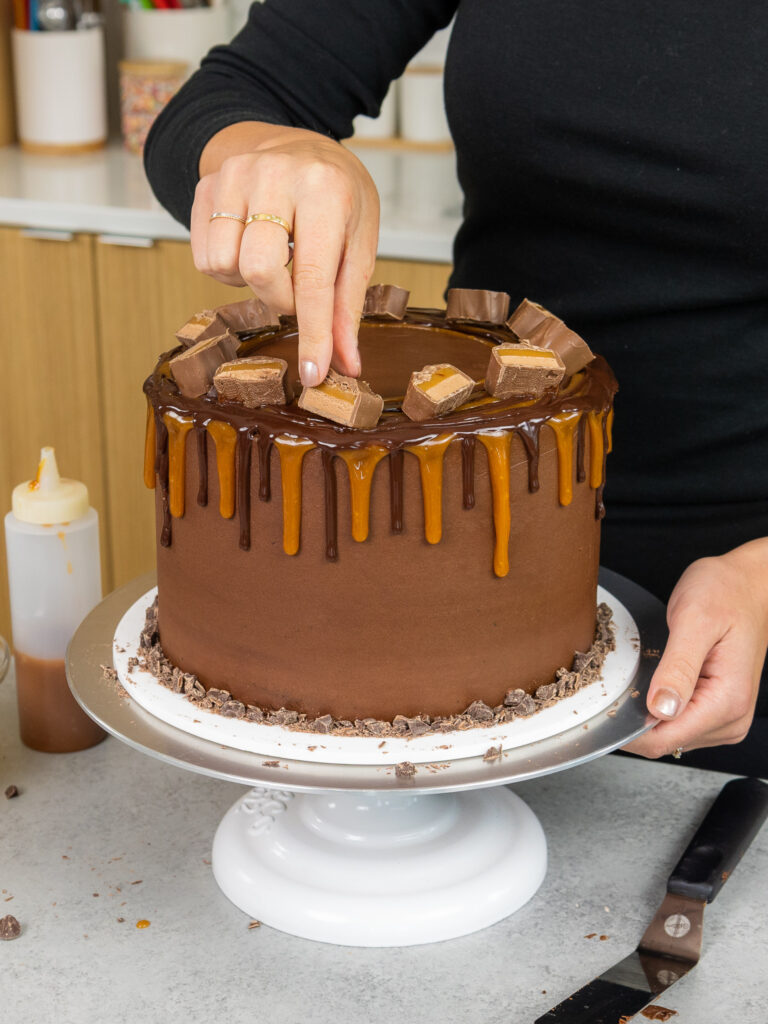
Decorate the top of the cake with a ring of sliced Milky Way bars and enjoy!
Substitutions & Swaps: Chocolate Cake Layers
While I love this chocolate Milky Way cake just the way it is, I know you might not have all these ingredients on hand.
Below are some swaps and substitutions that can be made in this recipe:
- All Purpose Flour – This recipe turns out best with all-purpose flour. However, you can swap in a good gluten free flour blend (like this) if needed. Just be sure to stir the batter longer than normal to help give the cake proper structure, and let the batter sit for about 20 minutes before baking it if you opt to make a gluten free version.
- Granulated Sugar – I do not recommend reducing the amount of sugar or changing the type of sugar, as it will change the texture of the cake layers.
- Unsweetened Baking Cocoa – I like to use regular unsweetened baking cocoa. However, you can also use Dutch-processed, dark, or black cocoa if needed.
- Buttermilk – You can also use full fat yogurt, sour cream, whole milk, or an alternative yogurt or milk (almond, soy, oat).
- Vegetable Oil – Use any flavorless oil can in this recipe. Canola, vegetable, or even sunflower oil would all work great. I don’t recommend olive oil though, as it has a strong flavor and will change the taste of the cake.
- Eggs – This recipe uses large eggs. If you have an egg allergy you can try using a vegan egg replacer.
Substitutions & Swaps: Chocolate Buttercream Frosting
Some swaps and substitutions that can be made in this frosting recipe include:
- Unsalted Butter – If you only have salted butter, on hand you can use it in place of the unsalted butter. Just be sure to omit the salt that this frosting recipe calls for. You can also use vegan butter in its place!
- Unsweetened Baking Cocoa – I like to use regular unsweetened baking cocoa. However, you can also use Dutch-processed, dark, or black cocoa if needed.
- Heavy Cream – Whole milk or alternative milk (soy, almond, oat) can also be used to make the frosting.
- Milk Chocolate – You can use milk chocolate chips, baking chocolate, or good-quality chocolate bars to melt and add into the frosting. Alternatively, you can also use dark or semi-sweet chocolate if you have a strong preference.
Tips for Making the Best Chocolate Milky Way Cake
- Ingredients at room temp mix together better! Set out any cold ingredients ahead of time.
- Be sure to properly measure your flour (spoon into the cup measure, then level). Or better yet, use a kitchen scale to measure your dry ingredients.
- Mix the cake batter just until the ingredients are incorporated. This will ensure your cake layers are tender and fluffy.
- Use a scale to weigh your cake pans as you fill them. Make sure each pan has the same amount of batter will make your cake layers bake to the same height and bake more evenly.
- Bang your cake pans on the counter before putting it in the oven. This helps any big air bubbles that are trapped in the batter come to the surface.
- Level your room temperature or thawed cake layers with a serrated knife to make them easier to stack.
- Chill your cake layers in the freezer for about 20 minutes before assembling the cake. It makes it so much easier to stack and frost them!
- These caramel drips have a tendency to continue to slowly run down the cake after they’ve been added. I recommend popping the cake in the freezer for about 30 minutes right after you finish decorating to help them stay in place.
Making this Chocolate Milky Way Cake in Advance and Storage Tips
- Make your cake layers in advance and freeze them. It breaks the process up and makes it more approachable.
- The caramel and chocolate drip can also be made in advance! Store them in airtight containers in the fridge for up to a month. Heat them up in the microwave in 5-10 second intervals until they reach a consistency that will allow you to make drips.
- Make your chocolate frosting ahead of time or save any leftover frosting! Store in an airtight container in the fridge for up to a month.
- This frosting can also be stored in the freezer for up to 3 months! Just be sure to give it a good stir once it thaws to make it nice and smooth again.
- A frosted cake can last in the fridge for up to a week, or in the freezer up to a month. If you freeze the cake, transfer it the fridge the night before you plan to eat it. This will help it gradually thaw and minimize any temperature shock. Remove the cake from the fridge about 30 minutes before you plan to cut into it.
Let Me Know What You Think
If you try this chocolate Milky Way cake recipe, I’d love to hear what you think! Please leave a rating below and a comment to let me know your thoughts.
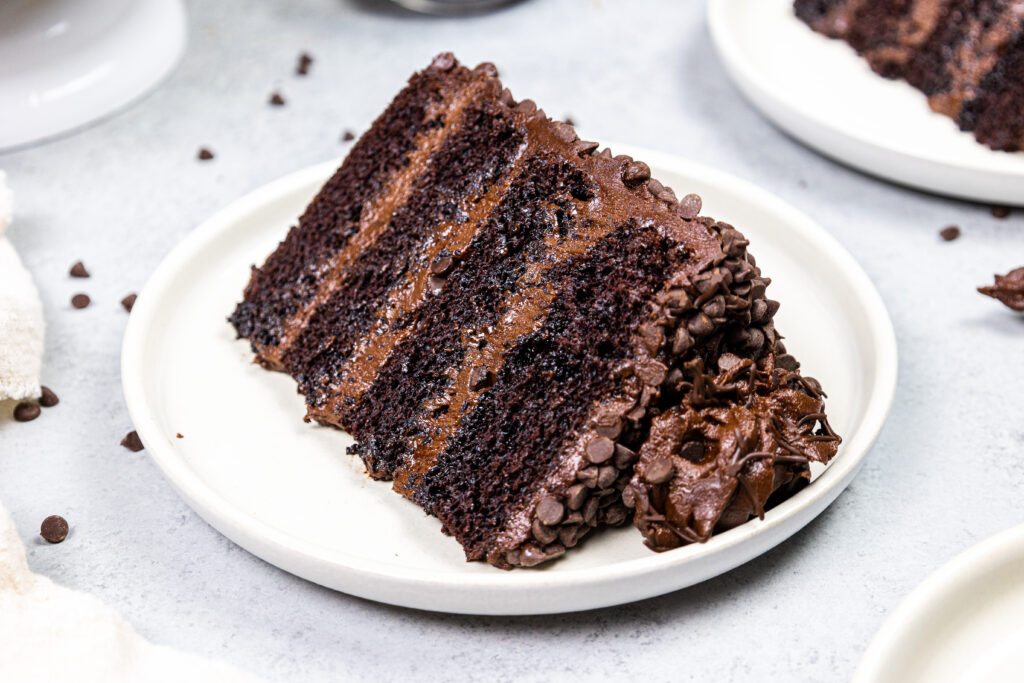
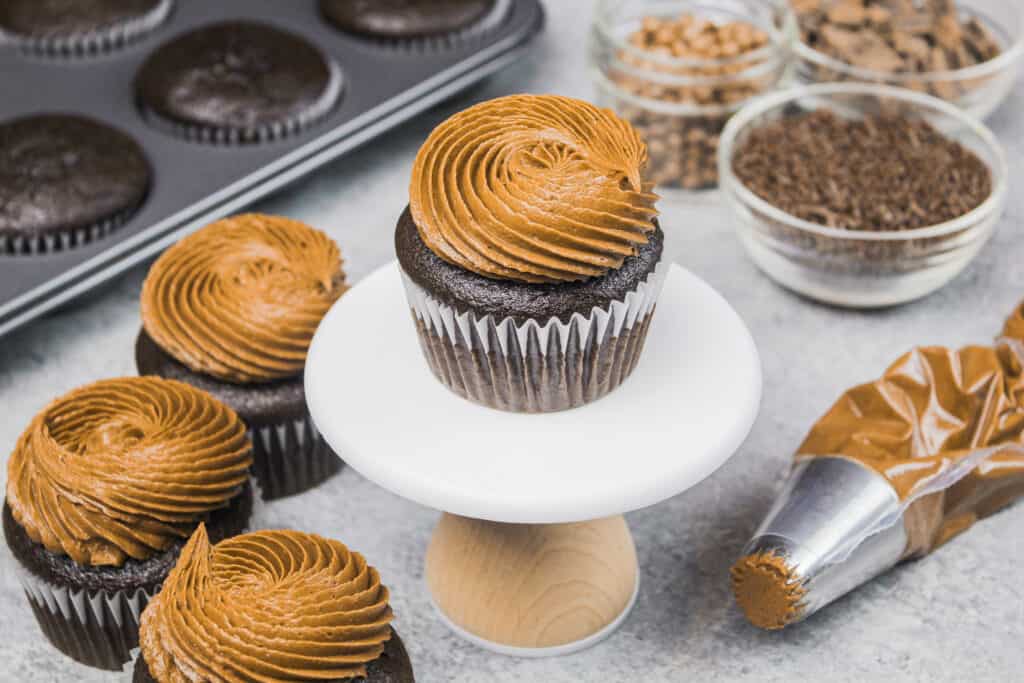
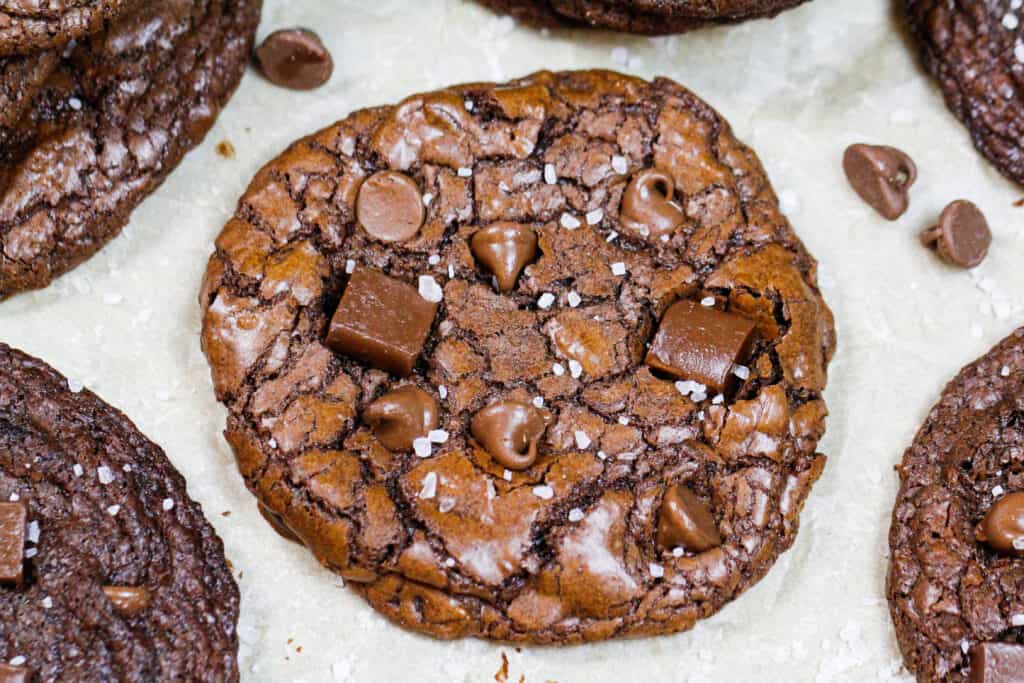
Other Recipes You Might Like:
Milky Way Cake
This chocolate milky way cake tastes just like our favorite candy bar! Its moist chocolate cake layers are filled with a fluffy chocolate filling, homemade caramel, and milk chocolate buttercream!!
Ingredients
Moist Chocolate Cake Recipe
- 2 1/2 cups all-purpose flour (325g)
- 2 1/2 cups granulated sugar (500g)
- 1 cup unsweetened cocoa powder, sifted (80g)
- 2 1/2 tsp baking powder (10g)
- 2 tsp baking soda (12g)
- 1 tsp salt (6g)
- 1 1/4 cup warm water (300ml)
- 1 1/4 cup buttermilk, room temperature (300ml)
- 2/3 cup vegetable oil (145ml)
- 3 large eggs, room temperature (168g)
- 2 tsp vanilla extract (8ml)
Caramel Drizzle
- 1 cup granulated sugar (200g)
- 6 Tbsp unsalted butter, room temperature (85g)
- 1/4 cup heavy cream, room temperature (60g)
- 1/4 tsp fine salt (2g)
Chocolate Drip
- 1/2 cup semi-sweet chocolate chips (95g)
- 1/3 cup heavy cream (80ml)
Chocolate Buttercream Frosting
- 2 cups (or 4 sticks) unsalted butter, room temperature (452g)
- 1/2 cup unsweetened natural baking cocoa, sifted (40g)
- 1 tsp vanilla extract (4ml)
- 1/2 tsp fine table salt (3g)
- 6 cups powdered sugar (750g)
- 2/3 cup heavy cream or heavy whipping cream, room temperature (180ml)
- 1 cup milk chocolate chips, melted and cooled (180g)
Fluffy Chocolate Cake Filling
- 4 large eggs whites (120g)
- 1 cup granulated sugar (200g)
- 1/2 tsp cream of tartar
- 1 Tbsp vanilla extract (12ml)
- 4 Tbsp unsalted butter, room temperature (56g)
- 2 Tbsp unsweetened baking cocoa powder, sifted (10g)
- pinch of fine salt (less than 1/8 tsp)
Cake Filling and Decoration
- 1 large Milky Way Bar, chopped into thin slices
Recommended Tools
- 8-inch cake pans
- Spinning cake stand
- 10-inch greaseproof cake board
- Large offset spatula
- Electric hand mixer or stand mixer
Instructions
Chocolate Cake Layers
- Preheat oven to 350 F / 175 C. Grease and line four, eight-inch cake pans.
- Sift or whisk together the dry ingredients (flour, sugar, cocoa powder, baking powder, baking soda and salt) into a large bowl.
- Pour in the warm water, buttermilk, oil, eggs, and vanilla into a separate bowl and whisk together until fully incorporated.
- Mix the wet ingredients into the dry ingredients just until they're incorporated into the batter. Do not over-mix!
- Divide the batter evenly between the prepared cake pans and bake for about 23-26 minutes or until a toothpick comes out with a few moist crumbs.
- Remove the cake layers from the oven and let them cool in the pans for about 10 minutes. Gently run an offset spatula around the rim of the cake pans to loosen them, then flip them into wire racks to finish cooling.
- Once cooled, use a serrated knife to level the top of each cake layer. If you are making these cake layers in advance, wrap and freeze them at this point. These can be made up to a month in advance.
Caramel Drizzle
- Make the caramel drizzle while the cake layers bake and cool. This can be made up to a month in advance.
- Place a medium saucepan over medium to medium-high heat.
- Once the pan has warmed up, pour in 1 cup sugar gradually, adding 1/4 cup at a time. Wait until the sugar is mostly dissolved, then add in the next bit of sugar.
- As the sugar melts it will gradually deepen in color.
- Stir occasionally until the sugar is fully dissolved and has become an amber color, then turn off the heat.
- Slowly mix in 6 Tbsp of butter (2 Tbsp at a time), then stir in 1/4 cup of heavy cream and 1/4 tsp salt. The mixture will be thin but will thicken as it cools.
- Pour into a separate container, then place in the fridge to cool and/or store. When you're ready to use it, heat the caramel in the microwave in short 10 second intervals until it's a more workable consistency.
Chocolate Ganache Drip
- Next, make the chocolate ganache drip. Place 1/2 cup semi-sweet chocolate chips in a heatproof bowl and set aside.
- Heat 1/3 cup of heavy cream in a heatproof bowl in the microwave for 45 seconds to 1 minute, until it's steaming and just starting to bubble. If you don’t have a microwave or prefer to use the stove top, you can heat the cream over a medium heat in a pan until it begins to simmer. Remove from heat.
- Gently pour the heavy cream over the chocolate, making sure it's fully covered with cream. Allow the mixture to sit for 1-2 minutes.
- Stir slowly until the cream and chocolate are fully combined and the mixture is smooth.
- Set aside to cool for about 10 minutes, until the mixture is just slightly warm to the touch. Cover with plastic wrap or pour into a plastic squirt bottle and set aside.
Chocolate Buttercream Frosting
- Then make the chocolate buttercream frosting. Beat the butter on a medium speed for 30 seconds with a paddle attachment until smooth.
- Add in the sifted cocoa powder, vanilla extract, and salt. Mix on low until the ingredients are fully incorporated.
- Slowly mix in the powdered sugar. Halfway through, add in the heavy cream to make the frosting easier to mix.
- Mix in the cooled, melted milk chocolate on a low speed until the ingredients are fully incorporated and the desired consistency is reached. Cover with plastic wrap to prevent crusting and set aside.
Fluffy Chocolate Cake Filling
- Make the fluffy chocolate cake filling last. It's a bit more time-sensitive and it's best to make it right before you assemble the cake. It can sit out at room temperature for about 3 hours, but it begins to lose its shape if it sits longer than that.
- Place the egg whites, sugar, and cream of tartar in a heatproof (preferably metal) bowl. Set the bowl over a saucepan filled with an inch or two of simmering water. Make sure the metal bowl does not touch the water!! If it does, it can cook /scramble the egg whites.
- Whisk constantly for about 4 minutes, until sugar is fully dissolved and has become thinner and lighter in color. The mixture will feel thick and tacky at first but will become thinner and start to look a bit frothy on top. I like to do the finger test to see if the meringue is ready, but you can also use a thermometer. To test with your fingers, dip a tiny bit of your pointer finger (it’s very hot, be careful) and rub the mixture between your thumb and finger. It should feel smooth, and you shouldn’t be able to feel any sugar granules. If you use a thermometer, the temperature should be 160 F / 70 C.
- Remove from heat and add the vanilla extract. Use a handheld or stand mixer fitted with a whisk attachment to beat on high speed for about 5 minutes, until stiff glossy peaks form.
- Mix in the butter, cocoa powder, and pinch of salt on a medium speed. Scrape around the side and bottom of the bowl as needed with a rubber spatula.
Assembling This Milky Way Cake
- Stack and frost cake layers on a greaseproof cake board, using a dab of chocolate buttercream to help stick the first cake layer to the board.
- As you assemble the cake, pipe a ring of chocolate buttercream around each cake layer. Spread about 1/3 of the fluffy chocolate cake filling inside the buttercream ring. Top with a generous drizzle of caramel.
- Repeat with the remaining cake layers. Smooth any overhanging buttercream around the cake with a large offset spatula. Then freeze the cake for about 10 minutes in the freezer or 30 minutes in the fridge. This will help the buttercream between the cake layers firm up and make the cake easier to frost.
- Carefully cover the cake with a thick, even layer of chocolate buttercream and smooth using a bench scraper. Chill the cake one more time in the fridge or freezer until the buttercream is firm to the touch.
- Heat up the caramel and chocolate ganache in the microwave for short 5-10 second intervals until they're a good consistency to add drips around the cake.
- Remove the cake from the fridge and add a test drip using both the chocolate ganache and the caramel to the back of the cake. Adjust the temperature of the caramel and the ganache as needed (hotter for longer drips, or let it cool more for shorter/thicker drips). Add chocolate and caramel drips around the cake.
- Decorate the top of the cake with a ring of sliced Milky Way bars and enjoy!
Notes
My Tips for Making the Best Milky Way Cake
- Ingredients at room temp mix together better! Set out any cold ingredients ahead of time.
- Be sure to properly measure your flour (spoon into the cup measure, then level). Or better yet, use a kitchen scale to measure your dry ingredients.
- Mix your cake batter just until the ingredients are incorporated. This will ensure your cake layers are tender and fluffy.
- Use a scale to weigh your cake pans as you fill them. Make sure each pan has the same amount of batter will make your cake layers bake to the same heigh and bake more evenly.
- Bang your cake pans on the counter before putting it in the oven. This brings any air bubbles that are trapped in the batter to the surface.
- Level your room temperature or thawed cake layers with a serrated knife to make them easier to stack.
- Chill your cake layers in the freezer for about 20 minutes before assembling the cake. It makes it so much easier to stack and frost them!
Making This Milky Way Cake in Advance & Storage Tips
- Make your cake layers in advance and freeze them. It breaks the process up and makes it more approachable.
- Make your chocolate frosting ahead of time or save any leftover frosting! It can be stored in an airtight container in the fridge for up to a month. This frosting can also be stored in the freezer for up to 3 months! Just be sure to give it a good stir once it thaws to make it nice and smooth again.
- These caramel drips have a tendency to continue to slowly run down the cake after they've been added. I recommend popping the cake in the freezer for about 30 minutes right after you finish decorating to help them stay in place.
- A frosted cake can last in the fridge for up to a week, or in the freezer up to a month. If you freeze the cake, transfer it to the fridge the night before you plan to eat it. This will help it gradually thaw and minimize any temperature shock. Remove the cake from the fridge about 30 minutes before you plan to cut into it.
Nutrition Information
Yield
24Serving Size
1Amount Per Serving Calories 594Total Fat 24gSaturated Fat 10gTrans Fat 0gUnsaturated Fat 12gCholesterol 94mgSodium 422mgCarbohydrates 91gFiber 2gSugar 76gProtein 6g
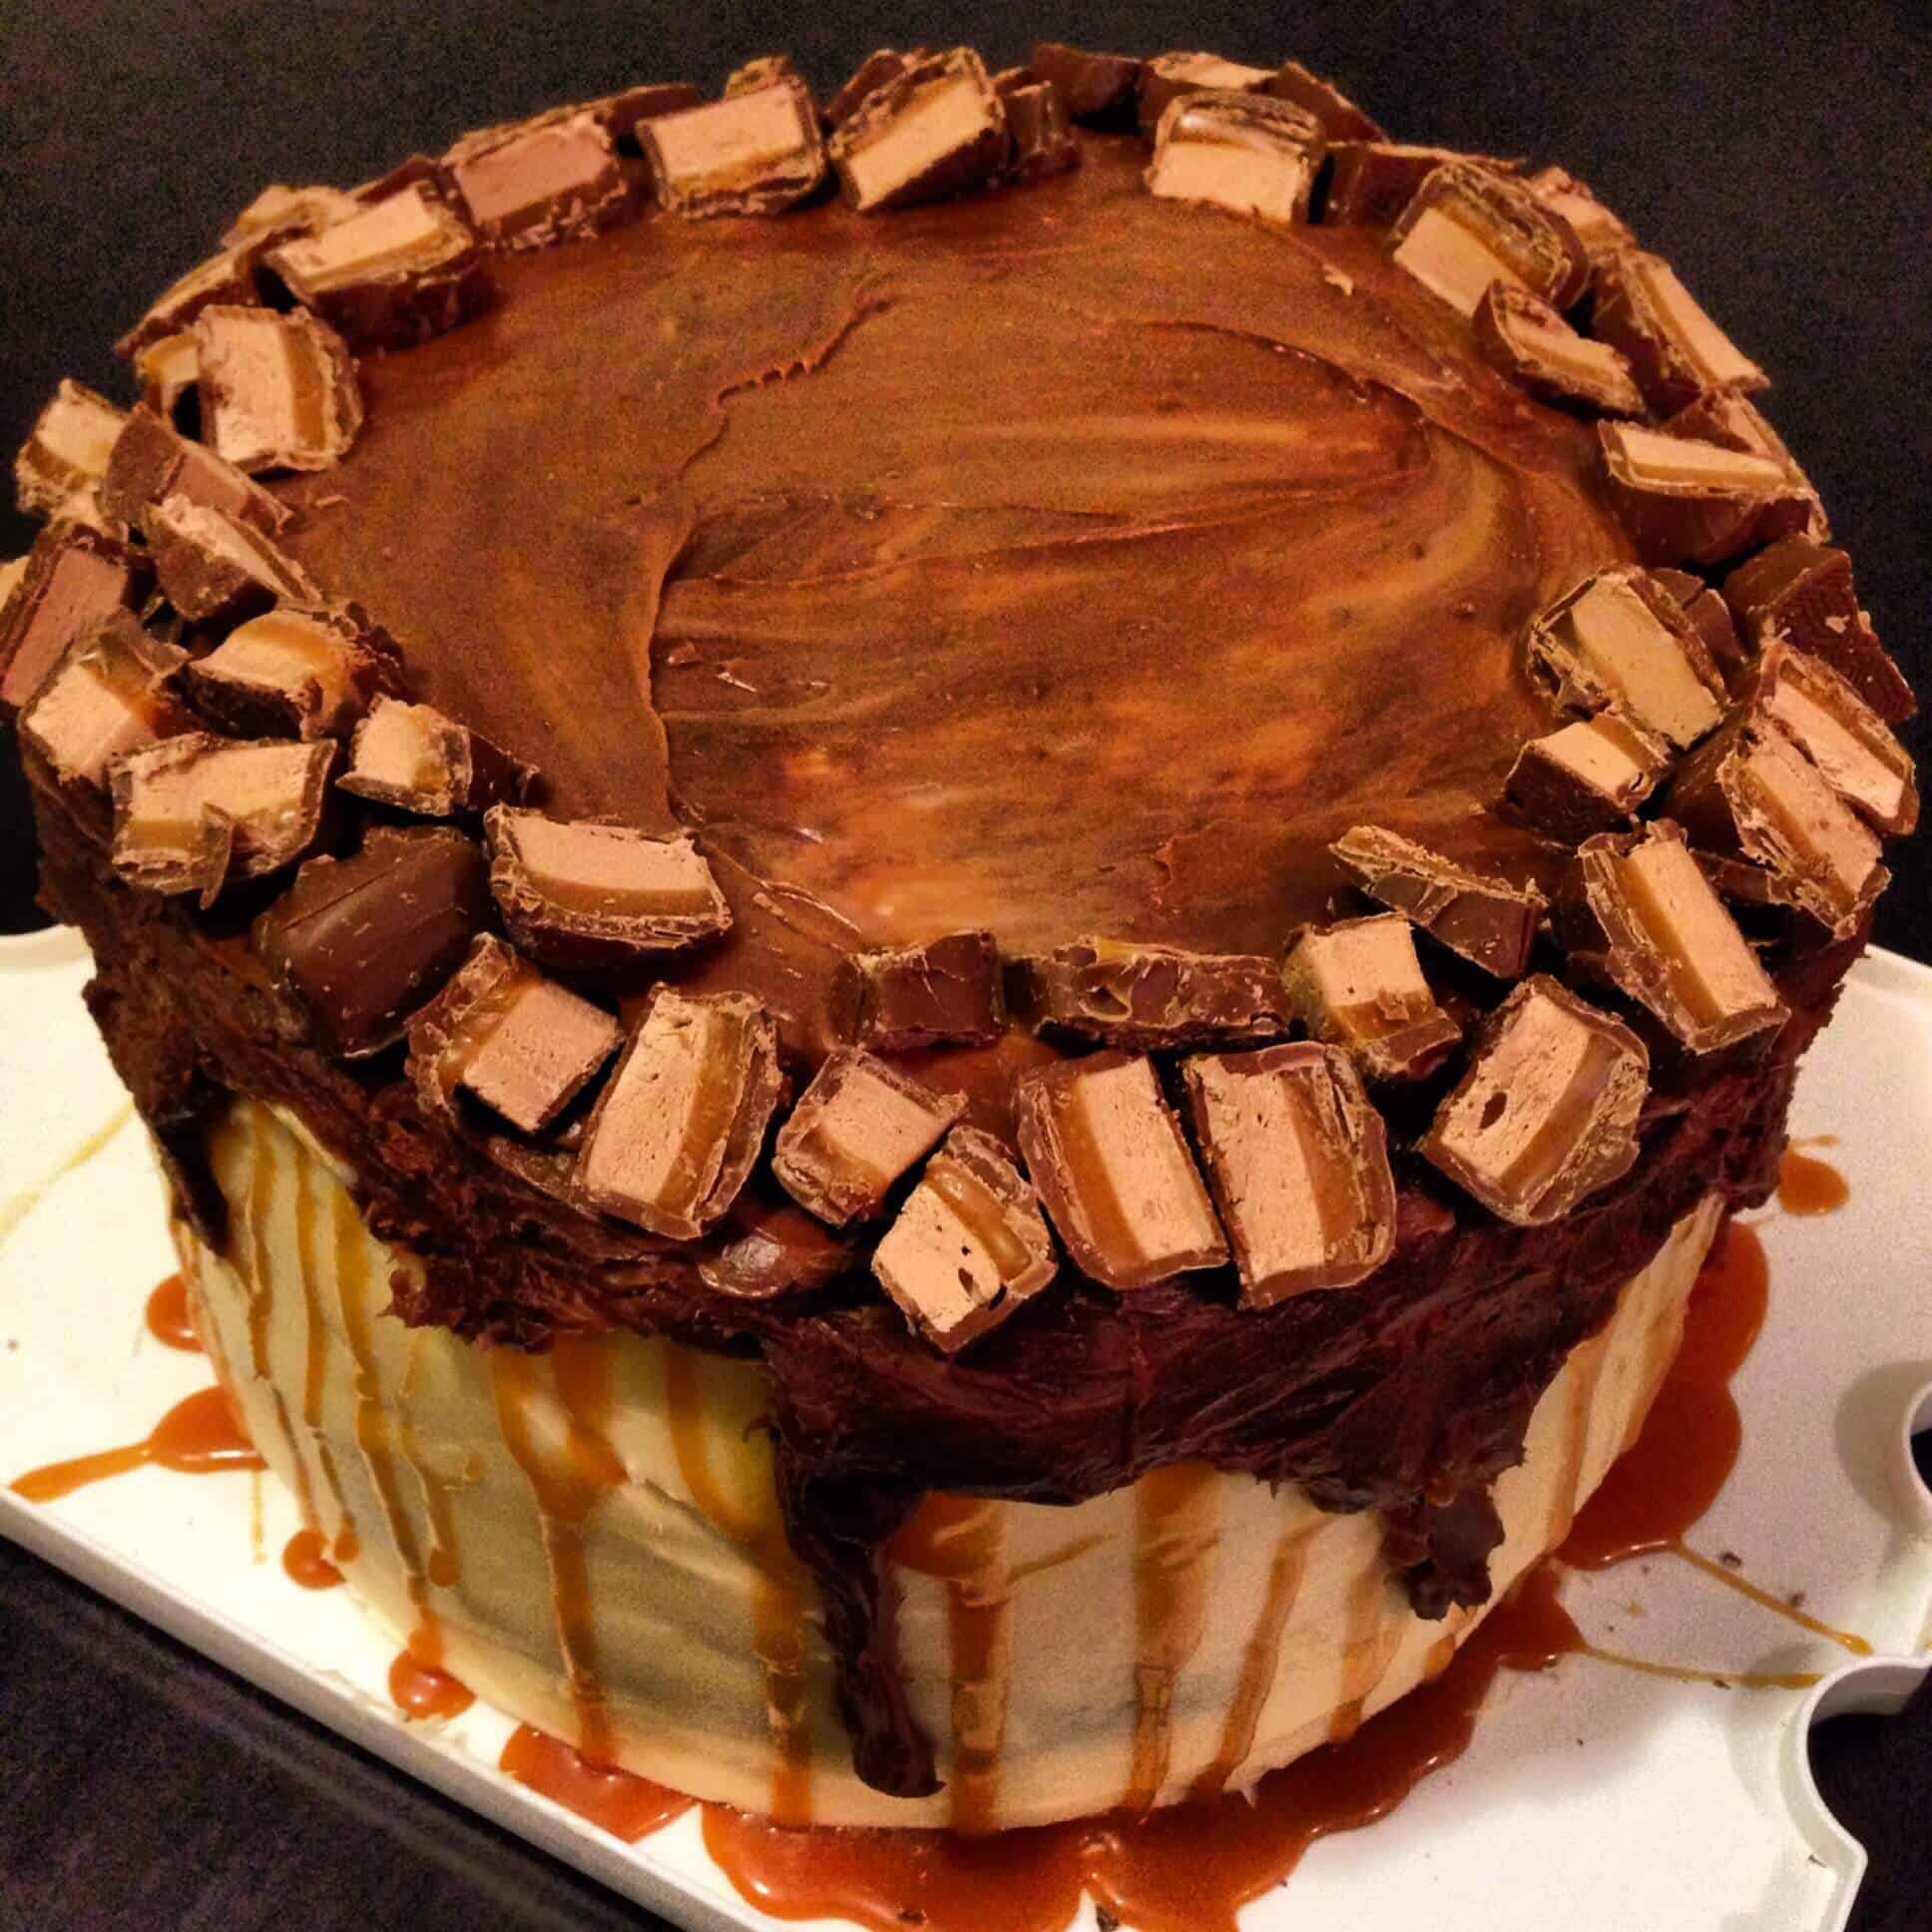
For a walk down memory lane, here’s a photo of my original Milky Way cake from 2014!! My drips have definitely come a long way since then 🙂

lola
Thursday 24th of March 2022
if i dont have cream of tartar, what could i replace it with ??
McKenna Shelby
Monday 21st of March 2022
Do you think that this cake would be stable enough to be the bottom tier of a 2 tier cake? Also do you have any experience with putting a fondant covered cake in the fridge overnight??
The Easiest Chocolate Drip Recipe - Only 2 Ingredients
Monday 14th of March 2022
[…] Drip Cake Milky Way Cake Buttercream Rosette Tutorial Pink Drip Cake Yield: 3/4 […]
Marble Cake Recipe - Moist, Fluffy, and So Simple to Make
Friday 18th of February 2022
[…] Drip Cake Chocolate Raspberry Cake Milky Way Cake Death by Chocolate Cake Yield: […]
Colored Drips - Easy Two Ingredient Recipe & Tutorial
Friday 18th of February 2022
[…] Drip Cake White Drip Cake Chocolate Strawberry Cake Milky Way Cake Yield: […]