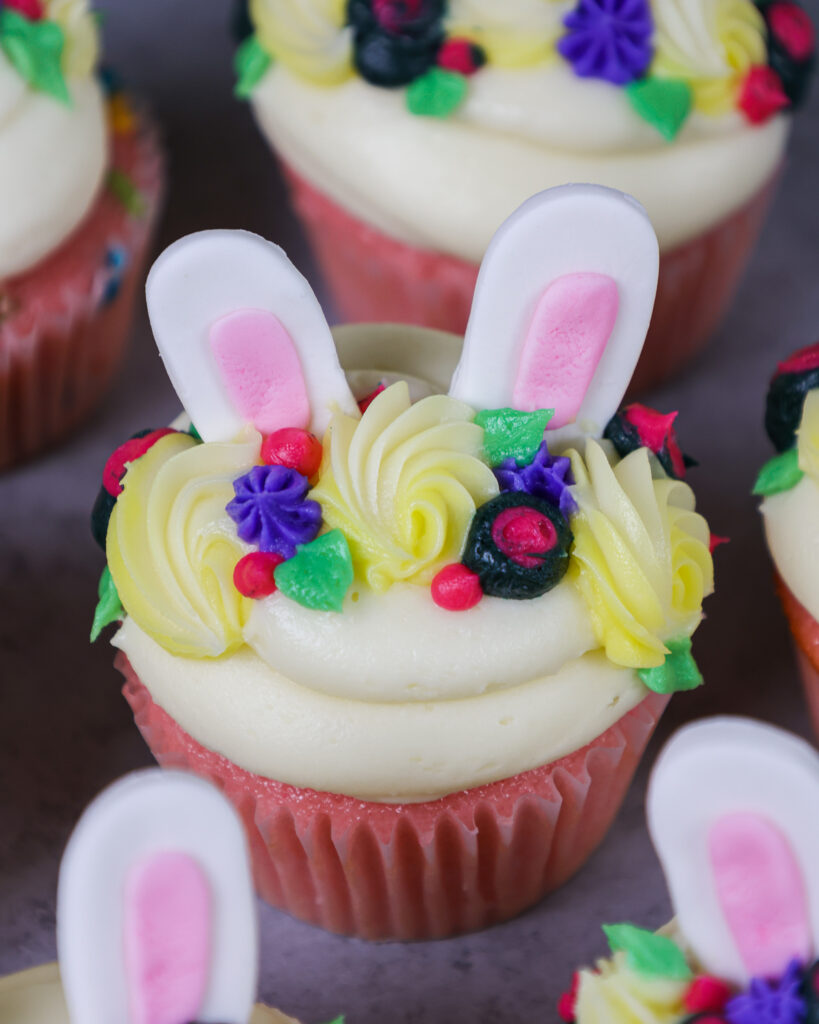
These adorable bunny cupcakes are made with my favorite vanilla cupcake recipe and decorated with delicious buttercream frosting and fondant bunny ears!
I made these for my sister’s bunny-themed baby shower, but they’d be adorable for any bunny lovers out there, or even for Easter.
Pro Tip – Make Your Bunny Ears in Advance!
If possible, make your bunny ears before you bake the cupcakes! They need a bit of time to dry and firm up.
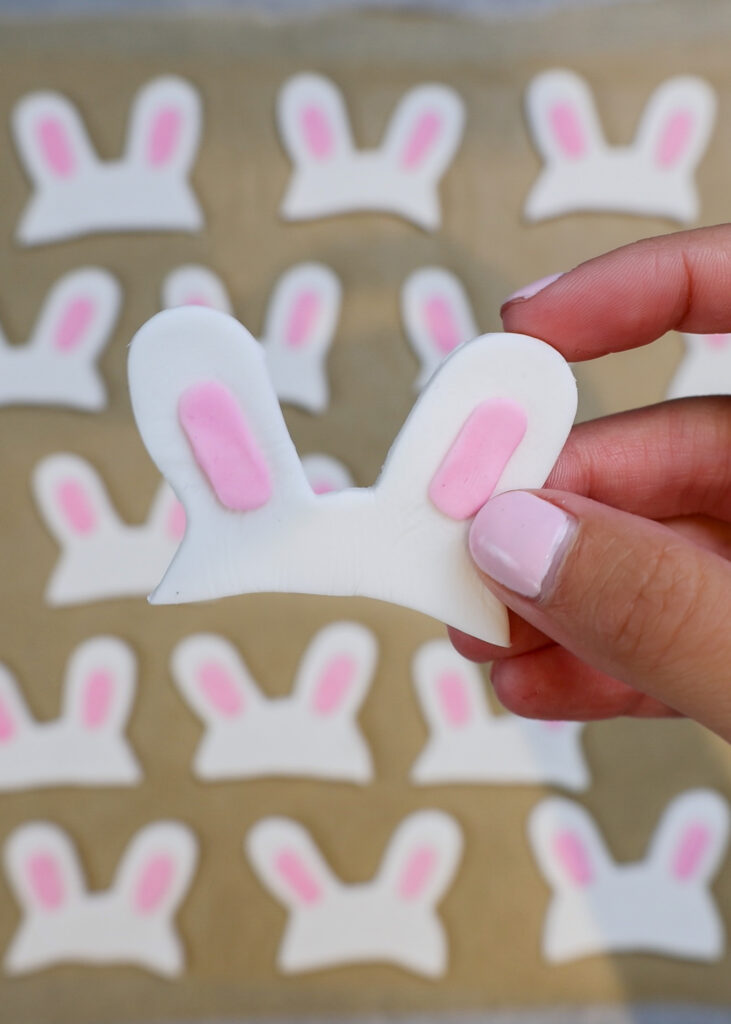
Roll out 1/2 cup of white fondant and use the top half of a bunny cookie cutter to cut out 12 sets of white bunny ears.

Roll out 1/4 cup of pink fondant and cut out 24 small circles (about 1/2 inch) using a small bottle cap or punch circle cutter. Press the circles between your fingers and elongate the circles until they become ovals that fit inside the bunny ears.
Paint a tiny bit of water on the center of each white bunny ear, and press a pink oval into place. Place these on parchment paper to dry for at least an hour (or overnight), until they’re firm to the touch.
Substitutions and Swaps – Bunny Cupcakes
While I love this recipe just the way it is, I know some of you might not have all of these ingredients on hand!
Below are some swaps and substitutions that can be made in this recipe:
- All purpose flour – This recipe turns out best with AP flour, but you can use a cup for cup gluten free flour blend if needed.
- Granulated sugar – I do not recommend reducing the amount of sugar or changing the type of sugar, as it will change the texture of the cupcakes.
- Sour cream – You can also use full fat yogurt, buttermilk, whole milk, or an alternative yogurt or milk (almond, soy, oat, etc.) if you’re dairy free.
- 1 large egg – If you don’t have eggs on hand or you have an egg allergy you can use a vegan egg replacer instead.
- Melted butter – You can also use any flavorless oil in the cupcake portion of this recipe like canola or sunflower oil. I advise against olive oil because of its strong flavor.
- Unsalted butter – If you only have salted butter on hand you can use it in place of the unsalted butter in this recipe. Just be sure to omit the salt that this frosting recipe calls for. You can also use vegan butter in its place!
Tips for Making the Best Bunny Rabbit Cupcakes:
- Properly measure your flour. Either fluff and level with a knife or use a scale.
- Ingredients at room temp mix together better! Set any cold ingredients ahead of time.
- Use a cookie scoop to easily fill your cupcake liners and make sure they all have the same amount of batter.
- Bang your cupcake pan on the counter before putting it in the oven. This brings any air bubbles that are trapped in the batter to the surface.
- Use a large round piping tip to frost large swirls on top of these cupcakes! I used an Ateco 807 to frost these.
- This frosting recipe makes enough to pipe large swirls on top of each cupcake. If you prefer less frosting, feel free to cut the frosting recipe in half.
- To make gluten free bunny cupcakes, swap in your favorite GF flour blend for the AP flour in this recipe. Be sure to give your batter some extra stir time (helps give GF baked goods proper structure) and let it sit for at least 30 minutes before baking for best results.
Making these Bunny Cupcakes in Advance & Storage Tips:
You can make these cupcakes in advance! If stored unfrosted in an airtight container, they can last for 2 days at room temperature or up to a week in the fridge.
These cupcakes can also last up to 3 months in the freezer. If you plan to freeze them, wait to fill and frost them until they’re thawed.
You can also make your frosting ahead of time or save any leftover frosting! It can be stored in an airtight container in the fridge for up to 3 weeks.
Be sure to give the frosting a good stir once it thaws to get the consistency nice and smooth again.
Frosted cupcakes can sit at room temperature overnight or in the fridge for up to 5 days in an airtight container. However, I find frosting them right before serving is best.
Let Me Know What You Think!
If you make these bunny cupcakes, I’d love to hear what you think of it! Let me know your thoughts by sharing a comment below.
Tag me @chelsweets and use the #chelsweets so that I can see your amazing creations on social media!
Other Posts You Might Like:
Bunny Cupcakes
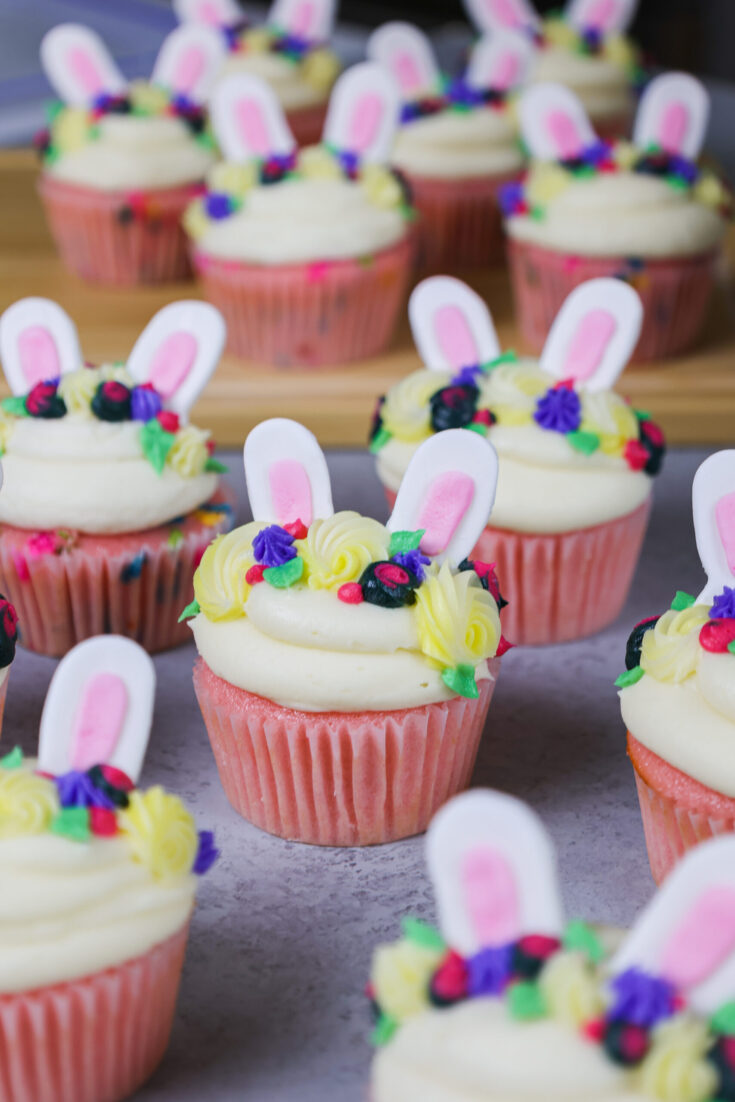
These adorable bunny cupcakes are made with moist vanilla cupcakes and decorated with delicious buttercream frosting and fondant bunny ears!
Ingredients
Vanilla Cupcakes:
- 1 1/4 cup all-purpose flour or gluten free flour blend (150g)
- 1 cup granulated sugar (200g)
- 1 1/2 tsp baking powder (6g)
- 1/2 tsp salt (3g)
- 1/2 cup sour cream, room temperature (125g)
- 1/2 cup water (120g)
- 1/4 cup unsalted butter, melted and cooled (56g)
- 1 large egg, room temperature (56g)
- 1 tsp vanilla extract (4g)
- Pink gel food coloring - optional
Vanilla Buttercream:
- 1 cup unsalted butter, room temperature (226g)
- 1 tsp vanilla extract (4g)
- 1/4 tsp salt (1g)
- 2 cups powdered sugar (250 grams)
- 1 Tbsp heavy cream or whipping cream (15 grams)
- Pink, purple, yellow and green gel food coloring
Tools & Decorations
- Bunny cookie cutter
- 1/2 cup white fondant
- 1/4 cup pink fondant
- Electric hand mixer or stand mixer
- Muffin tin
- Cupcake liners
- Large piping bag
- Large round piping tip (like an Ateco 807)
- 4 small piping bags
- 4 decorative piping tips (Wilton 104, Ateco 822, Wilton 5, and a Wilton 366)
Instructions
Fondant Bunny Ears:
- If possible, make these before you bake the cupcakes! They need a bit of time to dry and firm up.
- Roll out 1/2 cup of white fondant and use the top half of a bunny cookie cutter to cut out 12 sets of white bunny ears.
- Roll out 1/4 cup of pink fondant and cut out 24 small circles (about 1/4 inch) using a small bottle cap or punch circle cutter. Press the circles between your fingers and elongate the circles until they turn into ovals that fit inside the bunny ears.
- Paint a tiny bit of water on the center of each white bunny ear, and press a pink oval into place. Place these on parchment paper to dry for at least an hour (or overnight), until they're firm to the touch.
Vanilla Cupcakes:
- Preheat oven to 350°F (177°C), and place 12 cupcake liners in a muffin pan.
- Whisk together 1 ¼ cups all-flour, 1 cup of sugar, 1 1/2 tsp baking powder and 1/2 tsp salt. Set aside.
- In a separate medium-sized bowl, whisk together 1/2 cup sour cream, 1/2 cup water, 1/4 cup melted and cooled butter, 1 large egg and 1 tsp vanilla extract until combined.
- If you want to color your cupcakes, mix a drop of pink gel food coloring into your wet ingredients.
- Pour the wet ingredients into the dry ingredients, and whisk together until the ingredients are just combined and you can’t see any streaks of flour.
- Fill the cupcake liners 3/4 way full and bake for 19-21 minutes, or until a toothpick comes out clean.
- Allow the cupcakes to cool for 5 minutes before moving them onto a cooling rack to finish cooling.
Vanilla Buttercream:
- While the cupcakes bake and cool, make the vanilla buttercream.
- Beat 1 cup of unsalted butter on a medium speed for 30 seconds with stand mixer or hand mixer until smooth.
- Add in 1 tsp vanilla extract and 1/4 tsp salt and beat on low until the ingredients are incorporated.
- Mix in 2 cups of powdered sugar and 1 Tbsp of heavy cream on a low speed. Scrape the sides and bottom of the bowl as needed.
- Once fully mixed, if the frosting seems too thick, add in additional cream (1 tsp at a time). If the frosting is too thin, add in more powdered sugar (quarter of a cup at a time).
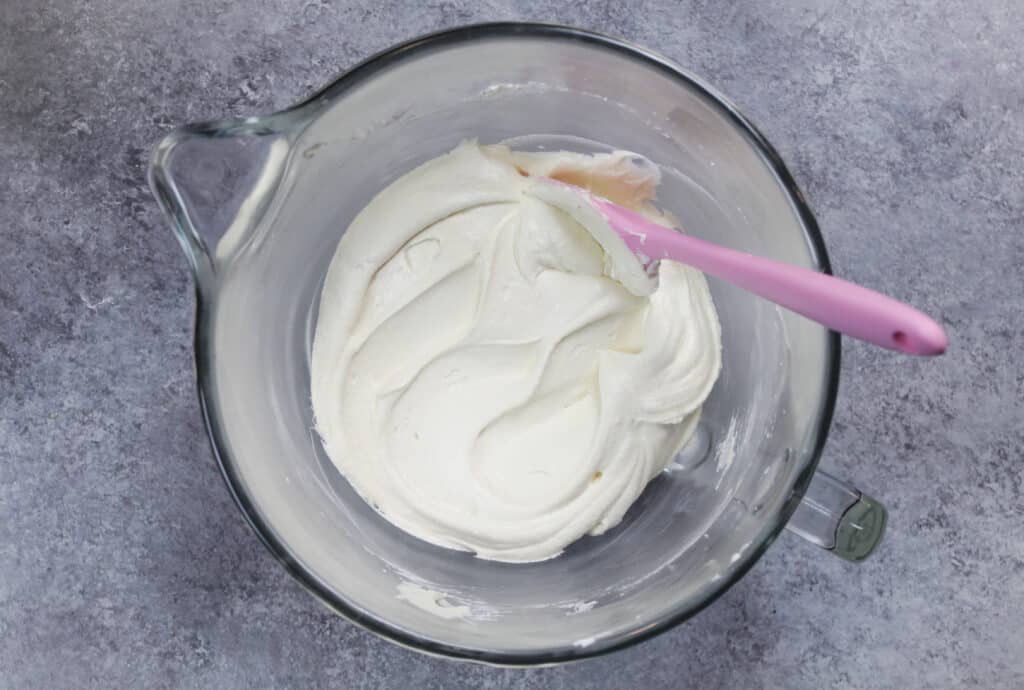
- Stir the frosting by hand with a rubber spatula once it's made for a minute or two to make the frosting super smooth.
- Cut off the tip of the bag, and fit it with a large piping tip (like an Ateco 807).
- Place the 2/3 of the vanilla buttercream in the piping bag and seal the top with a rubber band.
- Divide the remaining buttercream between 4 bowls and color them pink, purple, yellow, and green with gel food coloring. Place each color buttercream in a small piping bag fit with a variety of frosting tips. I used a few different piping tips, including a Wilton 104 (petal tip), Ateco 822 (small french tip), Wilton 5 (small round tip), and a Wilton 366 (leaf tip).
Decorating these Bunny Cupcakes:
- Once the cupcakes have fully cooled, top each cupcake with a swirl of vanilla buttercream.
- Press the fondant ears in the center of the buttercream swirl.
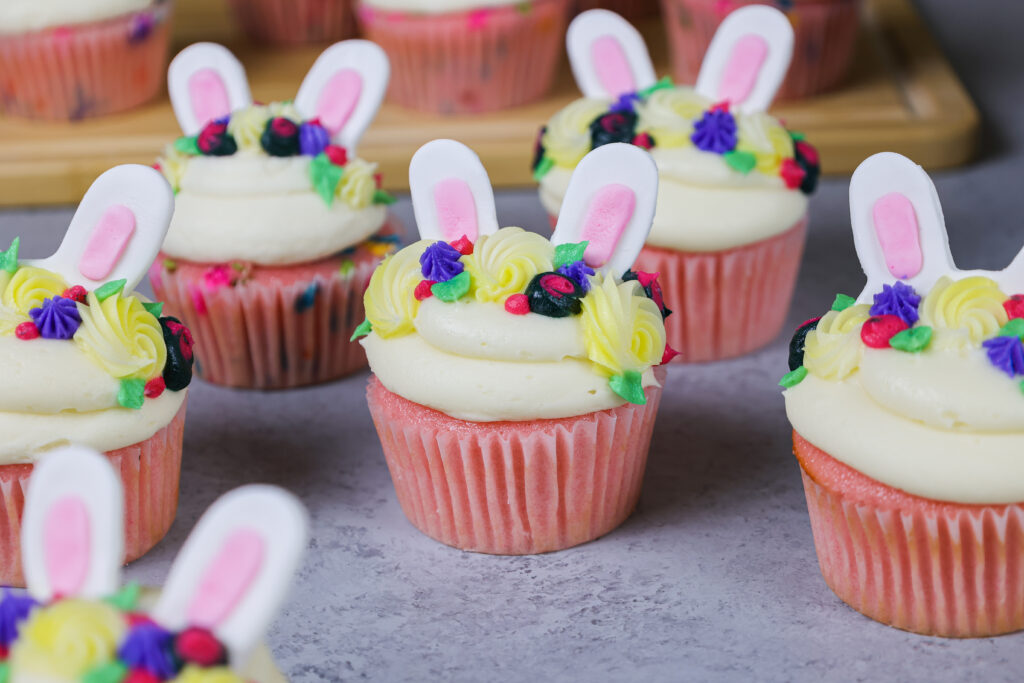
- Pipe colorful buttercream swirls in a band in front of the ears, then enjoy!
Notes
Yield:
One batch of this recipe makes 12 standard sized cupcakes. This recipe can be doubled or halved if you want to make a larger or smaller quantity.
Variations:
- To make eggless, dairy free bunny cupcakes, use an alternative dairy milk to replace the whole milk (almond, oat, or soy) and dairy free yogurt (almond, oat, or soy) in place of the sour cream.
- To make gluten free bunny cupcakes, swap in your favorite gluten free flour blend for the AP flour this recipe calls for, and be sure to over-mix your batter and let it sit for at least 30 minutes before baking for best results.
Tips for Making the Best Bunny Cupcakes:
- Be sure to properly measure your flour (fluff and level with a knife, or use a scale).
- Ingredients at room temp mix together better! Set any cold ingredients ahead of time.
- Use a cookie scoop to easily fill your cupcake liners and make sure they all have the same amount of batter.
- Bang your cupcake pan on the counter before putting it in the oven. This brings any air bubbles that are trapped in the batter to the surface.
- Use a large round piping tip to frost large swirls on top of these cupcakes! I used an Ateco 807 to frost these.
- The frosting recipe makes enough to pipe large swirls like the pictures. If you prefer less frosting, feel free to cut the frosting recipe in half.
- To make gluten free bunny cupcakes, swap in your favorite GF flour blend for the AP flour in this recipe. Be sure to give your batter some extra stir time (helps give GF baked goods proper structure) and let it sit for at least 30 minutes before baking for best results.
Making these Bunny Cupcakes in Advance & Storage Tips:
Make your cupcakes in advance! If stored unfrosted in an airtight container, they can last for 2 days at room temp, up to a week in the fridge, or up to 3 months in the freezer.
Make your frosting ahead of time too, or save any leftover frosting! It can be stored in an airtight container in the fridge for up to a month, or in the freezer for up to 3 months. Be sure to give it a good stir once it thaws to get the consistency nice and smooth again.
Frosted cupcakes can sit at room temperature overnight or in the fridge for up to 5 days in an airtight container. However, I find frosting them right before serving is best.
Nutrition Information
Yield
12Serving Size
1Amount Per Serving Calories 367Total Fat 15gSaturated Fat 6gTrans Fat 0gUnsaturated Fat 8gCholesterol 42mgSodium 245mgCarbohydrates 55gFiber 2gSugar 34gProtein 5g



Jessica
Thursday 2nd of June 2022
Do you have a preferred cupcake/muffin pan? I see you like Fat Daddios cake pans, but I didn't know if you like that brand for cupcake pans, too. I didn't see a recommended cupcake pan in your Amazon store. Thanks!
Chelsweets
Friday 3rd of June 2022
Hi Jessica,
My go to cupcake/muffin pan is just the amazon basics one! I think it gets the job done well, is super reasonably priced, and seems to be holding up well (I think I've had mine for about 2 years). Here's the link: https://amzn.to/3xbiLr3
Hope that helps, happy baking!
No Chill Chocolate Chip Cookies: Ready in 20 minutes
Sunday 16th of January 2022
[…] Bunny Cookies […]
Rabbit Cookies: Easy Recipe from Scratch - Chelsweets
Thursday 13th of January 2022
[…] these adorable rabbit cookies for the dessert table. And yes, I also made a matching bunny cake and bunny cupcakes. Go big or go home, […]
Bunny Birthday Cake: From-Scratch Recipe w/ Video Tutorial
Thursday 13th of January 2022
[…] for a very special party so I went all in on the bunny theme and made matching bunny cookies and cupcakes […]