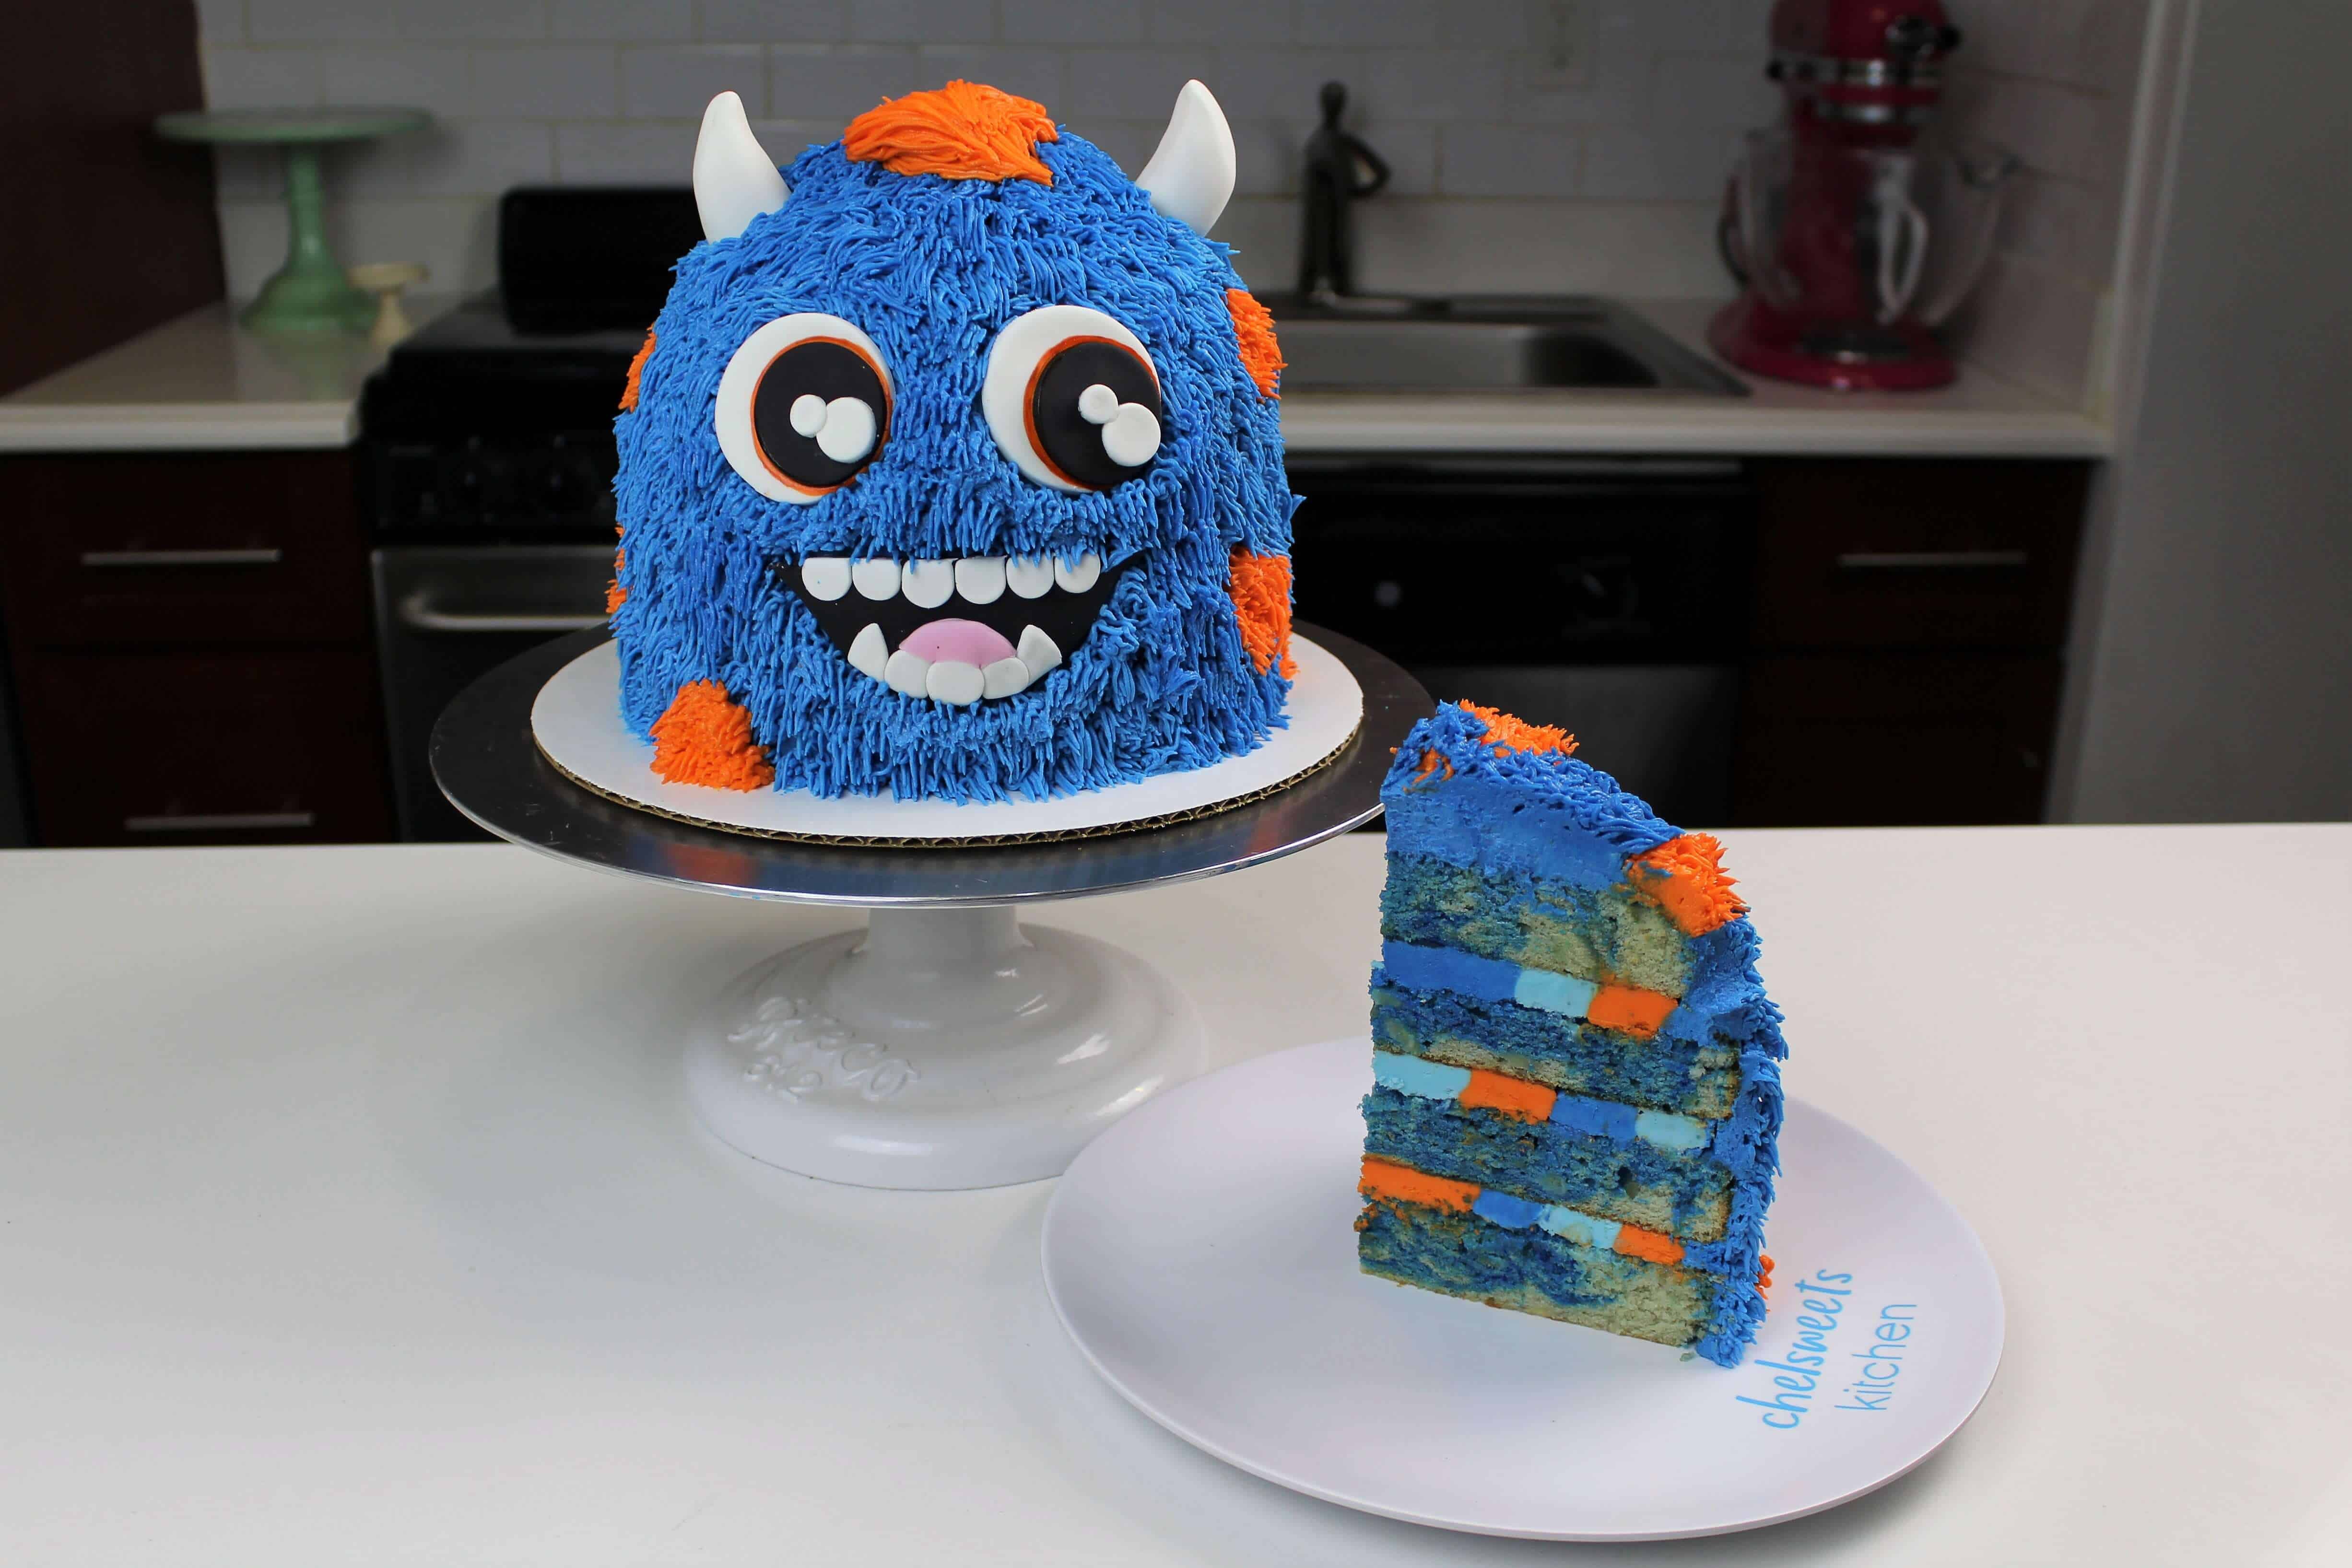
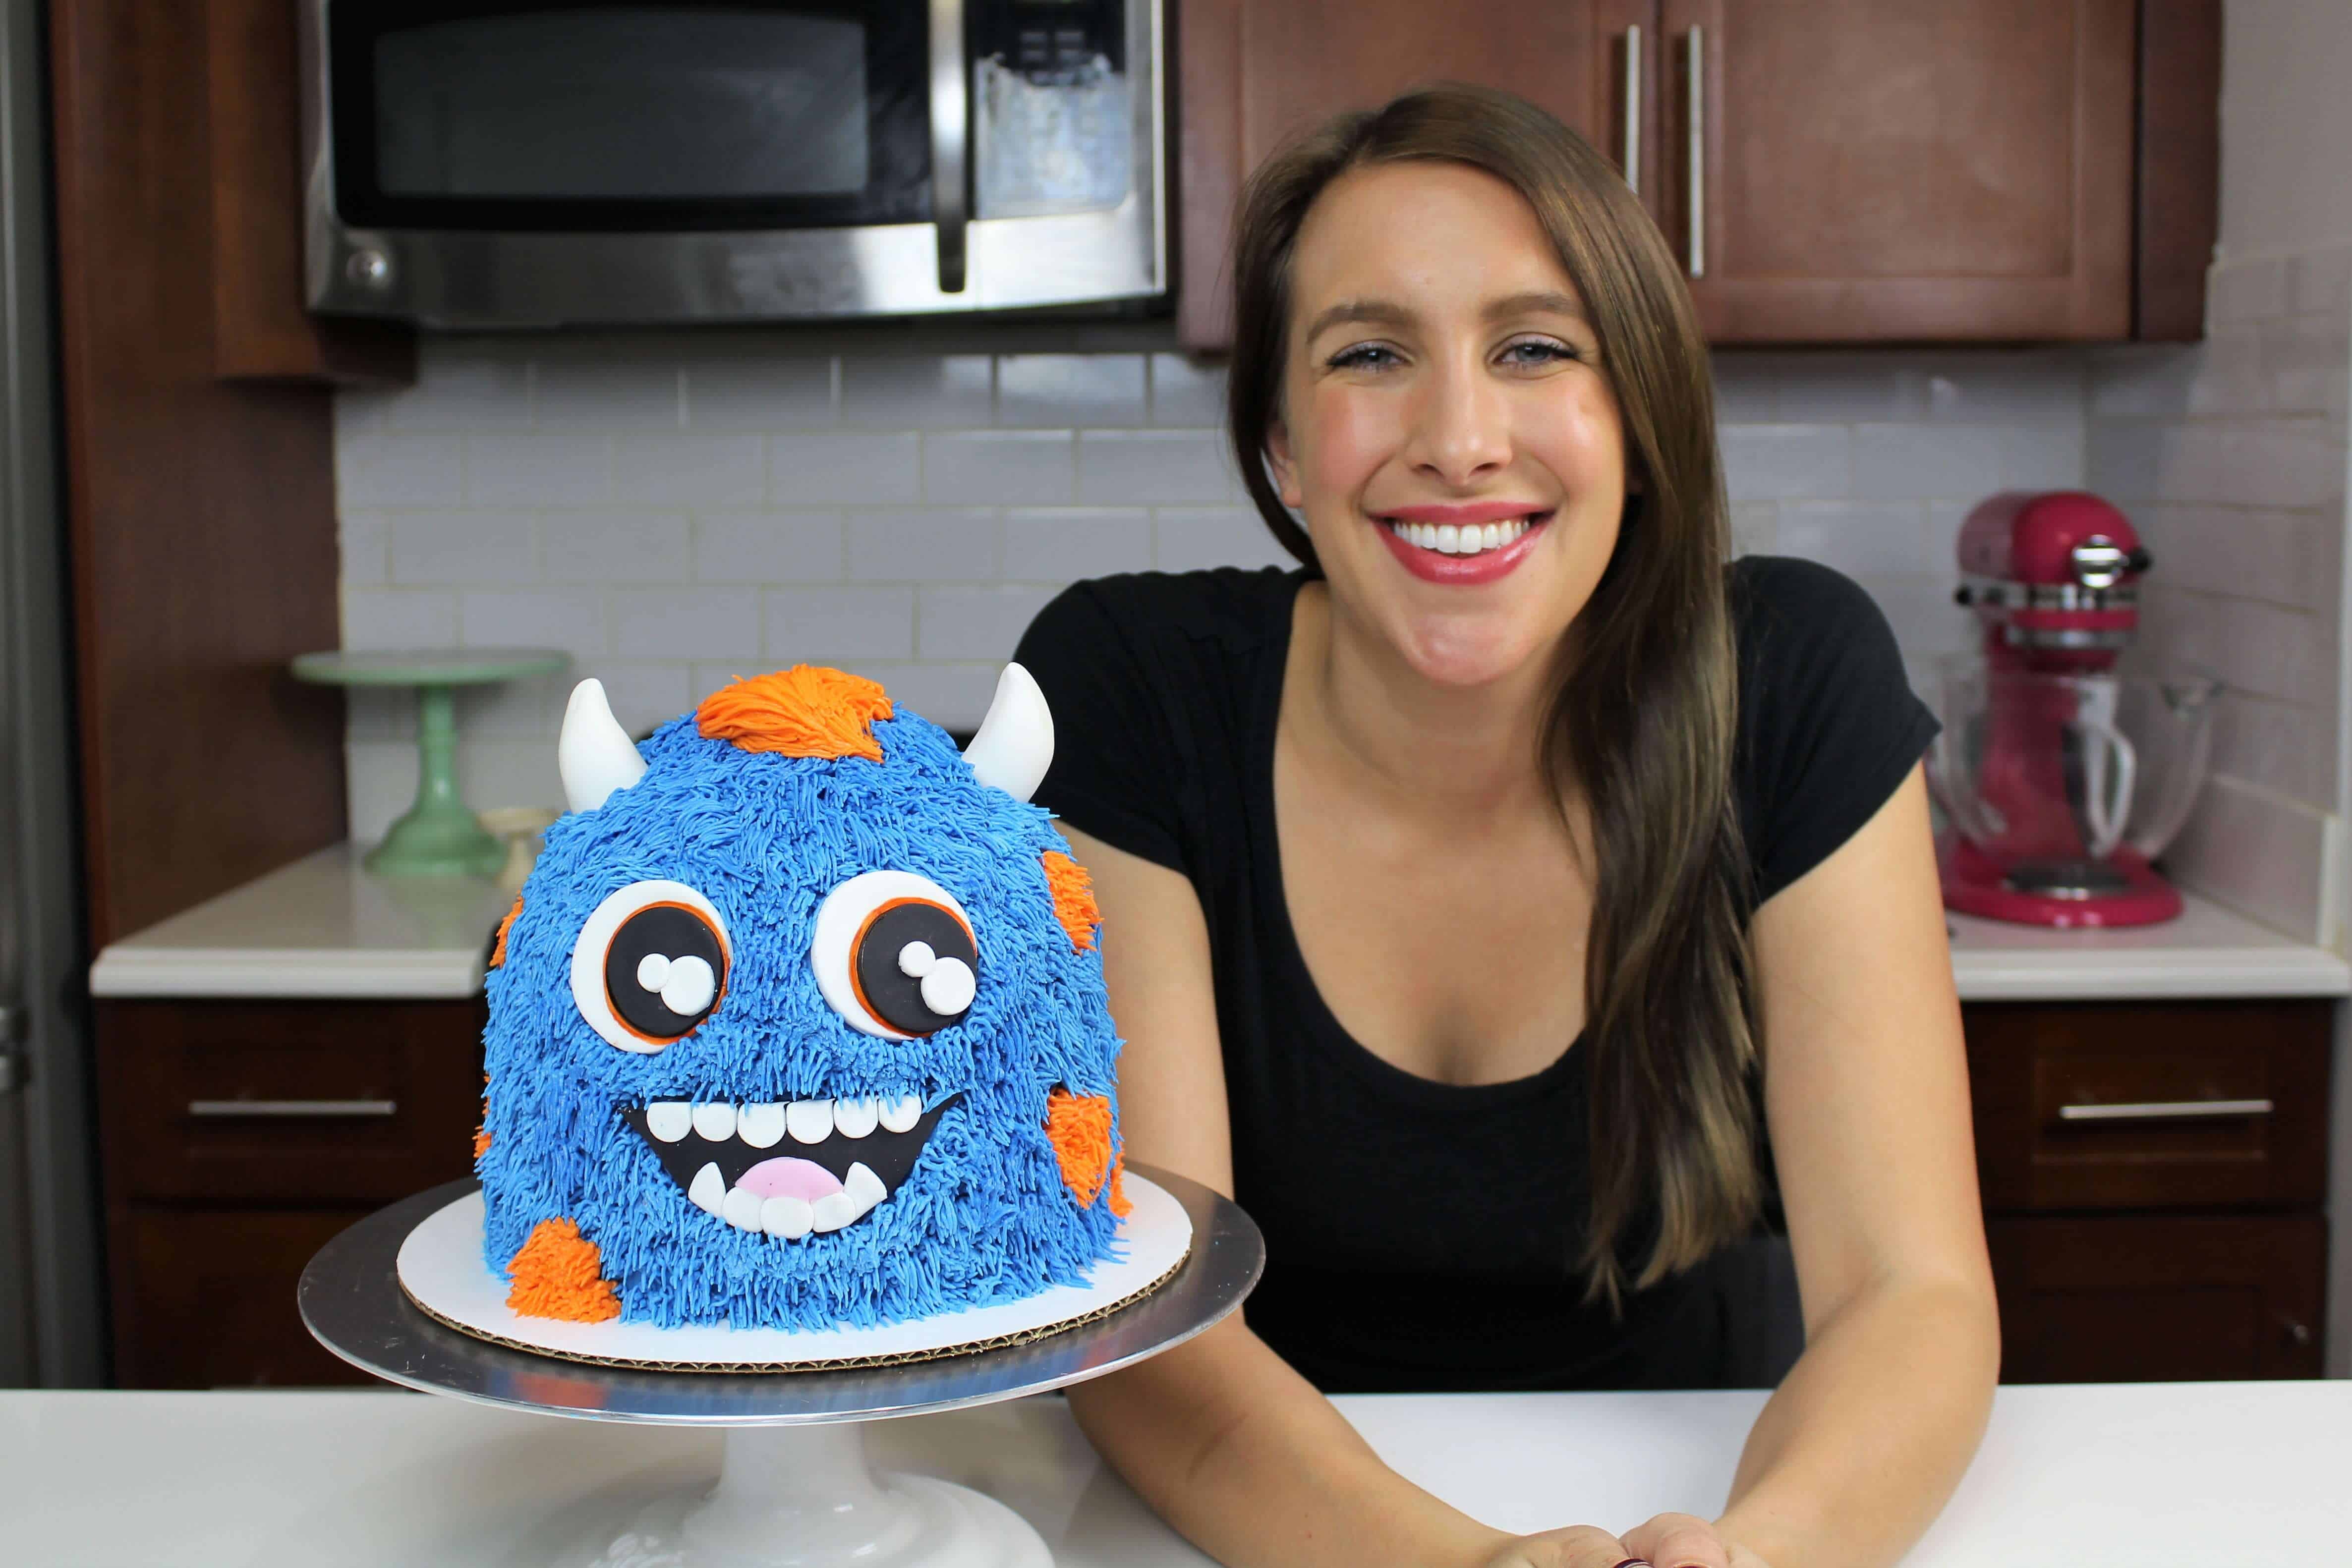
I’ve made some smash cakes in the past, but wanted to make a slightly larger smash cake this time! This blue monster cake is a lot easier to make than you might think.
While it would be perfect for a child’s first birthday, it also would be great for a kid’s birthday party at any age!
Or for any adults who enjoy monsters!! If someone made me this for my next birthday, I’d be pretty excited about it.
I got so emotionally attached to this monster cake after making it, I named him Phillip!
This cake is made with a moist banana cake layers, and frosted with a cream cheese buttercream.
Banana Cake Batter
1 1/2 cups sugar
1 cup unsalted butter, room temperature
1/2 tsp vanilla extract
3/4 cup buttermilk
1 tbsp vegetable oil
4 large eggs, room temperature
2 1/2 cups all-purpose flour
2 tsp baking powder
1/2 tsp baking soda
1/2 tsp salt
1 cup mashed bananas (3 medium sized bananas)
Cream Cheese Buttercream Frosting
- 6 sticks or 3 cups (650 grams) unsalted butter, room temperature
- 8 oz cream cheese (230g), room temperature
- 16 cups (1814 grams) powdered sugar
- 1 tsp (36 grams) salt
- 2 Tbsp. (30 grams) heavy cream
- 2 tsp (8 grams) vanilla
- Blue and orange colored gel food coloring
Additional Decorations:
- black and white fondant
- grass tip (I used a wilton 233)
- 2 pieces of dried spaghetti or 2 tooth pics (to secure the monster horns)
Preheat oven to 350 degrees. Line and grease three 7-inch pans, and one 6-inch pan.
Cream together the butter and sugar on medium high speed for 2 minutes, until the butter becomes lighter in color and is fluffy.
Mix in the eggs one at a time, then add the oil, vanilla and buttermilk.
Add in the mashed bananas and on a low speed, until just incorporated.
Combine the dry ingredients in a separate bowl, then add into the wet ingredients in 3 phases.
Divide batter evenly between two bowls, and color one blue with gel food coloring.
Alternate spoons of white and blue batter into the pans, then swirl the colors together using an offset spatula or butter knife.
You can see a full tutorial on how to make swirled cake layers here.
Bake layers for about 26 minutes, or until a toothpick comes out clean.
Once removed from the oven, carefully run a small offset spatula around the perimeter of the pan, to separate the layers.
Let these cool for about 10 minutes, then carefully remove them from the pans and place in the freezer for about 45 minutes (accelerates the cooling process).
While the layers bake and cool, prepare the cream cheese frosting.
Beat the butter and cream cheese on a medium speed for 30 seconds with a paddle attachment, until smooth.
Slowly add in the powdered sugar, 1 cup at a time.
Alternate with small splashes of cream.
Once fully mixed, add in the vanilla and salt, and beat on low until the ingredients are fully incorporated, and the desired consistency is reached.
If the frosting is too thick, add in cream (1 Tbsp at a time). If the frosting is too thin, add in more powdered sugar (quarter of a cup at a time).
To watch a full tutorial on how I make my frosting, you can click here.
Color 1/2 the frosting a deep shade of blue, color 1/4 a light shade of blue, and 1/4 orange. Place into piping bags with a 1.5 cm opening (I simply cut the tips of the bags).
Stack and frost layers.
Pipe rings on top of each cake layer, starting at the perimeter of the cake layer, working your way into the center.
Be sure to follow the same color pattern (blue, light blue, orange), but alternate which color you start frosting with each layer.

Place the 6 inch cake layer on top of the 7 in layers.
Use a serrated knife to trim the edges of the 6 inch layer, to create a dome shaped top.
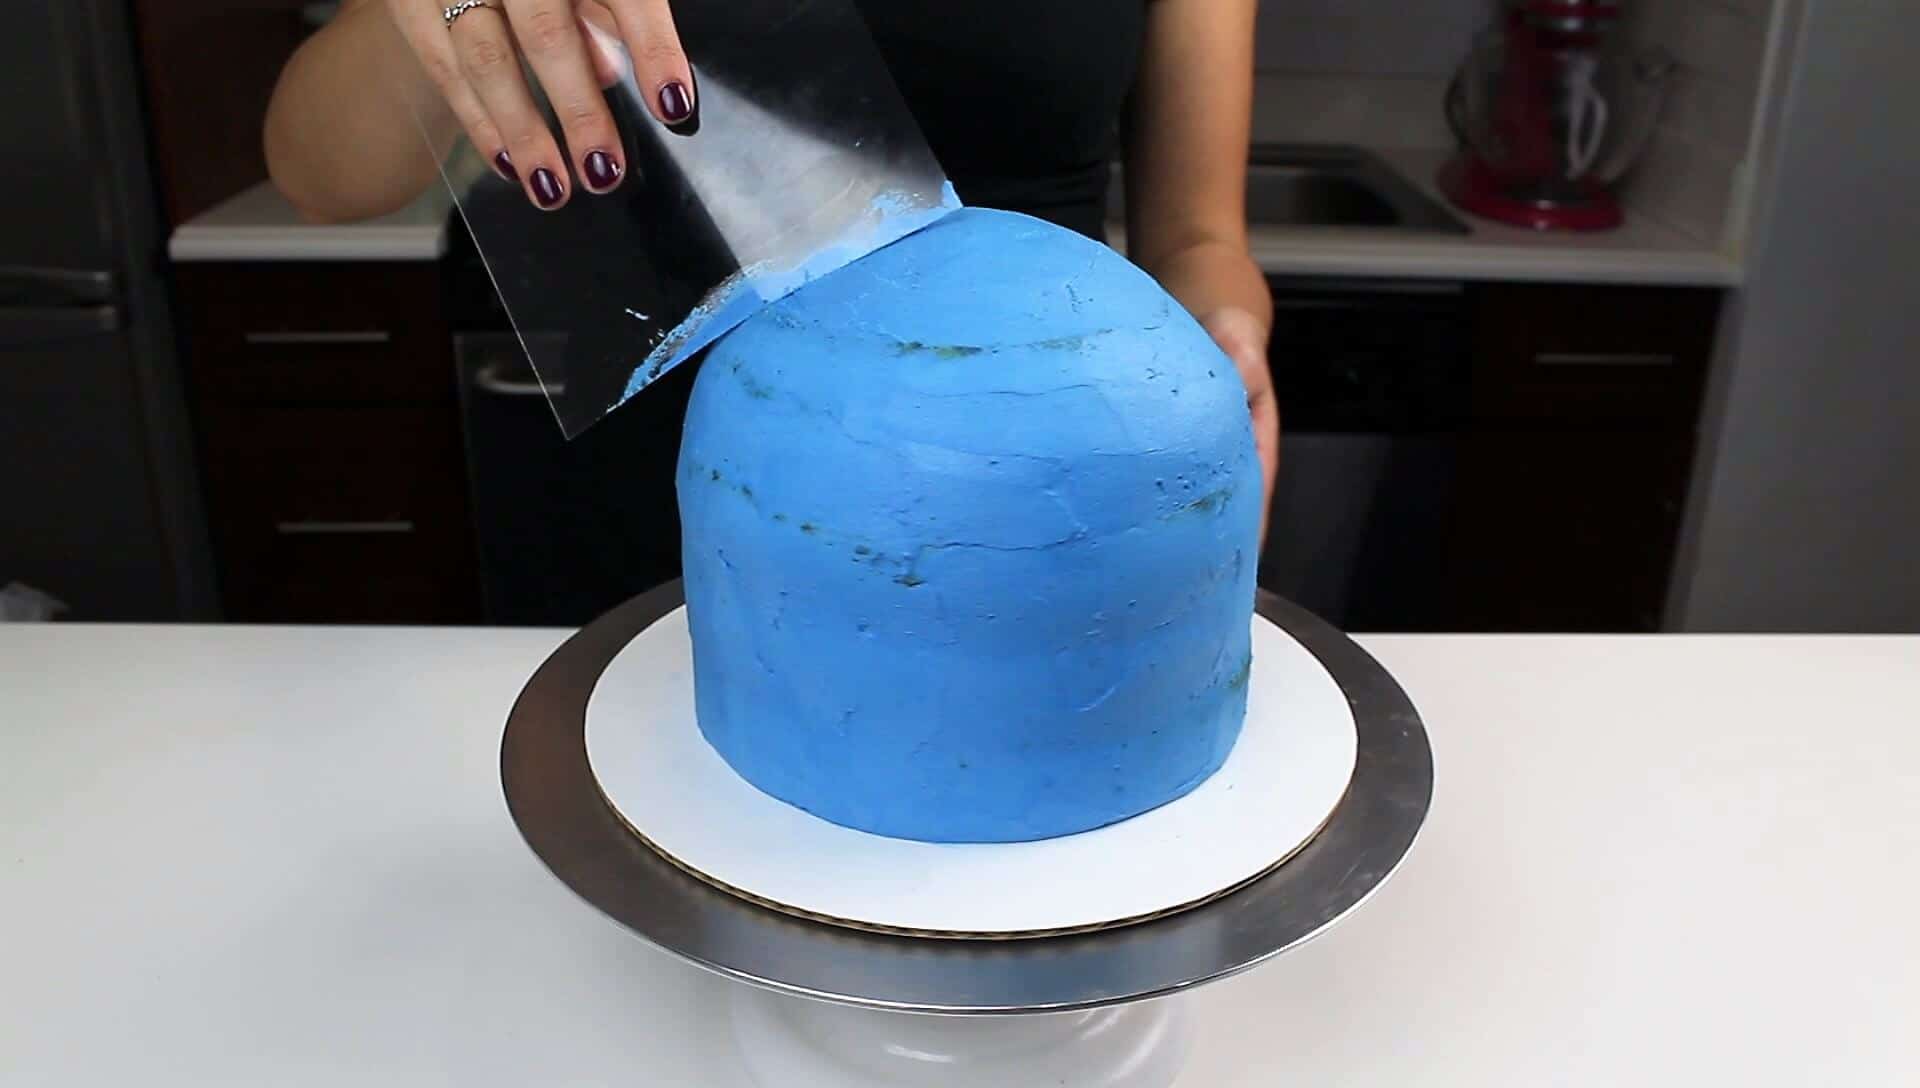
Cover the cake in a thin crumb coat, and chill in the freezer or fridge for about 5 minutes.
Place remaining blue and orange frosting into two piping bags with a grass tip.
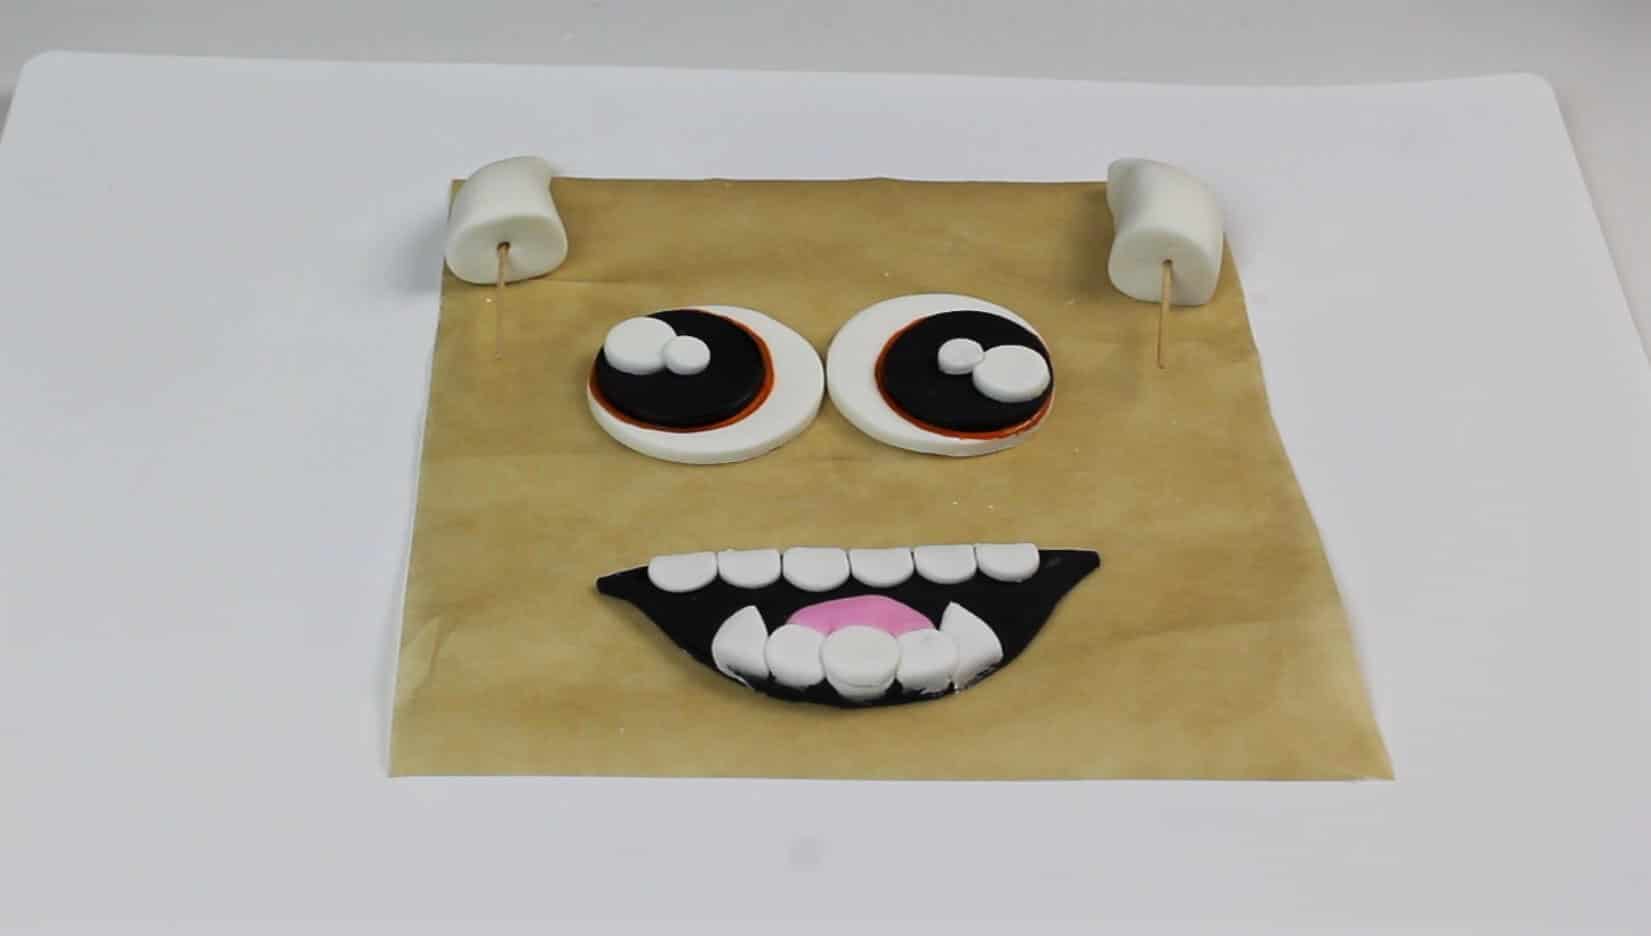
While the crumb coat chills, make the fondant facial features.
You can get creative here and make however many eyes you want (I went with two, but have done one and three in the past).
Make a mouth and horns, and insert either toothpicks or dry pieces of spaghetti into the horns.
Set aside on parchment paper.
Once the crumb coat is firm to the touch, pipe on the second layer of frosting to look like fur!
I added orange fur spots first, then the fondant facial features. I filled in the remaining open space with blue frosting fur.
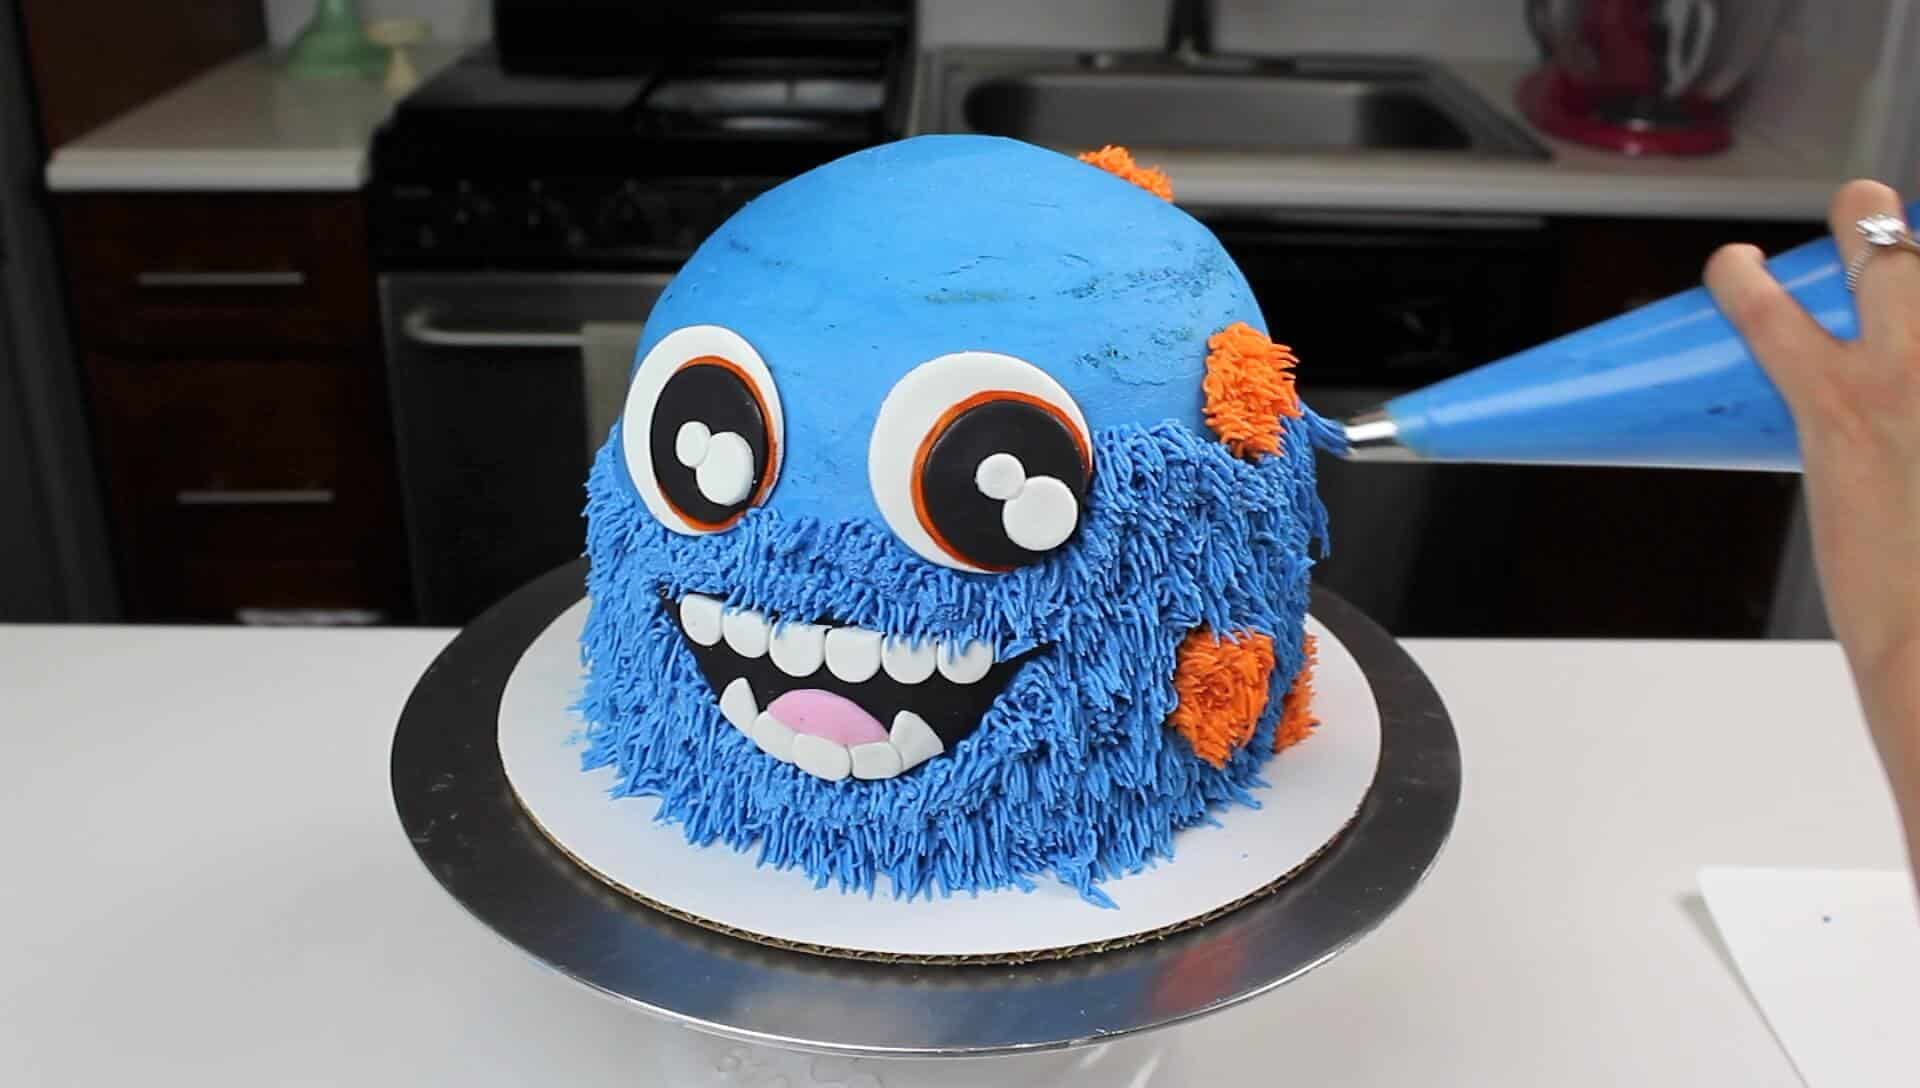
Wrap the frosting bags with paper towels or a thin towel to help limit the amount of heat your hands transfer to the frosting.
Once all the fur is on, add the horns. And just like that, your monster cake is complete!
Then cut in to see the swirled layers and fun striped frosting pattern!

I really enjoyed making this little monster!
If you want to use natural food coloring, you can try using India Tree food coloring (you can buy online or at whole foods).
It’s not as vibrant as the Americolor gel food coloring I used here, but it does add color in a natural way.
Let Me Know What You Think!
If you try this monster cake recipe, I’d love to hear what think of it!
Please let me know your thoughts by sharing a comment, or tagging me in your creations on social media @chelsweets!!

Kelli Ferrin
Saturday 3rd of October 2020
Is there a benefit to using cream cheese frosting over buttercream for this one? I'm making a cookie monster cake for a client and this is the most similar. They're not picky and love whatever I make (coworkers) so I have free reign to do whatever I want. Just curious if cream cheese holds up or forms the grass tipped hair better or not.
Carrie
Friday 5th of October 2018
Hi Chelsea! I was wondering if this banana cake recipe would work for cupcakes??
Chelsweets
Monday 15th of October 2018
It doesn't rise a ton, so I think it'd be better as a layer cake! But you could try it!!
Ashley
Friday 27th of July 2018
By 8 oz cream cheese frosting- do you mean an 8 oz block of cream cheese or 8 oz of actual pre-made or store bought cream cheese frosting?
Chelsweets
Wednesday 1st of August 2018
ah typo!! it should just say cream cheese*** So sorry for the confusion <3
Lauren McGrath
Sunday 15th of July 2018
Hi Chelsea!
I love your blog and yt channel. I've been making my way through your recipes and they're all so good! Thank you for sharing.
I'm going to make this monster for my little boy's first birthday in a couple of months. Is this blue frosting going to make all of our guest's teeth go blue?? Can you please let me know the americolor colours you used?
Thanks so much
Chelsweets
Monday 16th of July 2018
it probably will tint their mouths a bit! but you can use uncolored buttercream to fill the cake, to help reduce the amount of colored buttercream that they consume! I just used their royal blue and orange gel food coloring, the standard shades!
Amy
Monday 5th of March 2018
Hi Chel, I am in love with your blog! Only discovered it last week but have spent a long time looking at all your recipes and awesome cakes and will keep doing so. I am baking for my boy's first birthday in a couple of days and was hoping to use less sugar than standard cake and cream/frosting recipes. Do you have any cake and buttercream/frosting recipes with less sugar for babies/toddlers? Would frosting still be pipeable using a sugar-free/less sugar recipe? Thanks in advance for any suggestions/recipes :-)
Chelsweets
Monday 5th of March 2018
You can try frosting it with whipped cream, but it's much more difficult to color / smooth!